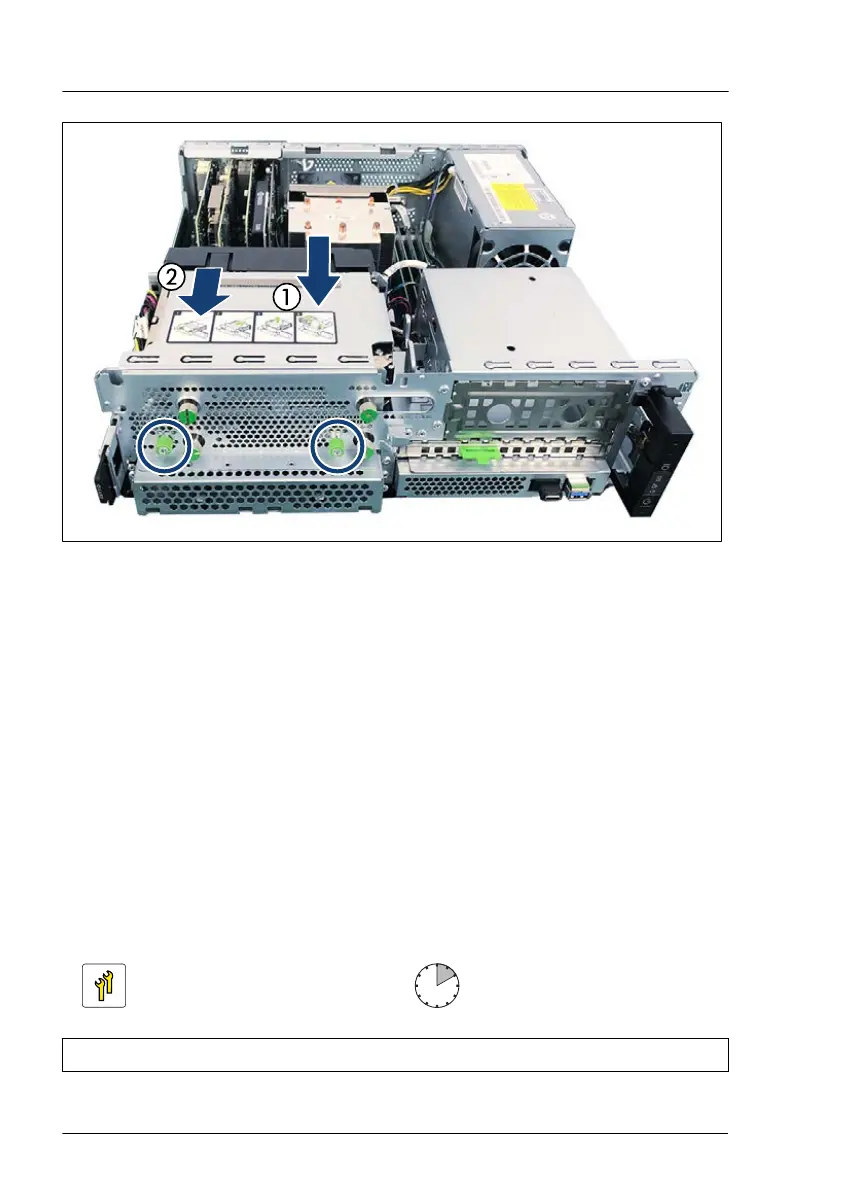
Figure 73: Installing the HDD cage
▶
Insert the HDD cage (1).
▶
Slide the HDD cage in the direction of the arrow (2).
▶
Fasten the two knurled screws of the HDD cage (see circles).
Concluding steps
▶
"Reassembling" on page
54.
▶
"Connecting the power cord" on page
57.
▶
"Switching on the server" on page 60.
7.4.4 Replacing a 3.5-inch non hot-plug HDD
Upgrade and Repair Unit
(URU)
Hardware: 10 minutes
Tools: tool-less
Hard disk drive (HDD) / solid state drive (SSD)
148 Upgrade and Maintenance Manual TX1320 M5

 Loading...