4. Adjust the biopsy line by using the Trackball (pos) and the left Touch panel button (
Line
rotate
).
5. Press
Store
to save the line.
6. Press
Exit
to close the Biopsy Setup.
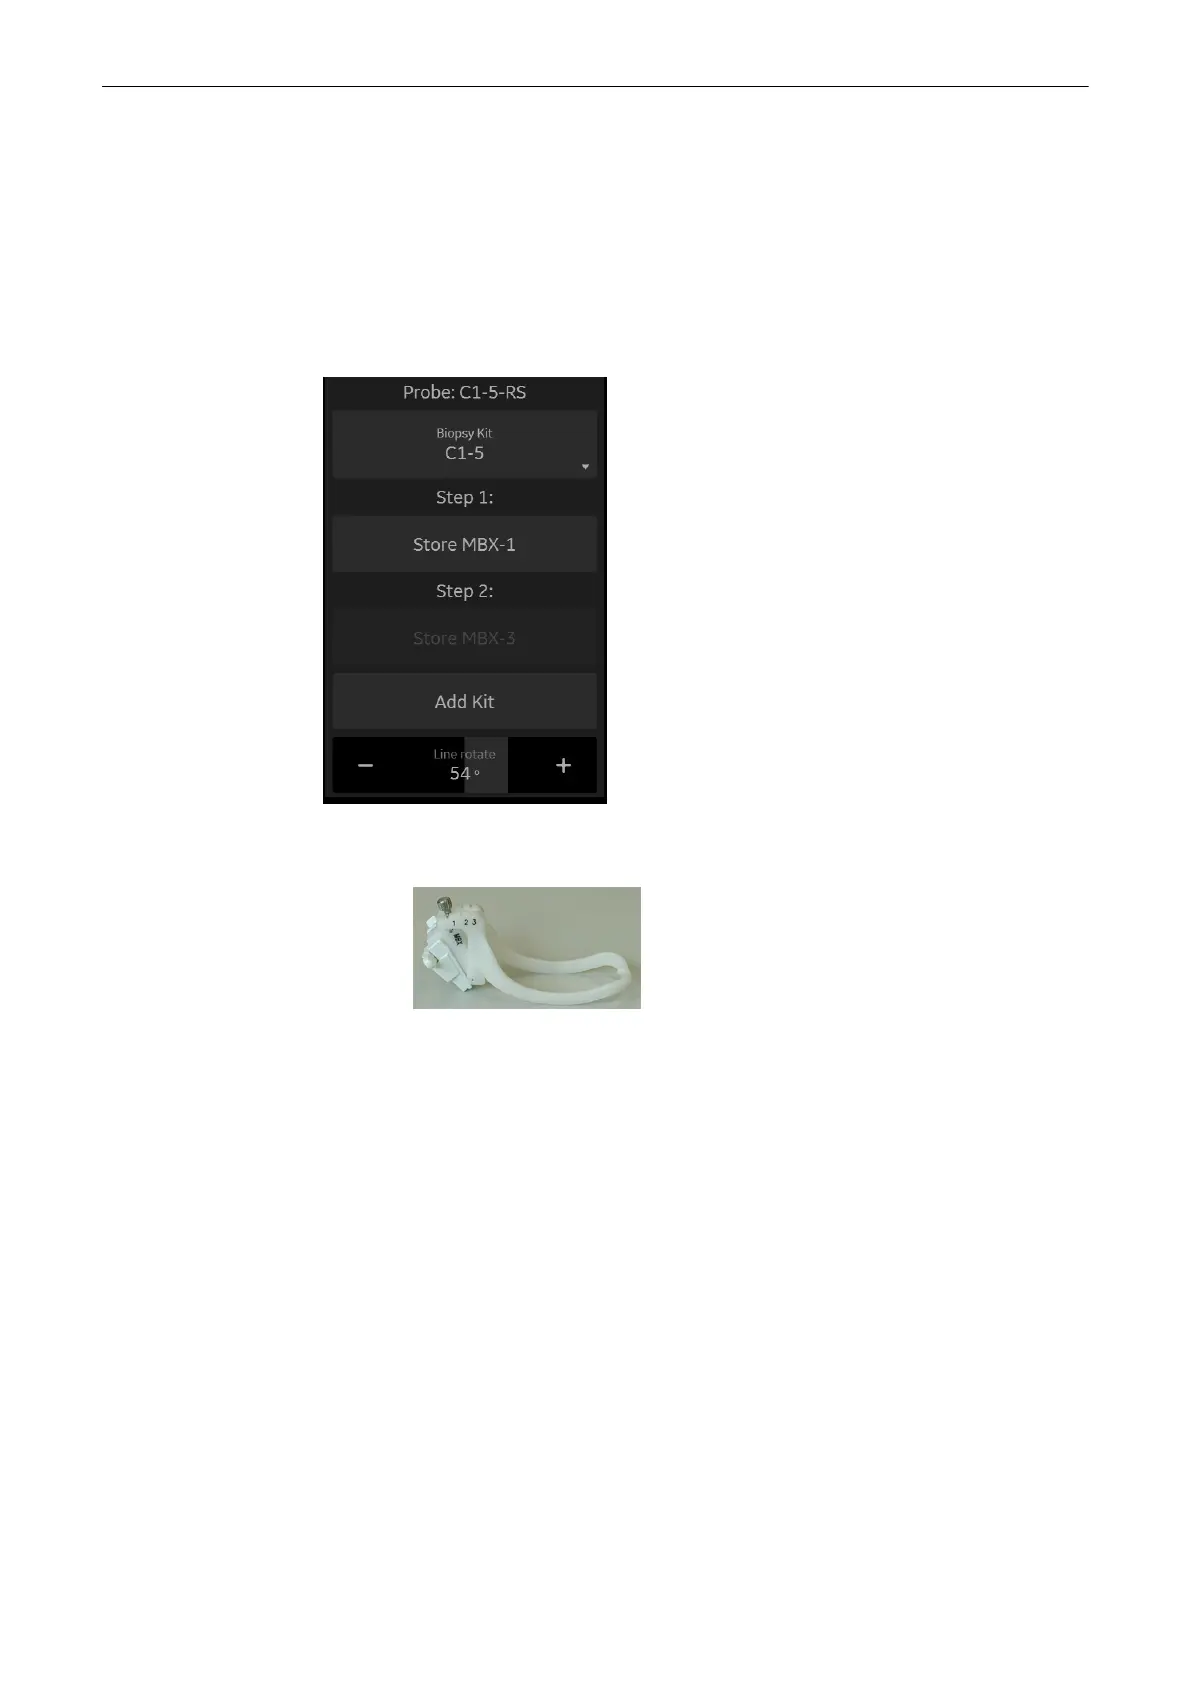
5.4.3.2 Biopsy line adjustment for multi angle biopsy guide
Storing a biopsy line
Figure 5-13 Biopsy Setup Menu: Multi angle
biopsy guide
1. Set the biopsy guide angle to MBX-1.
Perform steps 1 to 8, see 'Biopsy setup'
on page 5-22
.
2. Select a biopsy kit.
3. The MBX-1 biopsy line is shown on the monitor screen.
4. Adjust the biopsy line by using the Trackball (
pos
) and the left Touch panel button (
Line
rotate
).
5. Press
Store MBX-1
to save the MBX-1 line.
6. Set the biopsy guide angle to MBX-3.
7. Adjust the position of MBX-3 line and press
Store MBX-3
.
8. Press
Exit
to close the Biopsy Setup.
9. Biopsy line MBX-2 will be calculated and stored by the system.
5.4.3.3 Biopsy line adjustment for a user defined biopsy guide
Adding a biopsy kit
1. Perform steps 1 to 8, see 'Biopsy setup'
on page 5-22
.
2. Press
Add Kit
.
Probes and Biopsies
5-24
Voluson™ SWIFT / Voluson SWIFT+ Instructions For Use
5831612-100 R
evision 4