FC2250-UM-251-9370 8-17
8. ELECTRICAL ADJUSTMENTS
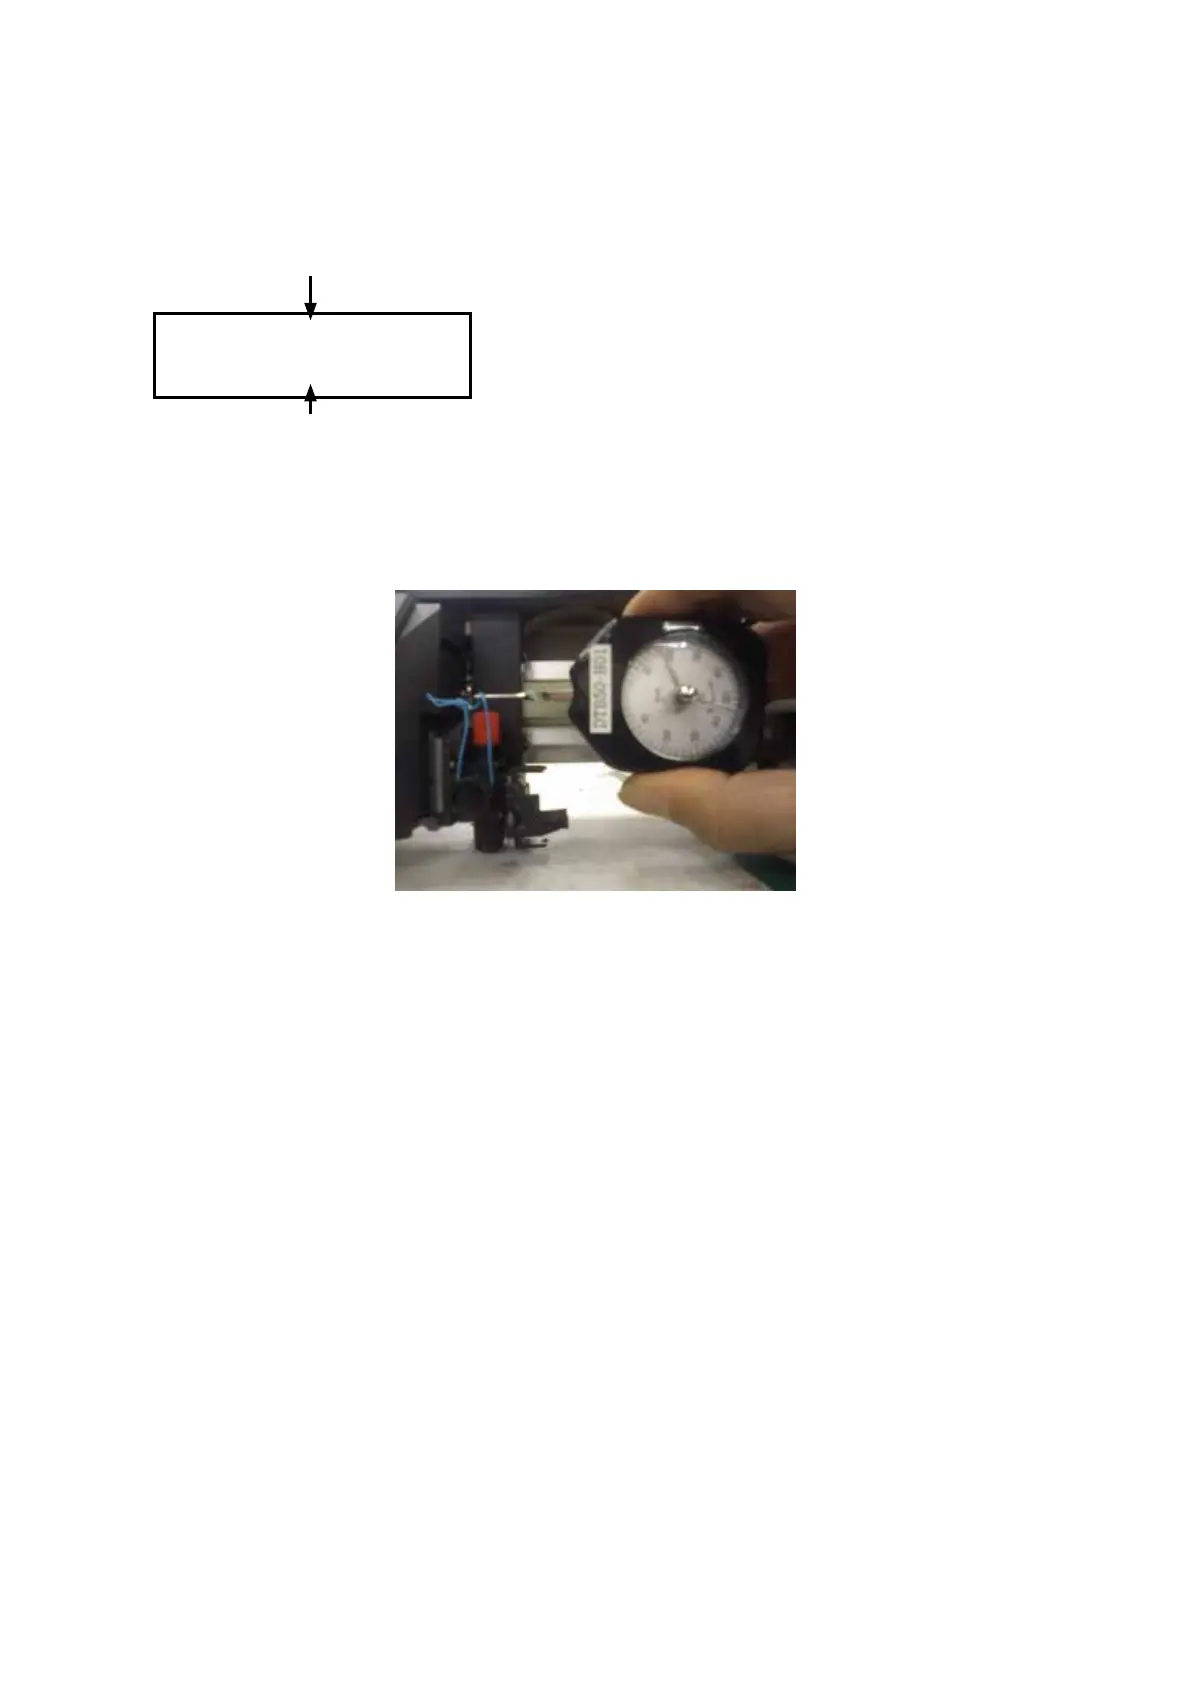
(7) Press the [Enter] key. When the LCD screen changes to display the following, measure the pen pressure
with a Correx gauge. Use the [F1] through [F4] keys to adjust the pen pressure until the pressure is
within 24 ± 1 g. After adjustment, press the [Enter] key to go to the next step. If you have only replaced
the main board, input the adjustment values that were recorded.
+1 24g -1
+10 ***** -10
Correction value
Target pen pressure
[F1] key: Increases pen pressure by a small amount.
[F2] key: Increases pen pressure by a large amount.
[F3] key: Reduces pen pressure by a small amount.
[F4] key: Reduces pen pressure by a large amount.
When the pen holder is lifting up by your hand, the measuring point for the pen pressure is when the
bottom of the cutting plunger left from the surface of writing panel.
(8) Next, when the LCD display changes to the 210 g setup screen, adjust the pen pressure to within 210 ±
10 g in the same way as described above.
(9) Next, on the 400 g setup screen, adjust the pen pressure to within 400 ± 20 g.
(10) TheadjustmentmenusfortheNo.2penwillbedisplayedafteryouhavenishedtheadjustmentsforthe
No.1 pen.
Adjust the pen pressure for the No.2 pen in the same way as you did for the No.1 pen.
(11) Proceed to the adjustments for the 48 g to the 1000 g.