FC2250-UM-251-9370 8-18
8. ELECTRICAL ADJUSTMENTS
(12) When the adjustments have been completed for the No.2 pen, the LCD display returns to the 24 g
screen for the No.1 pen. At this screen, either press the [NEXT] key to proceed to the next adjustment,
or turn off the plotter to exit the adjustment menu and then return the DIP switch to its normal settings.
NOTE: After you have changed the numeric value on the LCD, press the F3 key (PEN U/D) to raise and
lower the cutter before measuring the pen force again.
Whenthemeasuredpenforceisthespeciedvalue,presstheENTERkey.Thenextspeciedpenforce
appears on the LCD panel.
Repeat the above procedure in the following sequence.
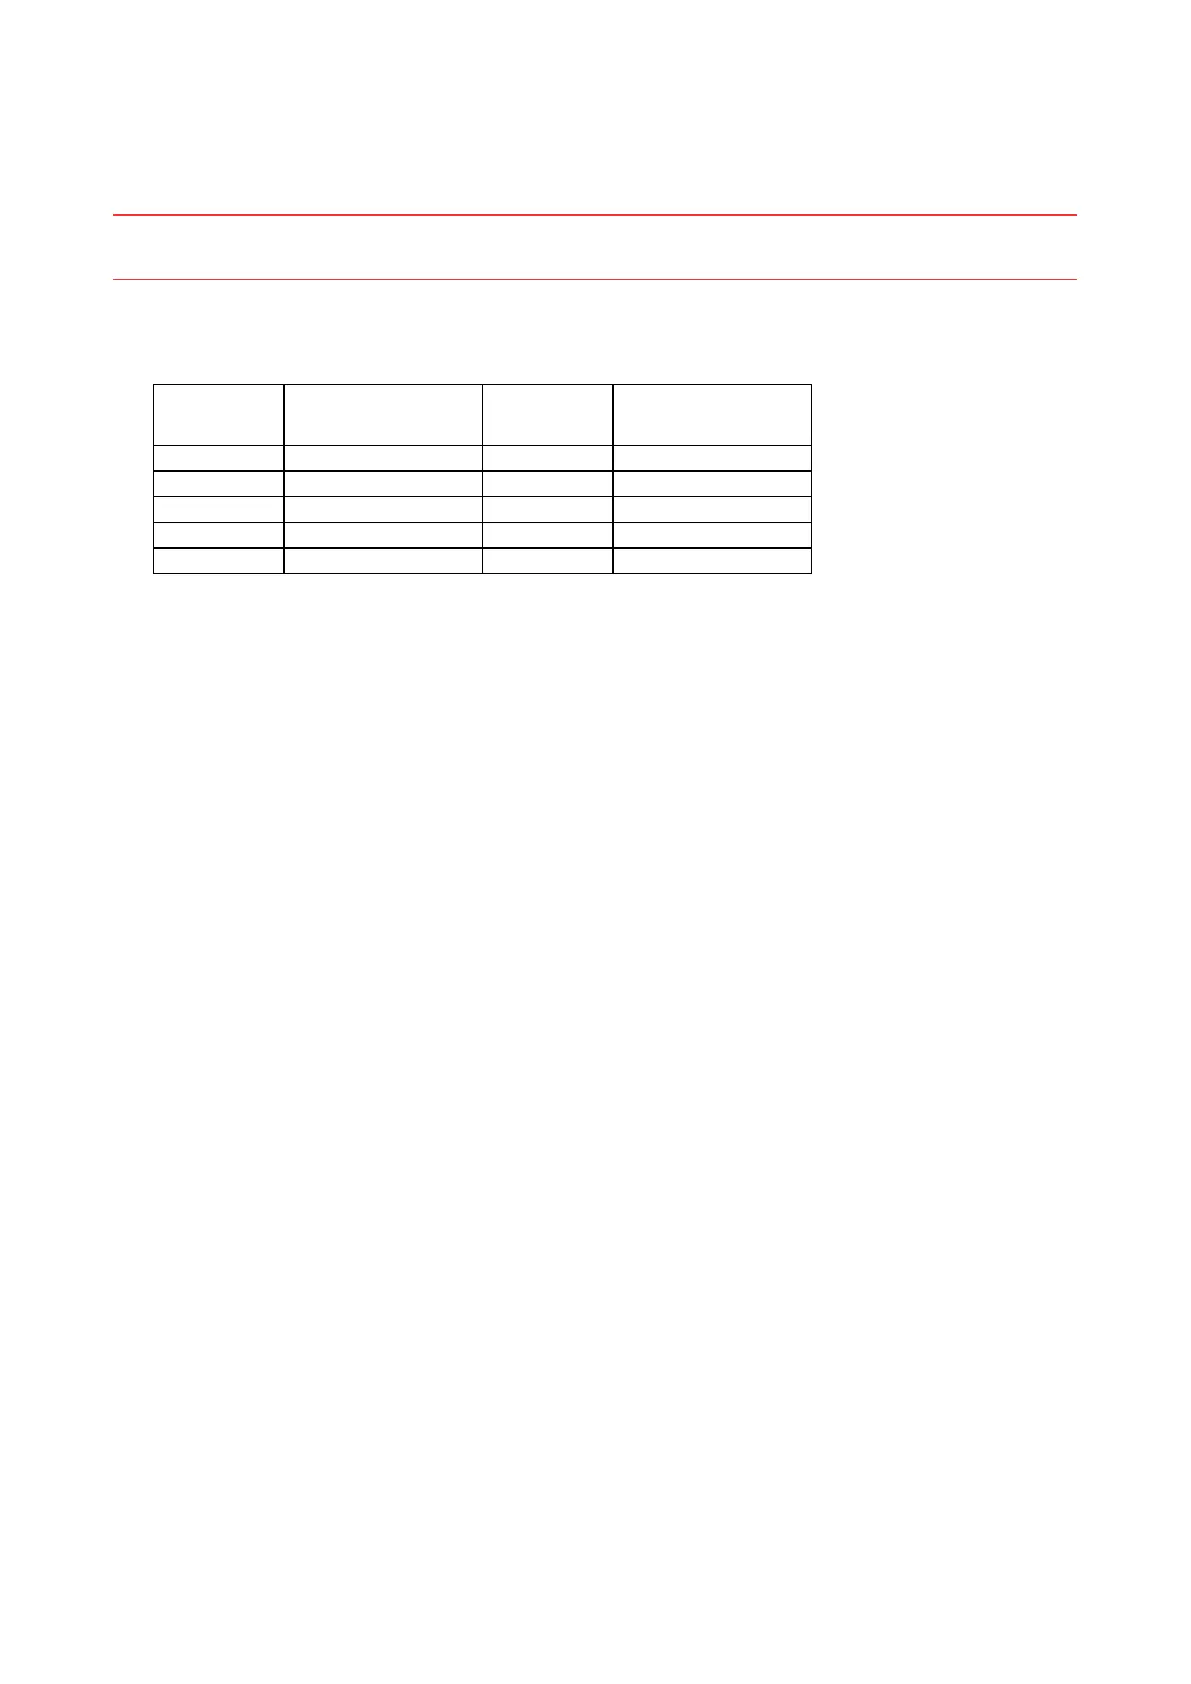
Displayed
target force
No.1 pen pressure Displayed
target force
No.2 pen pressure
24 24 g ± 1 g 48 48 g ± 2 g
210 210 g ± 10 g 210 210 g ± 10 g
400 400 g ± 20 g 400 400 g ± 20 g
700 700 g ± 30 g
1000 1000 g ± 50 g