288
IMPORTANT
•••••••••••••••••••••••••••••••••••••••••••••••••••••••••••••••••••••••••••••••••••••••••••••••••••••
• Conrm the following before conducting any operations in this section.
– Be sure to use the power supply cord that is included with the system, and connect the mains plug (Hospital Grade) to a
wall mounted AC socket outlet. Do not connect the mains plug to a two-pin socket outlet using conversion adapters, etc.
Doing so may cause an electric shock.
•••••••••••••••••••••••••••••••••••••••••••••••••••••••••••••••••••••••••••••••••••••••••••••••••••••••••••••••••••••
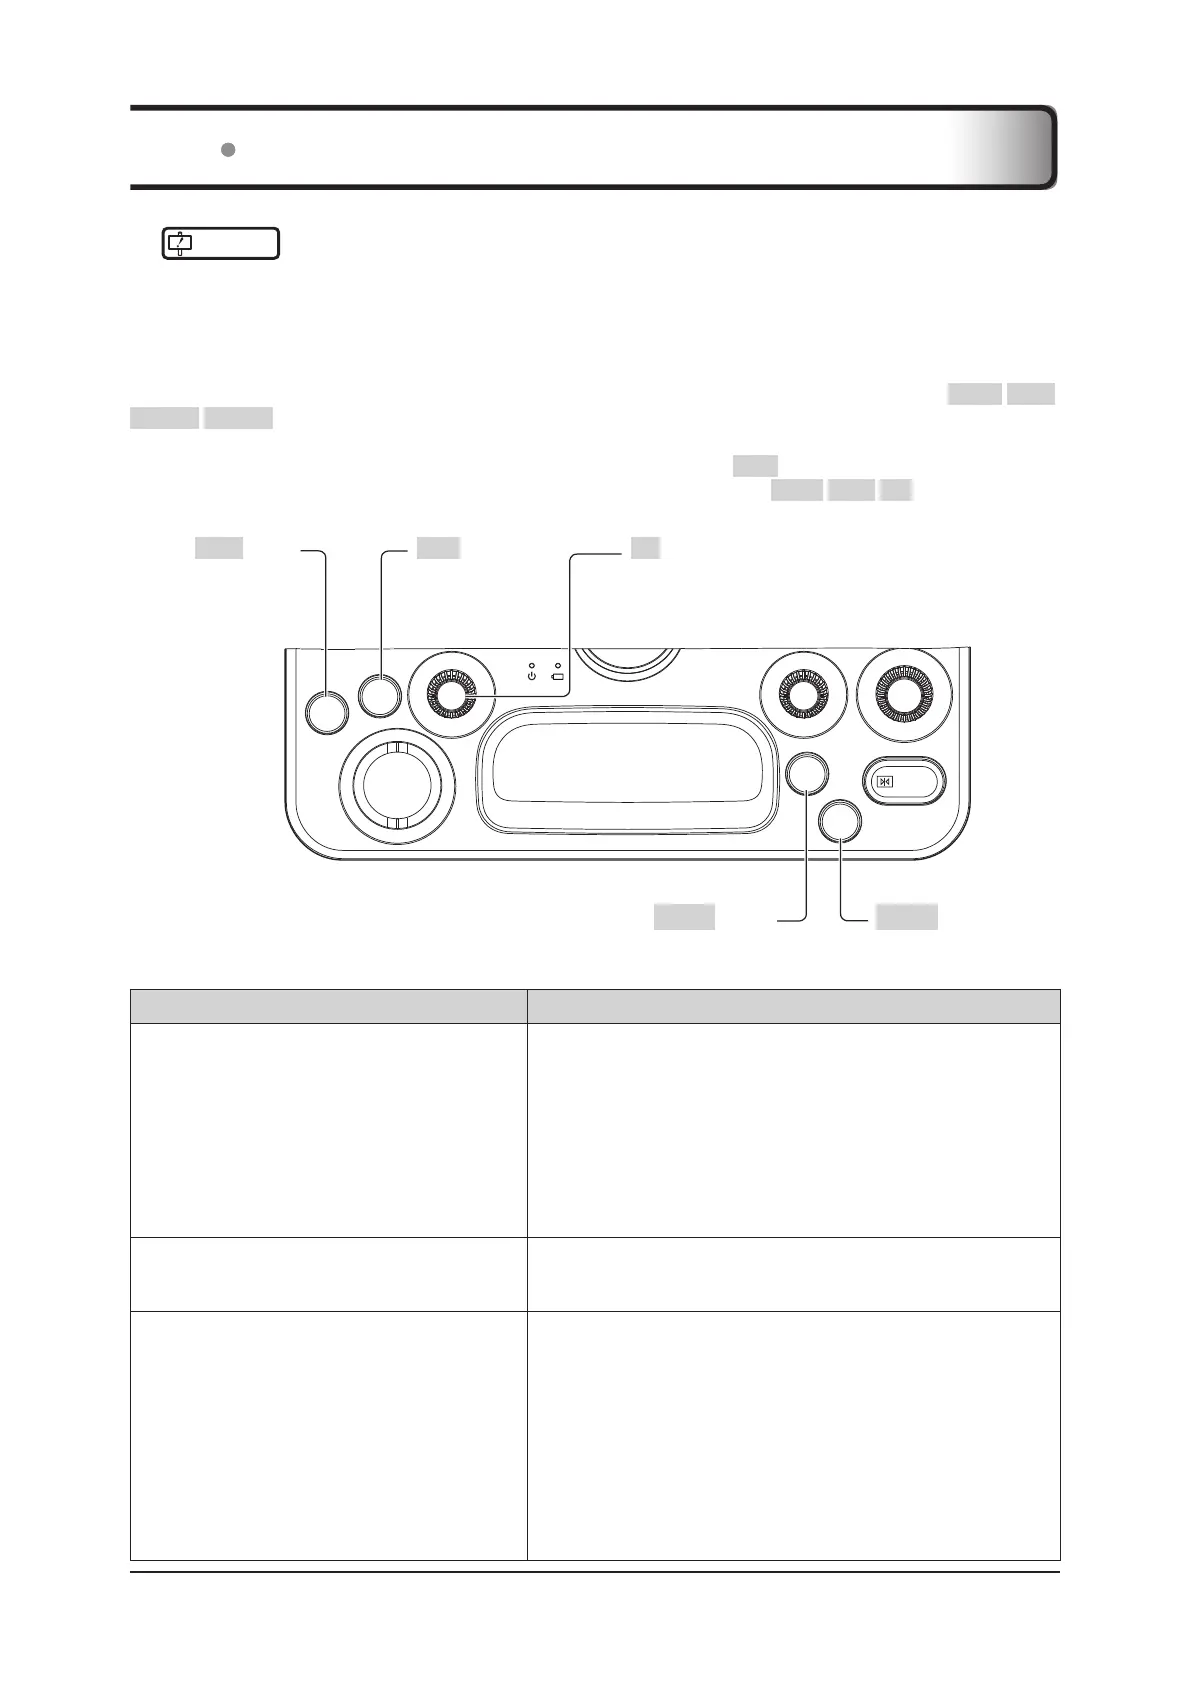
If the system can be turned on, while the system is starting, press simultaneously the four buttons ( EXIT / SET /
User 1 / User 2 ) of the mini console in the gure below. Next, when there is a still image or clip that needs to be
stored, freeze the image if it is in a live state and perform [Print] / [Still Store] / [Clip Store] / [Cine Clip Store] by con-
trolling the displayed trackball pointer to operate the trackball and using the SET button.
If the trackball pointer is not displayed, display it by pressing the three buttons ( EXIT / SET / F2 (Push)) simultane-
ously.
SET
FREEZE
User
1
User
2
F2 F1
Gain
EXIT
User 2 button User 1 button
EXIT button SET button F2 (Push) button
Then check the following items. If the problem persists, please contact your service representative.
Problems What to check
The system cannot be turned ON.
• Check that the battery status indicator LED on the mini console is lit or
blinking.
• Check that the power switch LED is lit.
• Check that the AC adaptor LED is lit.
• Check that the power code and the AC adaptor are connected cor-
rectly.
• Check that the power supply cord is connected to a wall mounted AC
socket outlet correctly.
• Remove the AC adapter and battery, reinsert them after 10 seconds or
more, and then press the power switch.
Characters are displayed but no images are dis-
played.
• Check that the transducer is correctly connected to the transducer
connector and locked in place.
• Check the Tx Level setting.
An SD memory card cannot be recognized.
• When an SD memory card is inserted for the rst time the system
needs to perform a registration, therefore this may take some time.
Time of recognition will be shorter for the second and subsequent con-
nections.
• Use the following procedure to connect the SD memory card to the
system for the rst time.
1. Shut down the system.
2. Disconnect all external storage media and peripheral devices from
the system.
3. Insert the SD memory card into the SD memory card slot.
4. Start up the system.
11.1 Troubleshooting