3.3 Registering Patient Information
99
Chapter 3
3.3.3 Entering Patient Information
The patient information entry area includes the [Basic] screen and the [Advance] screen and touching a tab will allow
you to change and operate the screen. You can enter, search or change patient information.
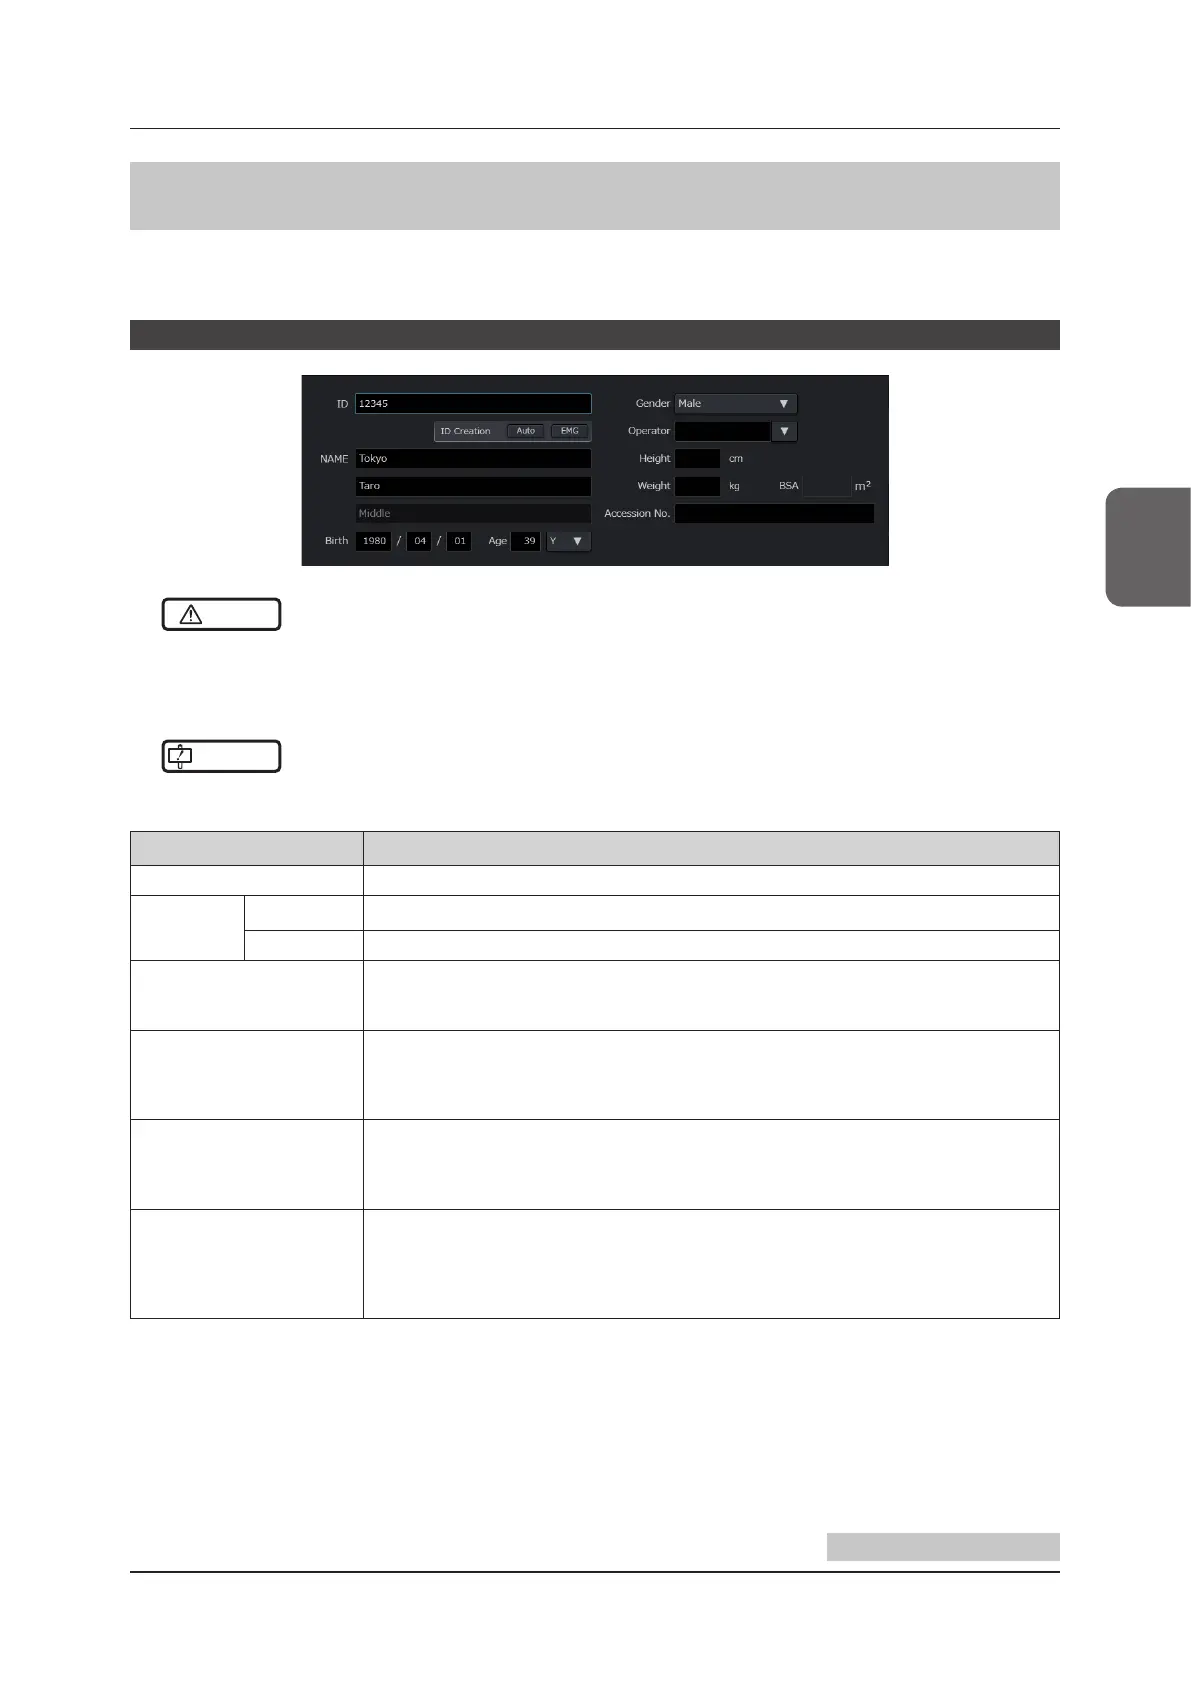
Patient information entry area [Basic]
CAUTION
•••••••••••••••••••••••••••••••••••••••••••••••••••••••••••••••••••••••••••••••••••••••••••••••••••••
• Be sure to enter the correct data such as ID, name and values for doing study. Incorrect data will result in incorrect
diagnosis.
•••••••••••••••••••••••••••••••••••••••••••••••••••••••••••••••••••••••••••••••••••••••••••••••••••••••••••••••••••••
IMPORTANT
•••••••••••••••••••••••••••••••••••••••••••••••••••••••••••••••••••••••••••••••••••••••••••••••••••••
• The [ID] eld must be entered.
•••••••••••••••••••••••••••••••••••••••••••••••••••••••••••••••••••••••••••••••••••••••••••••••••••••••••••••••••••••
Item Functions
[ID]
*
1
Enter Patient ID.
[ID Creation]
[Auto] button Automatically assigns a patient ID number.
[EMG] button Automatically assigns an emergency ID number.
[NAME]
*
2
Enter a patient name.
• There are four types of input format and you can set each of them.
Refer to "Patient Screen" of the "Operation Manual: Applications".
[Birth]
Enter a date of birth.
• Input format for Date is selectable.
• Selection of the name of era is needed in case of Japan Format.
Refer to "System Screen" of the "Operation Manual: Applications".
[Age]
Automatically calculated from [Birth] for display.
• If this is manually entered, [Birth] will be cleared.
• Input range: 0 to 150
• Select the unit of age from the pull-down menu.
[Gender]
Select the gender from the pull-down menu.
• Exam type-specic defaults are selected as shown below.
[OB], [GYN] → [Female]
[Testicle] → [Male]
Other than the above → Blank
Continued on the next page