3.2 Examination Flow
94
Registered patient
• Patient information can be called up by searching using a patient ID or patient name. Select the desired patient
and go to step 3.
Reference
•••••••••••••••••••••••••••••••••••••••••••••••••••••••••••••••••••••••••••••••••••••••••••••••••••••
• For patient search, refer to "3.5 Patient Search".
•••••••••••••••••••••••••••••••••••••••••••••••••••••••••••••••••••••••••••••••••••••••••••••••••••••••••••••••••••••
3
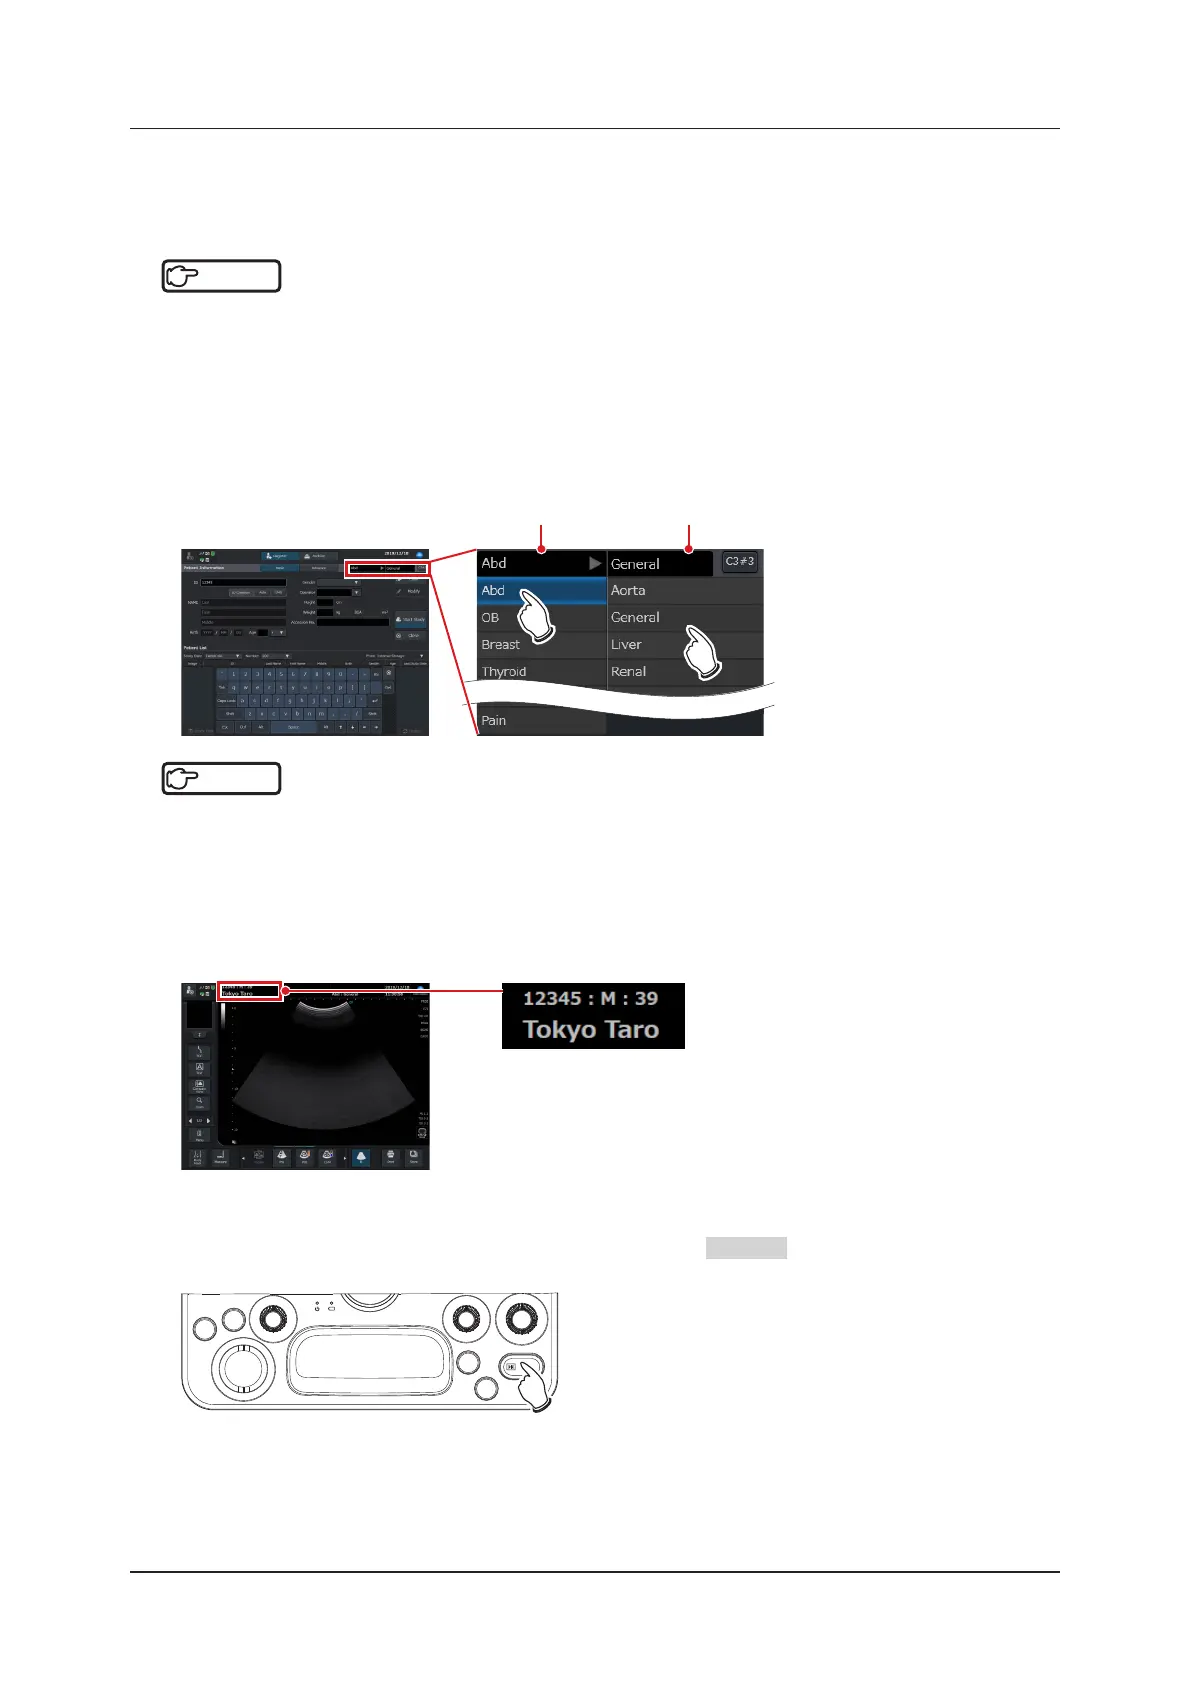
Select the desired examination.
• Select the desired exam type and preset of the region for diagnosis.
Example: [Abd] selection
• Touching and selecting [Abd] displays the preset items related to [Abd] to the right of [Abd]. There you can se-
lect the desired item.
Exam list Preset list
Reference
•••••••••••••••••••••••••••••••••••••••••••••••••••••••••••••••••••••••••••••••••••••••••••••••••••••
• For an exam type, refer to "3.4 Exam Type Selection".
•••••••••••••••••••••••••••••••••••••••••••••••••••••••••••••••••••••••••••••••••••••••••••••••••••••••••••••••••••••
4
Start an examination.
• Press the [Start Study] button on the [Patient] screen to start an examination.
• The [Patient] screen closes so as to display the study screen, and the previously-entered patient information is
displayed in the patient information area of the study screen.
5
Acquire an ultrasound image.
• After the desired ultrasound image has been displayed, press the FREEZE button of the mini console.
• The image freezes.
SET
FREEZE
User
1
User
2
F2 F1
Gain
EXIT