3 Remove the rear door and cover. See “Rear exit door removal” on page 317 and “Rear cover removal” on page
318.
4 Remove the scanner assembly. See “Scanner assembly removal” on page 336.
5 Remove the top cover. See “Top cover removal” on page 324.
6 Disconnect cable JNRW1 from the controller board.
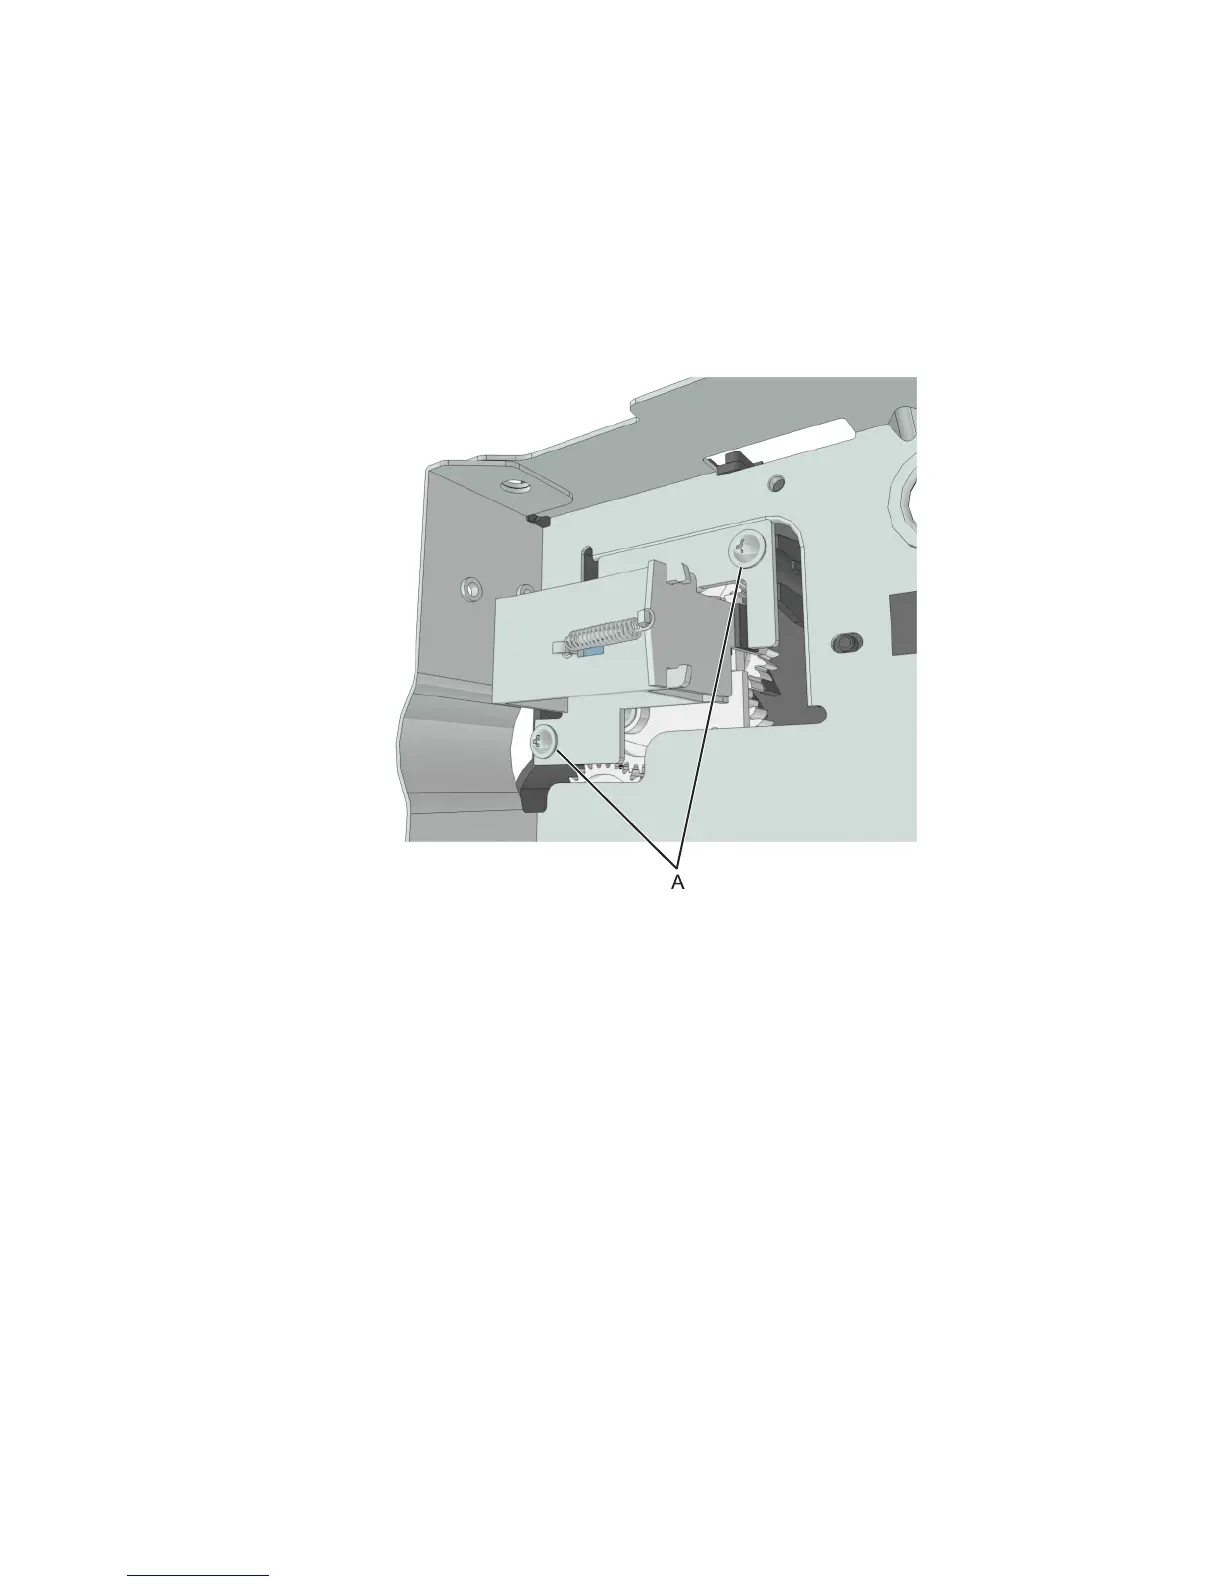
7 Remove the two screws (A), and then disconnect the reverse solenoid.
Note: Do not disconnect the reverse solenoid cable from the controller board.
8 Remove the stapler cable. See “Stapler cable removal” on page 321.
7016
Repair information
319