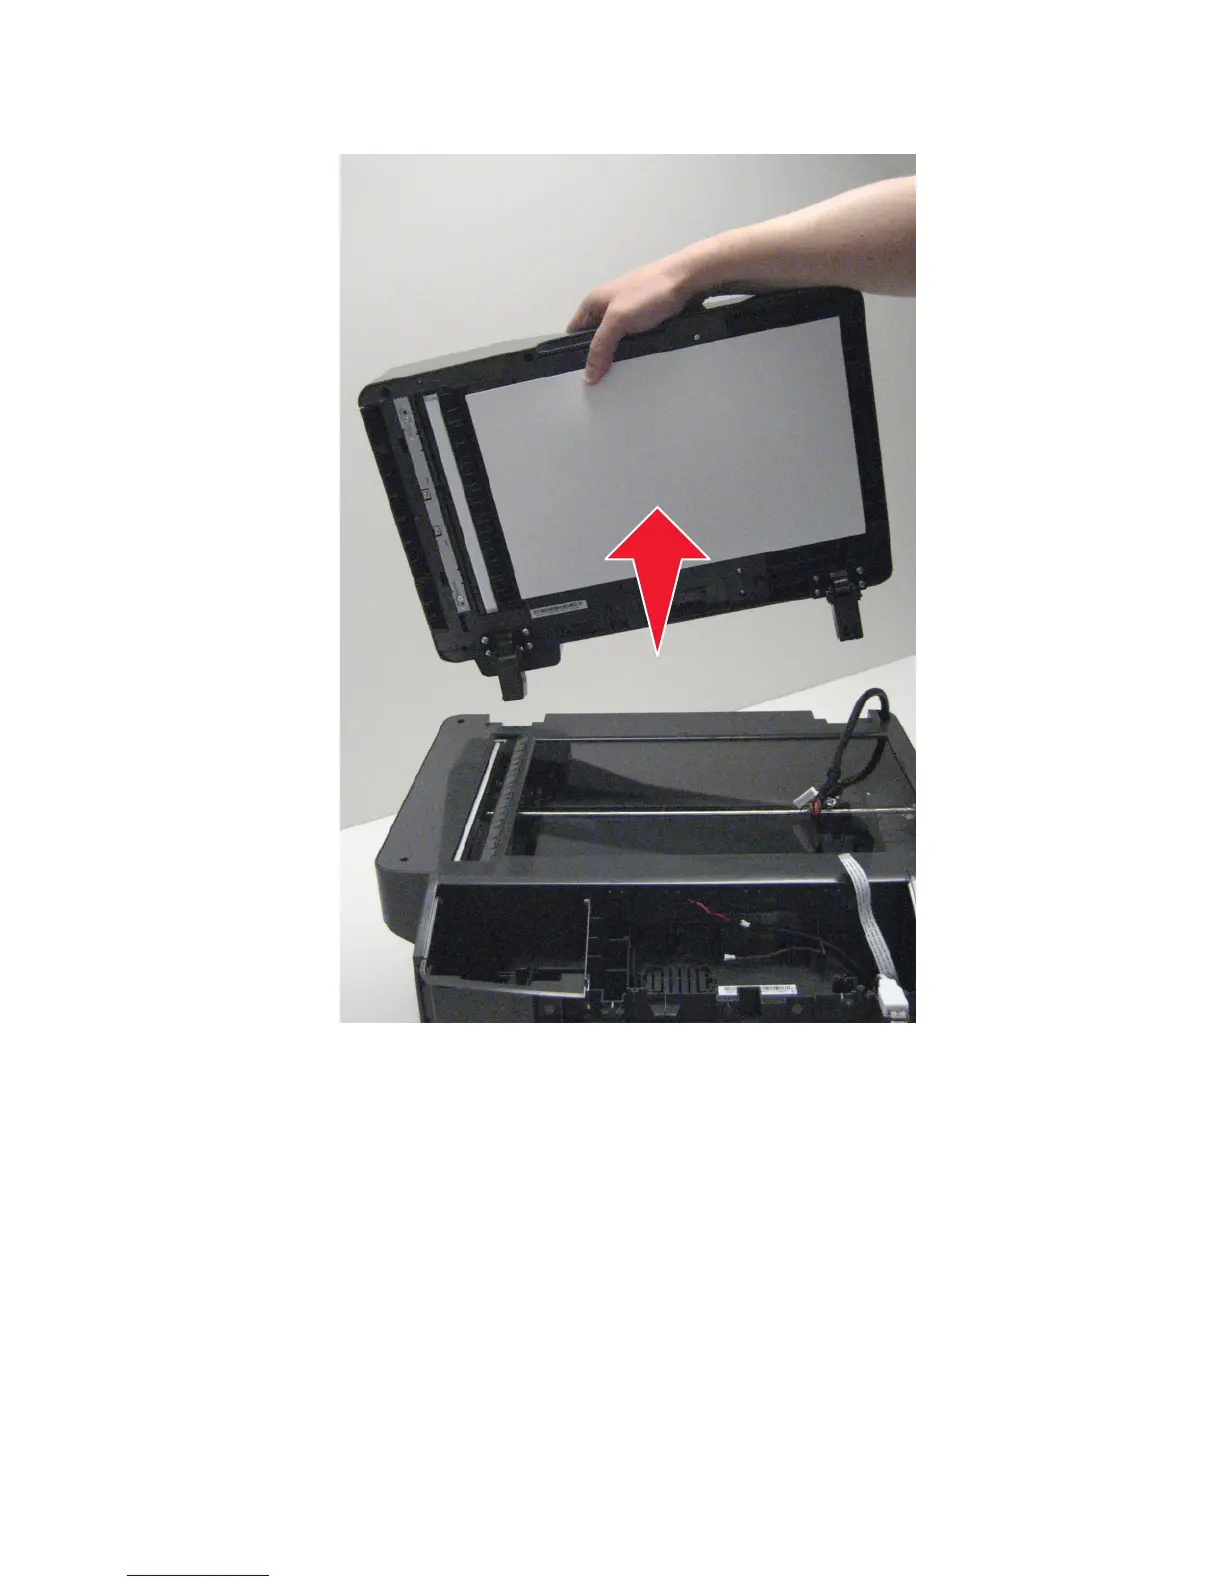
7 Remove the ADF unit.
Installation note: After the new ADF is installed, perform scanner manual registration, see “Scanner manual
registration” on page 205 and scanner calibration, see “Scanner calibration” on page 181.
Scanner assembly removal
1 Remove the diverter cover. See “Diverter cover removal” on page 323.
2 Remove the rear cover assembly. See “Rear cover removal” on page 318.
3 Open the front access cover. See “Front access cover removal” on page 291.
4 Remove the left cover. See “Left cover removal” on page 239.
5 Remove the right cover. See “Right cover removal” on page 252.
6 Remove the controller board shield. See “Controller board shield removal” on page 259.
7016
Repair information
336