Charging and Starting System
90-8M0050731 MAY 2011 Page 2B-33
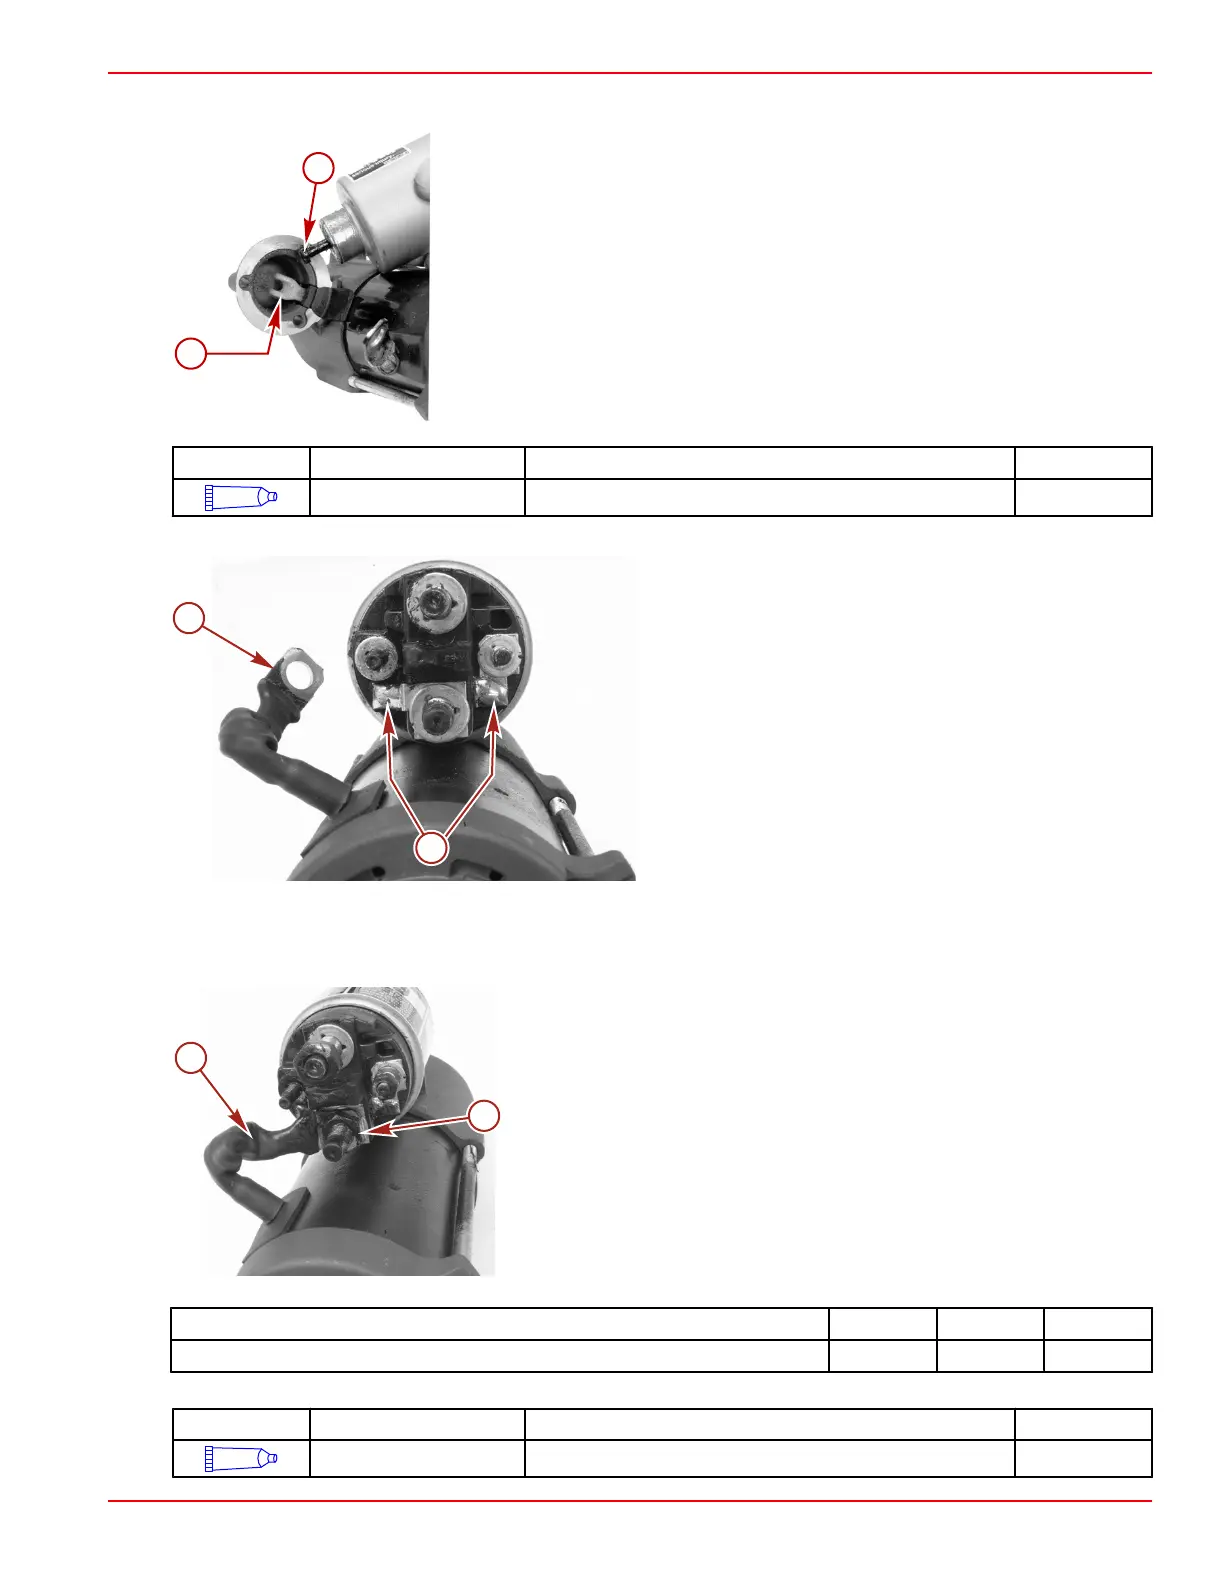
3. Insert the solenoid actuating plunger end into the fork of the solenoid arm.
a - Fork of the solenoid arm
b - Solenoid actuating plunger
Tube Ref No. Description Where Used Part No.
95
2-4-C with Teflon Solenoid actuating plunger 92-802859A 1
4. Align the solenoid so the two solder joints are closest to starter assembly.
a - Solder joints
b - Starter brush lead
5. Install the starter brush lead onto the solenoid terminal and secure with a lockwasher and nut. Tighten the nut to the specified
torque.
6. Apply Liquid Neoprene to the starter brush lead connection to prevent corrosion.
a - Starter brush lead
b - Nut and lockwasher
Description Nm lb‑in. lb‑ft
Nut 9 80
Tube Ref No. Description Where Used Part No.
25
Liquid Neoprene Starter brush lead connection 92- 25711 3

 Loading...