Jet Installation
90-8M0050731 MAY 2011 Page 1D-15
2. Attach the other end of the flush hose to the flush adapter. Fasten with a cable tie clamp as shown.
a - Flush adapter
b - Cable tie
c - Flush hose
IMPORTANT: Before mounting the flush adapter bracket, route the adapter and hose to the selected mounting location. Hose
routing must not interfere with throttle or control linkage.
NOTE: Mount the flush adapter bracket in an area of the motor compartment that has a mounting surface thicker than the
depth of the mounting bracket screws.
3. Locate an easily accessible area within the motor compartment to mount the flush adapter bracket. Secure the bracket to the
mounting surface with the three screws provided.
a - Mounting surface
b - Bracket
c - Screw (3)
4. Snap the flush adapter into the bracket as shown.
a - Bracket
b - Flush adapter
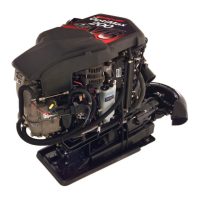
Installing the Powerhead
1. Install the water inlet O‑ring and driveshaft opening O‑ring.
2. Install the powerhead gasket on the drive housing cover.
3. Check that the slinger is on the driveshaft.
 Loading...
