Powerhead
Page 4A-54 90-8M0050731 MAY 2011
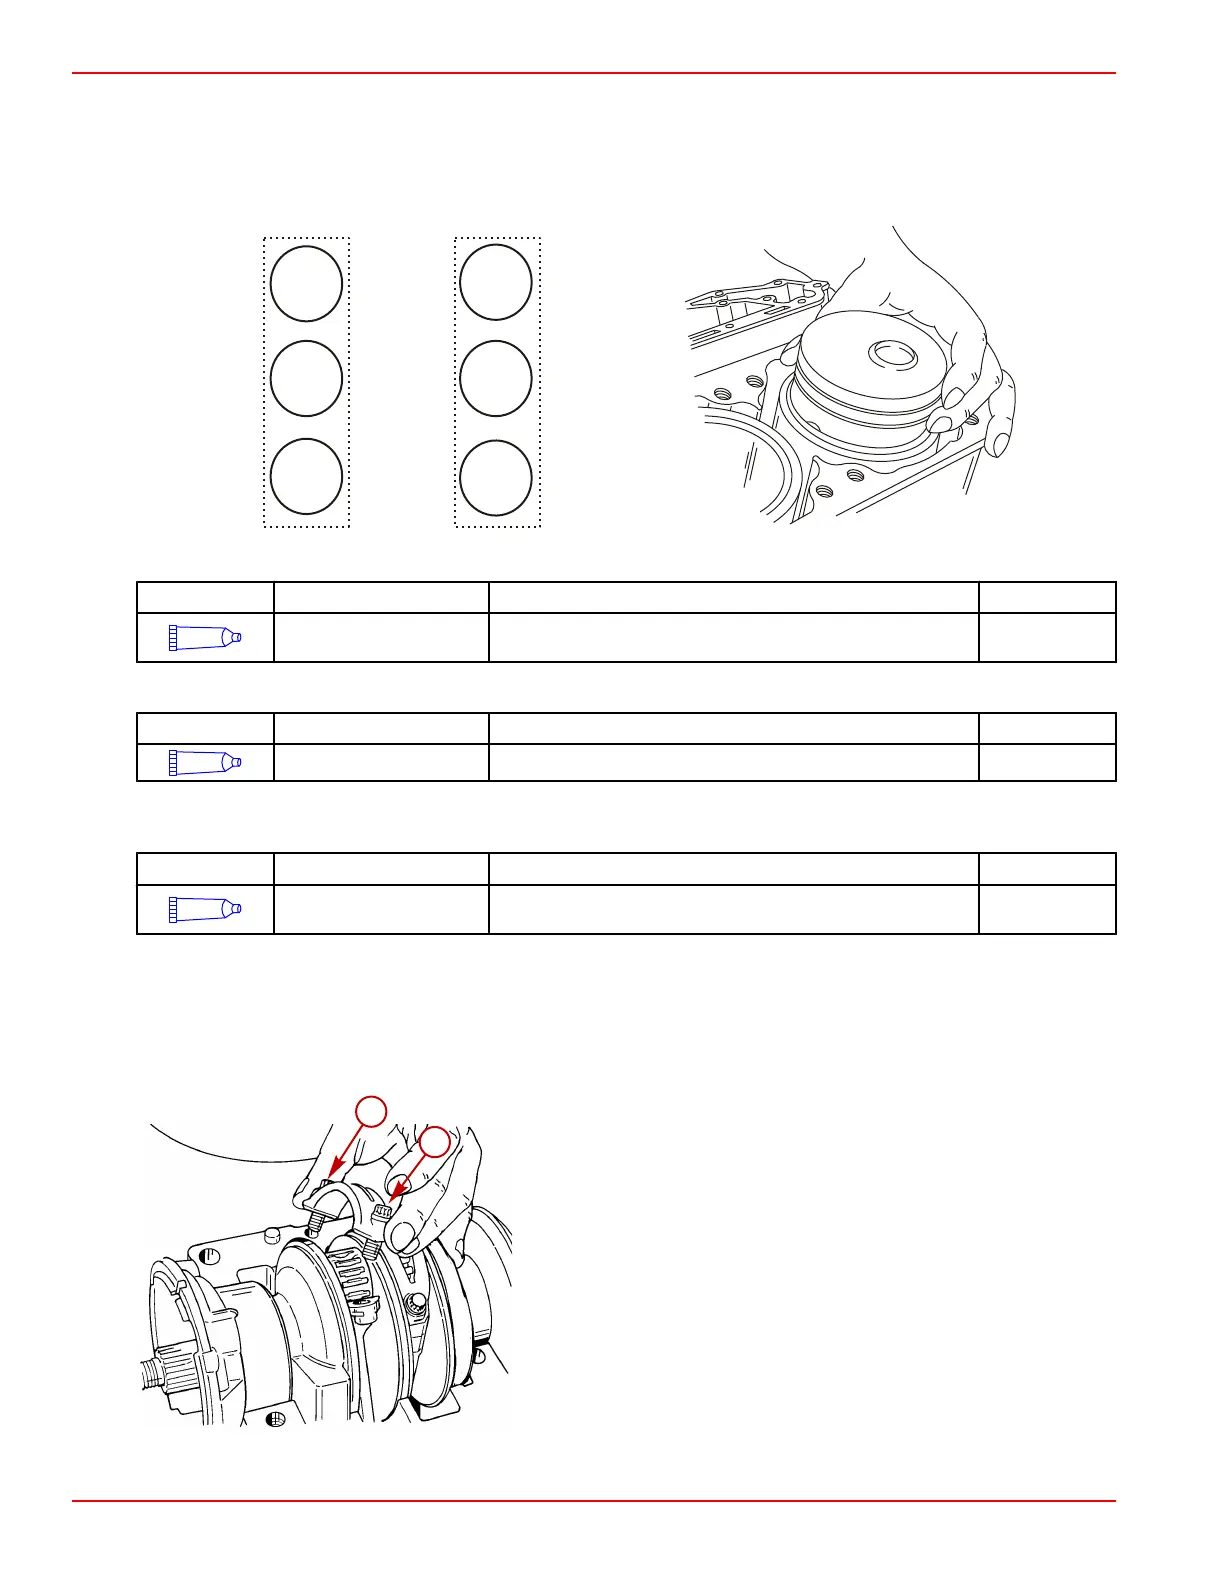
8. Remove the screws and connecting rod cap from the piston rod assembly.
9. Install the pistons with the letter "P" into the port side of engine with the word "UP" facing toward the flywheel.
10. Install the pistons with the letter "S" into the starboard side of engine with the word "UP" facing toward the flywheel.
11. Apply 2‑Cycle Premium Outboard Oil to the cylinder bores. Install the piston assembly into the cylinder it was removed from.
Push the piston into the cylinder bore.
CYL 2
CYL 4
CYL 6
CYL 1
CYL 3
CYL 5
UP
P
UP
P
UP
P
UP
S
UP
S
UP
S
17263
UP
S
Tube Ref No. Description Where Used Part No.
14
2-cycle Premium
Outboard Oil
Cylinder bores and pistons 92-858021K01
12. Apply 2‑4‑C with Teflon to the bearing surface of the connecting rod and rod cap. Install the connecting rod bearing.
Tube Ref No. Description Where Used Part No.
95
2-4-C with Teflon Bearing surfaces of connecting rod and rod cap 92-802859A 1
13. Install the connecting rod cap. Lubricate the threads and face of the connecting rod screws with 2‑Cycle Premium Outboard
Oil. Thread the screws into the connecting rod finger‑tight while checking the alignment of the rod cap.
Tube Ref No. Description Where Used Part No.
14
2-cycle Premium
Outboard Oil
Threads and face of connecting rod screws 92-858021K01
IMPORTANT: The connecting rod and rod cap are a matched set. Do not torque the screws before completing the following
procedure.
• Run a pencil lightly over the ground area.
• If the pencil stops at a fracture point, loosen bolts, retighten, and check again.
NOTE: If you still feel the fracture point, discard the rod.
a - Connecting rod cap screws

 Loading...