SETTING OF REGISTER MARK DETECT OPERATION
5-13
How to detect Register mark
1. Set the work to the plotter.
2.
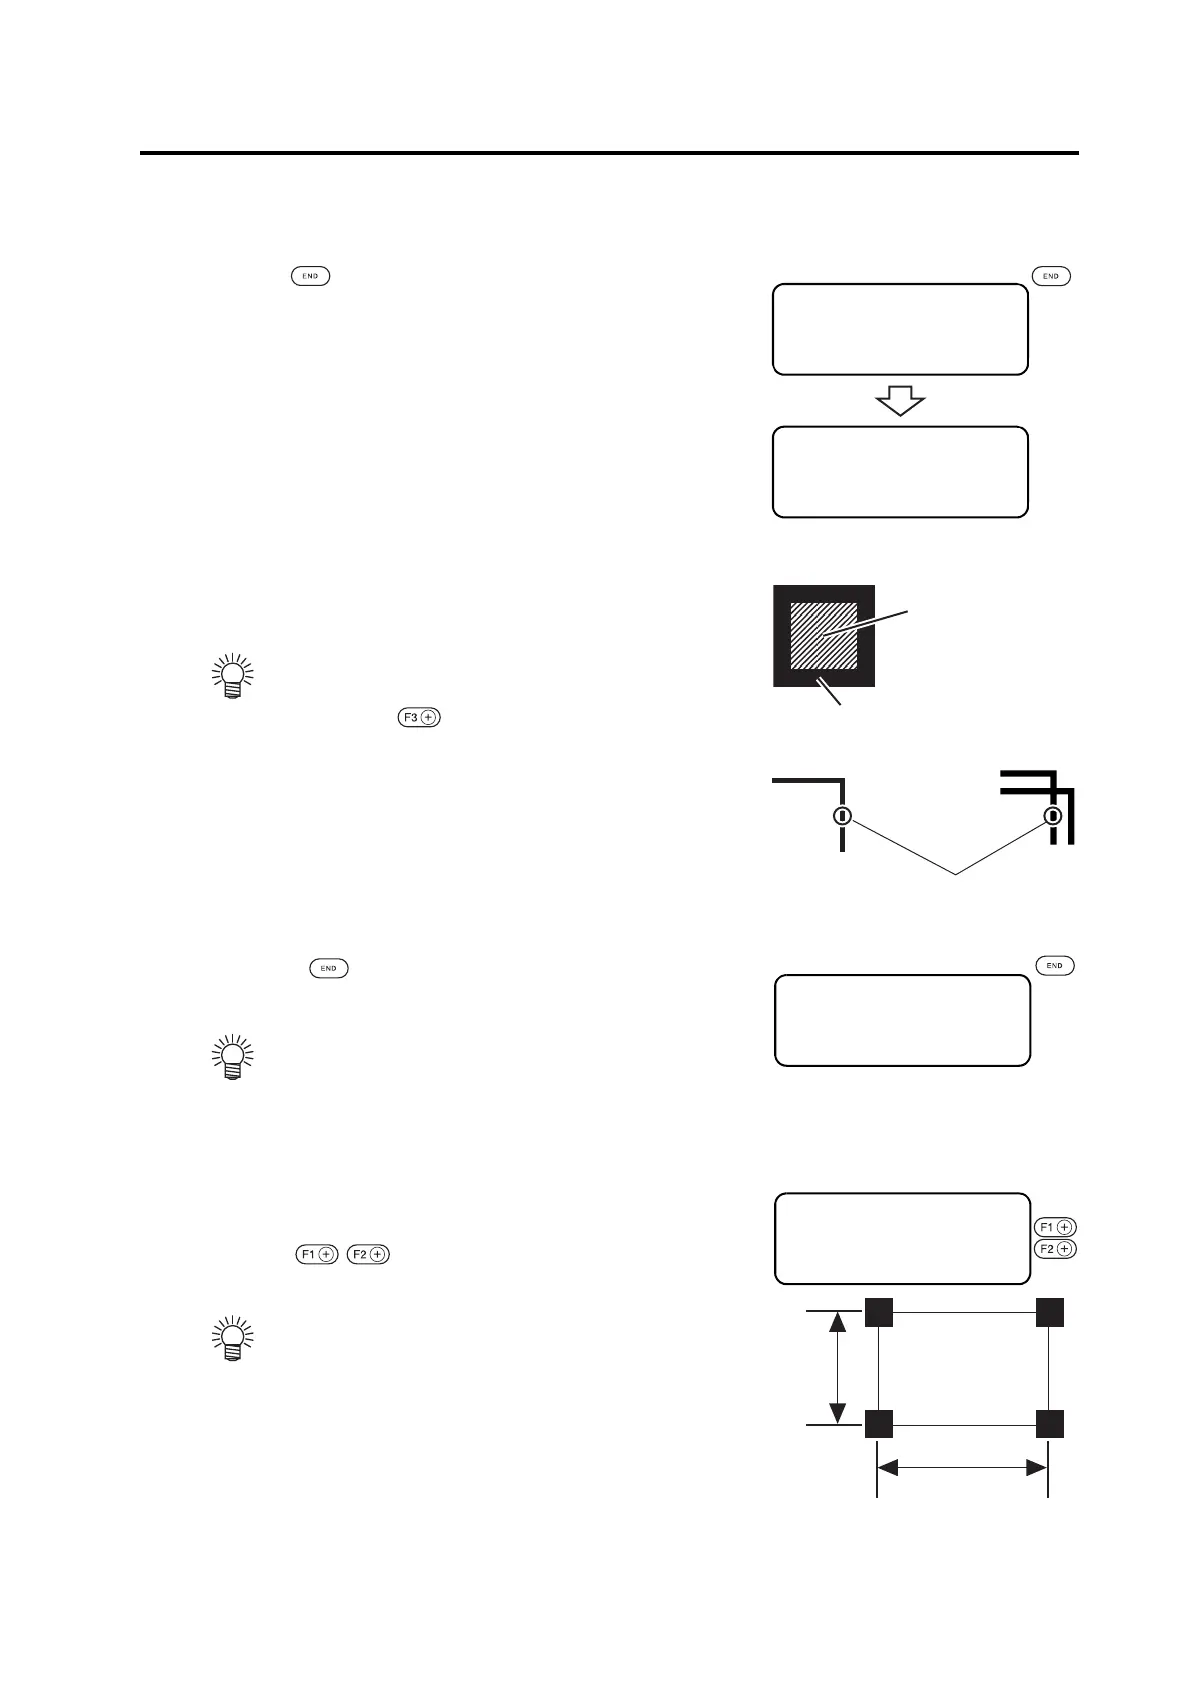
Press the key on the [Local] mode.
Display changes to [DETECT] mark mode
3. Move and align the light pointer on the center of the
TP1 vertical line precisely with jog key. In the case of
square mark, move to around the center.
4. Press the key.
Start detecting a register mark.
5. After detect the register mark, display changes to Scale
compensation. If the data and detected length differs,
set with
key.
• If [SPEED] is set to AUTO, speed automati-
cally changes while pressing the jog key.
•
Press the key enables to move the head to
LL (Lower-Left).
• When register mark detection failed, error is
displayed. Reset the work to the plotter.
• If [SCALE] is set to “BEFORE”, LCD of Step5
is displayed before register mark detection.
• If [Scale] is set to OFF, <SCALE SET> is not
displayed.
• If [MARK DETECT] is set to 2Pt, X length is
not displayed.
• If [MARK DETECT] is set to 1Pt, <SCALE
SET> is not displayed.
[LOCAL] 1 / 4
TOOL SELECT ――― >
CONDITION ――― >
TEST CUT ――― >
<DETECT SET>
Set LED Pointer
SPEED AUTO>
LOWER LEFT ->
TP1
Single
Double
LED detect point
Square
<DETECT SET>
Set LED Pointer
SPEED AUTO>
LOWER LEFT ->
<SCALE SET>
1-2 (X) 400.8>
1-3 (Y) 149.1>

 Loading...


