2-36
SETTING THE CUTTING AREA [CUT AREA]
The cutting area is maximized when turning on the power to the device. The cutting area can be adjusted to the size of
works placed on the device or set to a desired size.
To specify a new cutting area, determine the lower left point (LL; Lower Left) and the upper right point (UR: Upper
Right) of the area.
To clear the cutting area specified, re-turn on the power to the device. This will maximize the cutting area.
1. Invoke the LOCAL menu on the screen.
If the device is in the REMOTE mode, press the key to select
the LOCAL mode.
2. Press the key several times until the LCD indi-
cates page 4 of the LOCAL MENU.
3. Select the [CUT AREA].
4. Move the tool to the current LL (lower left) point.
The coordinates of the LL point in terms of the command origin are
shown on the LCD.
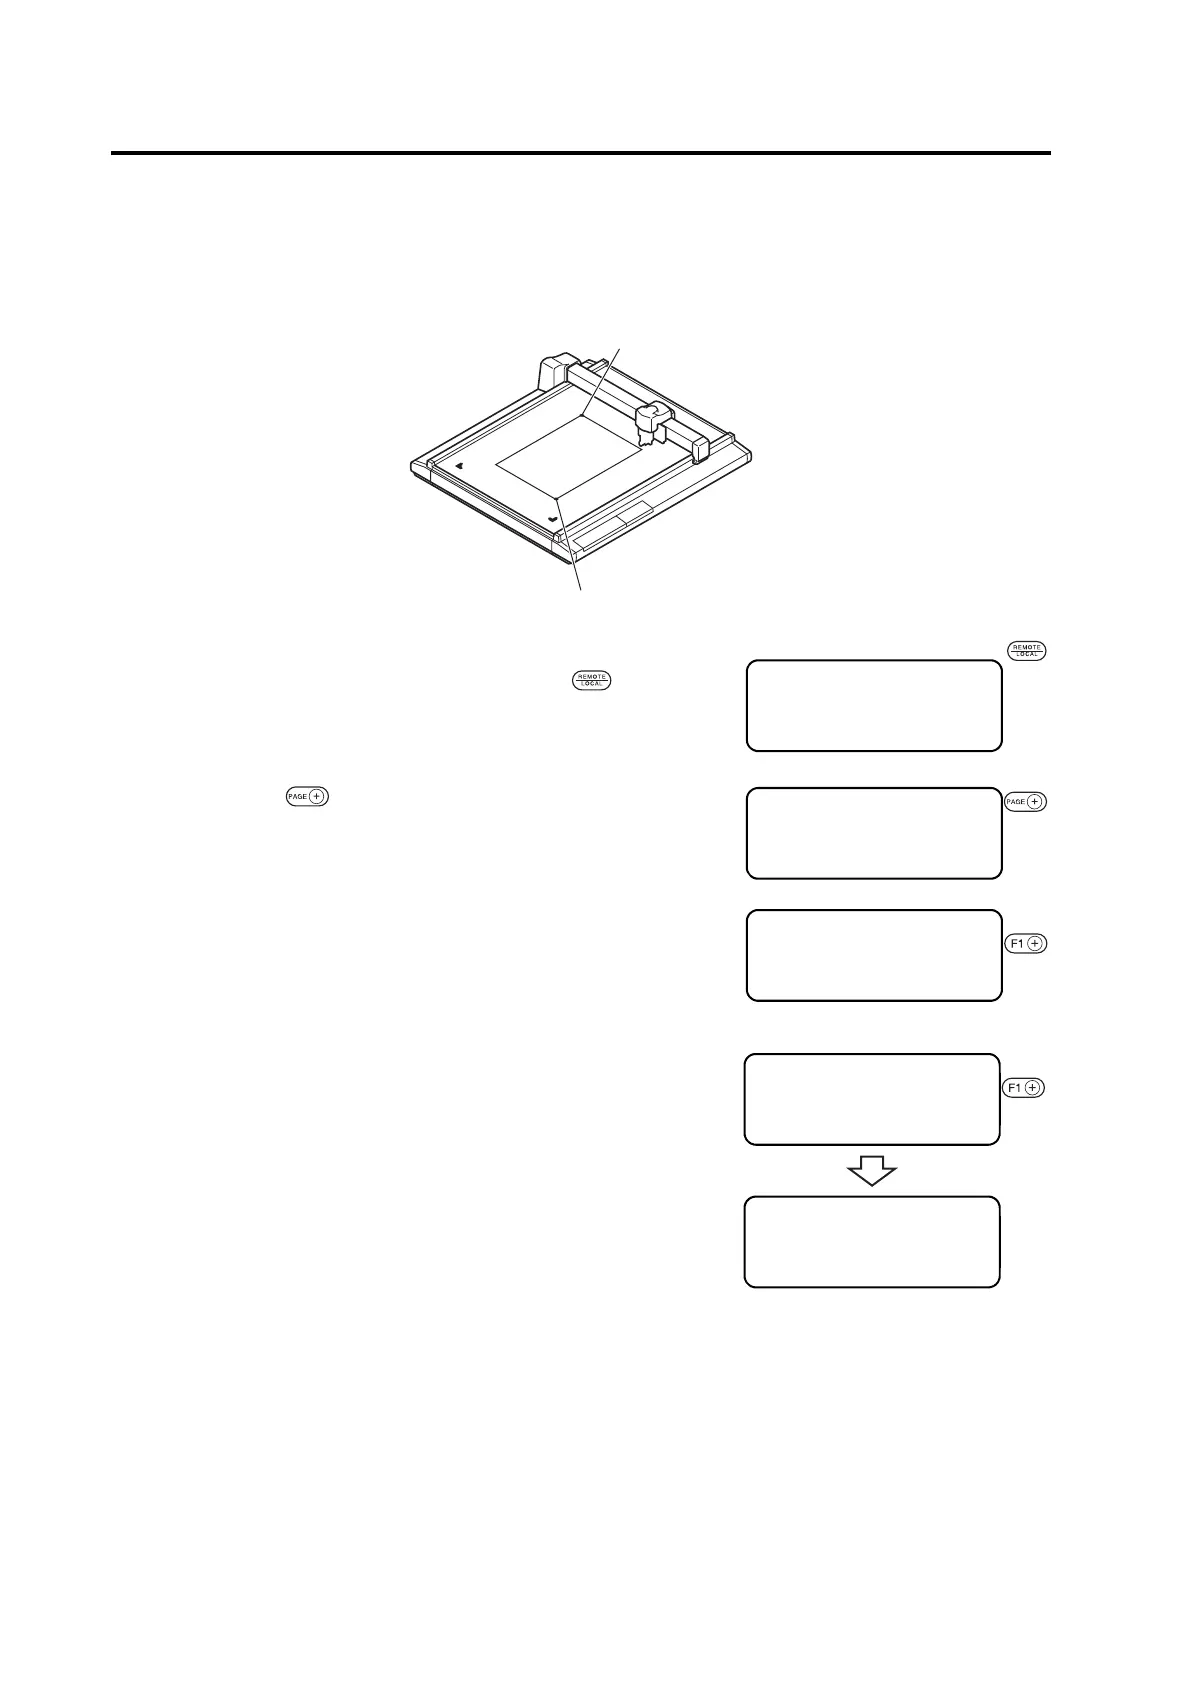
Upper right point (UR)
Lower left point (LL)
Cutting area
[LOCAL] 1 / 4
TOOL SELECT ――― >
CONDITION ――― >
TEST CUT ――― >
[LOCAL] 1 / 4
TOOL SELECT ――― >
CONDITION ――― >
TEST CUT ――― >
[LOCAL] 4 / 4
CUT AREA ――― >
AXIS ALIGN ――― >
TOOL SELECT ――― >
< CUT AREA > [mm]
LOWER LEFT →
< AREA LL > [mm]
―600. 0 ―450.0
SPEED FAST >
CUTTER UP >

 Loading...


