3-12
How to adjust:
Follow the adjusting procedure given below.
How to adjust the tools
“TOOL SELECT” consists of two categories; i.e., the “adjustment of the cutter”, the “adjustment of the roller” and
“circle q adjust”.
The tool adjusting procedure is described below taking the “adjustment of the cutter 1” as an example.
1. Attach a pen and a tangential cutter to the head.( P. 2-15, P. 2-16)
2. Press the key several times until the LCD indicates
page 4 of the LOCAL MENU.
3. Select the [TOOL ADJSUT].
4. Select the [CUTTER ADJUST].
The menu changes to the eccentricity adjustment menu.
The illustration on the left is for when a roller is set to unit B, when a
tangential cutter is set to the unit C.
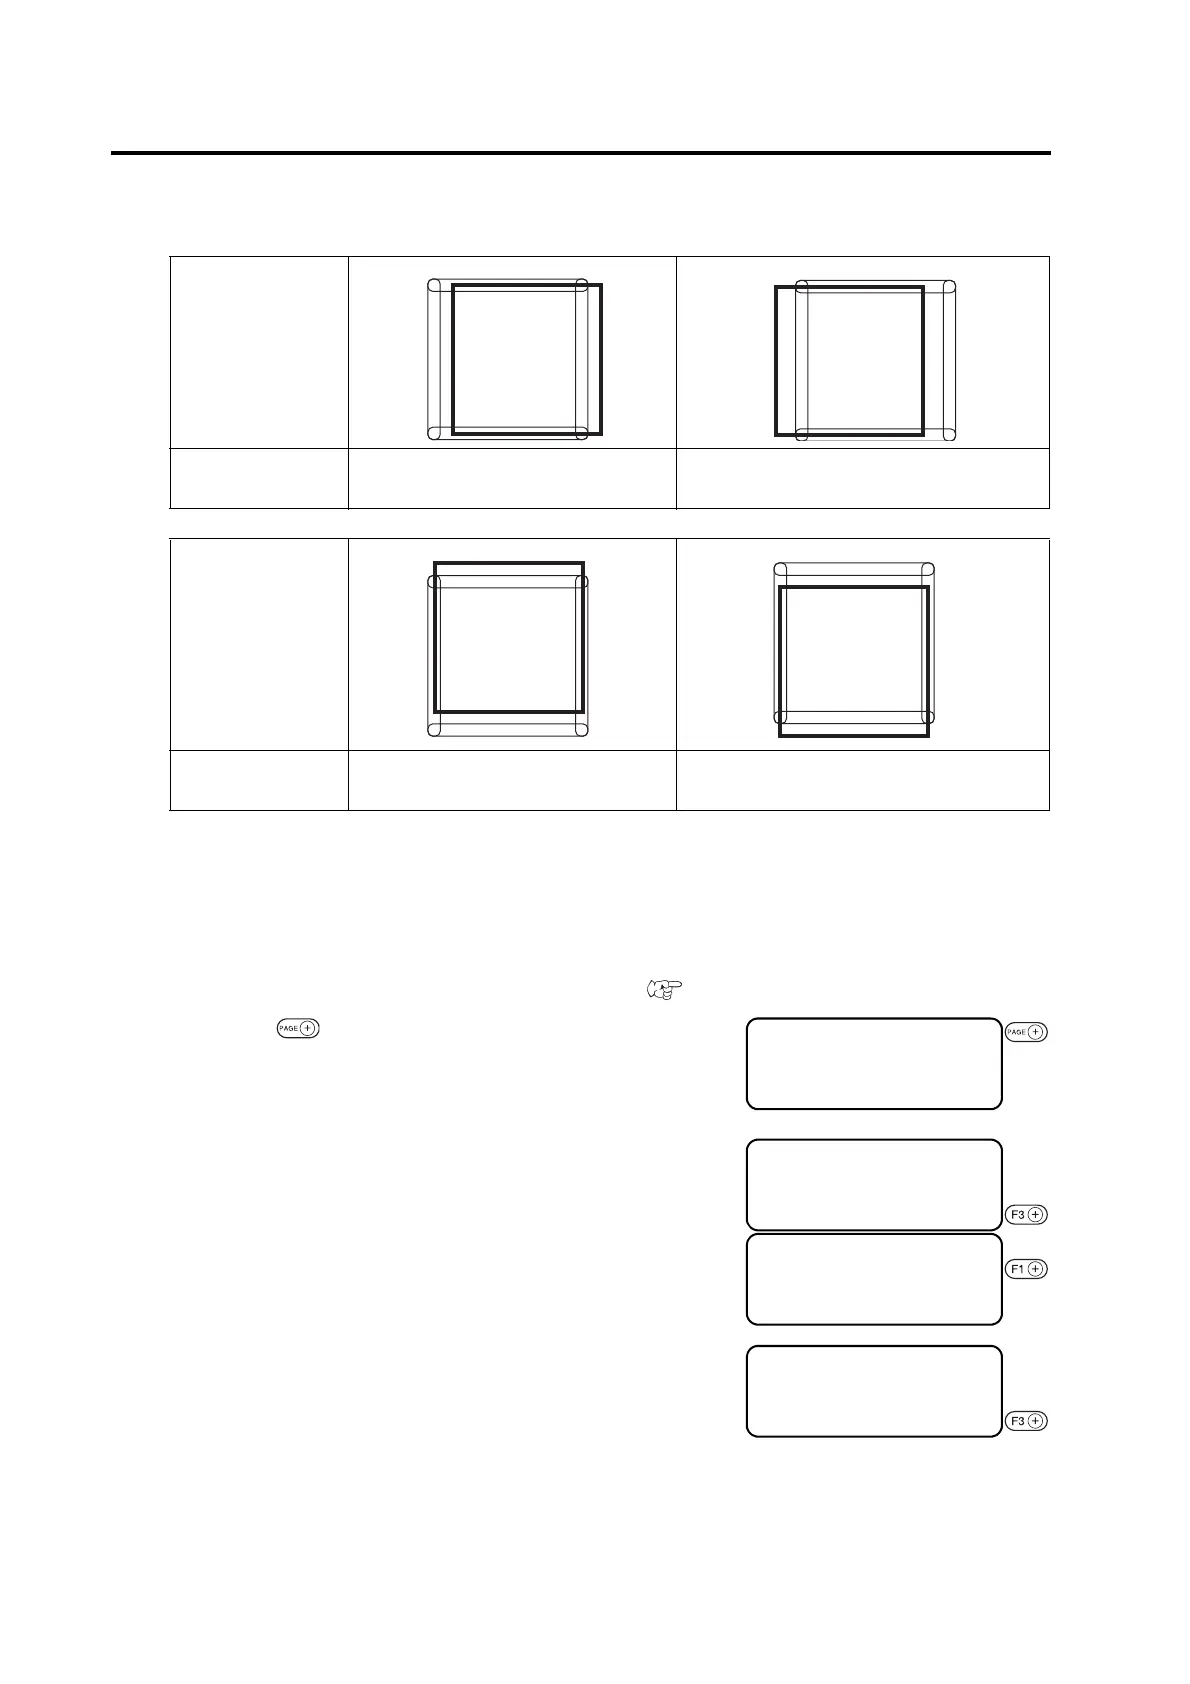
5. To check for the eccentricity of the cutter, select the
[TEST PATTERN] to cut patterns A and B.
Sample pattern
How to adjust
If the roller deviates to the right, increase
the X value for the roller.
If the roller deviates to the left, decrease the X
value for the roller.
Sample pattern
How to adjust
If the roller deviates upward, increase the
Y value for the roller.
If the roller deviates downward, decrease the Y
value for the roller.
[LOCAL] 1 / 4
TOOL SELECT ――― >
CONDITION ――― >
TEST CUT ――― >
[LOCAL] 4 / 4
CUT AREA ――― >
AXIS ALIGN ――― >
TOOL ADJUST ――― >
< TOOL ADJUST > 1 / 2
B CUTTER ADJUST ――― >
C ROLLER ADJUST ――― >
CIRCLE θ CORP ――― >
< ADJ > SWIVEL 1 / 3
A (LNG) **. **>
B **. **>
TEST PATTERN ――― >

 Loading...


