1-14
TURNING THE POWER ON/OFF
The device is provided with separate switches for turning the power on and off.
Turn on/off the power to the device following the procedure described below.
Turning the power on
1. Confirm nothing is placed on the cutting panel.
If there is a thing on the cutting panel, remove it from the panel.
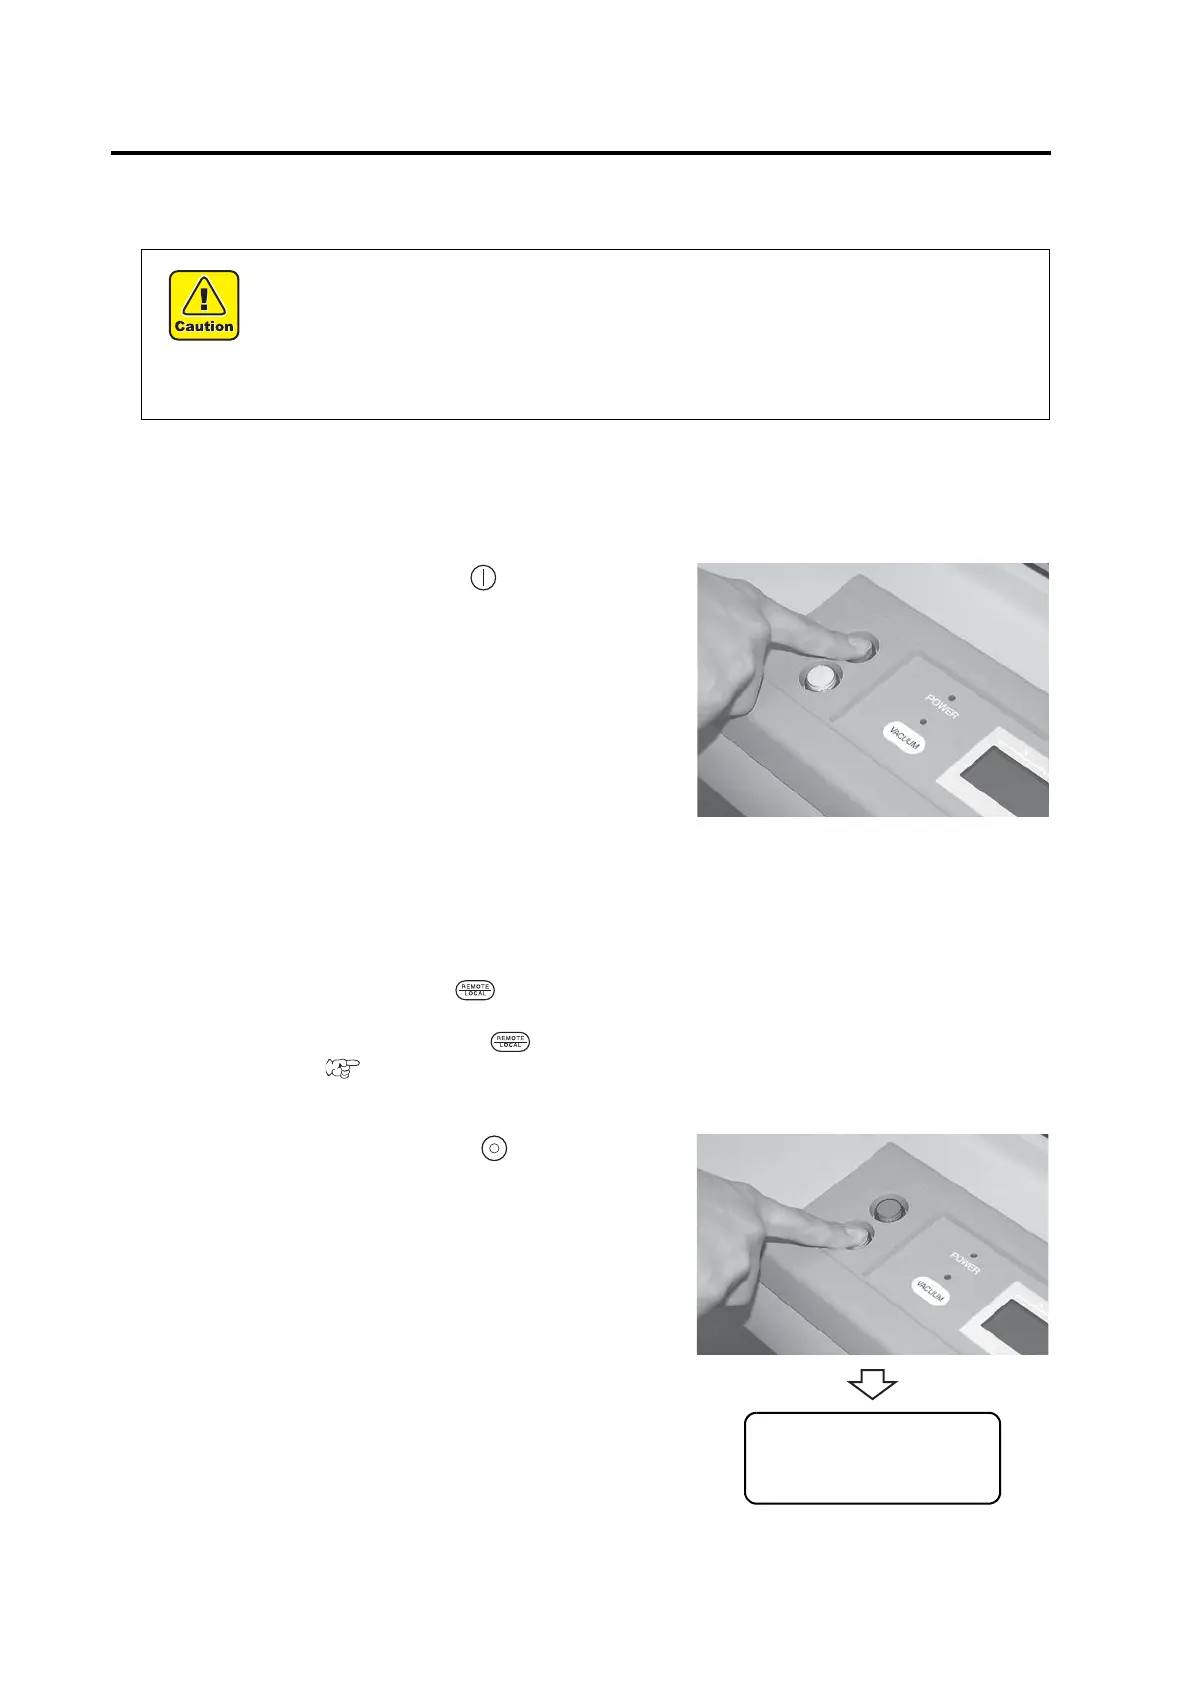
2. Press the POWER ON switch .
The POWER lamp lights up (in green).
The head travels to the retracted point (at the lower right) on
the cutting panel.
Then, the first page of the local menus will appear on the LCD.
Turning the power off
To turn the power off, check first whether or not there is data received and there remains data that has not yet been
output in the device.
To check for the remaining data, press the key to cause the device to enter the REMOTE mode. The amount of
data received is displayed on the LCD, and the device starts cutting (plotting) according to the data displayed.
To clear the remaining data received, press the key to cause the device to enter the LOCAL mode, then execute
the “data clear” function.( P. 2-40)
1. Turn off the power to the personal computer that is connected to the device.
2. Press the POWER OFF switch .
After displaying [POWER DOWN WAIT] on the LCD, the
POWER lamp goes out to turn the power off.
• Do not place any thing other than a work on the cutting panel when turning the power on.
Turning the power on causes the head to travel to the retracted point located at the lower
right of the cutting panel. If a thing is present on the cutting panel, the head may come in
contact with the thing, giving rise to a failure.
• If the device is restarted, do not turn on the power until 30 minute after turning off. The
device may be caused faulty function.

 Loading...


