5-40
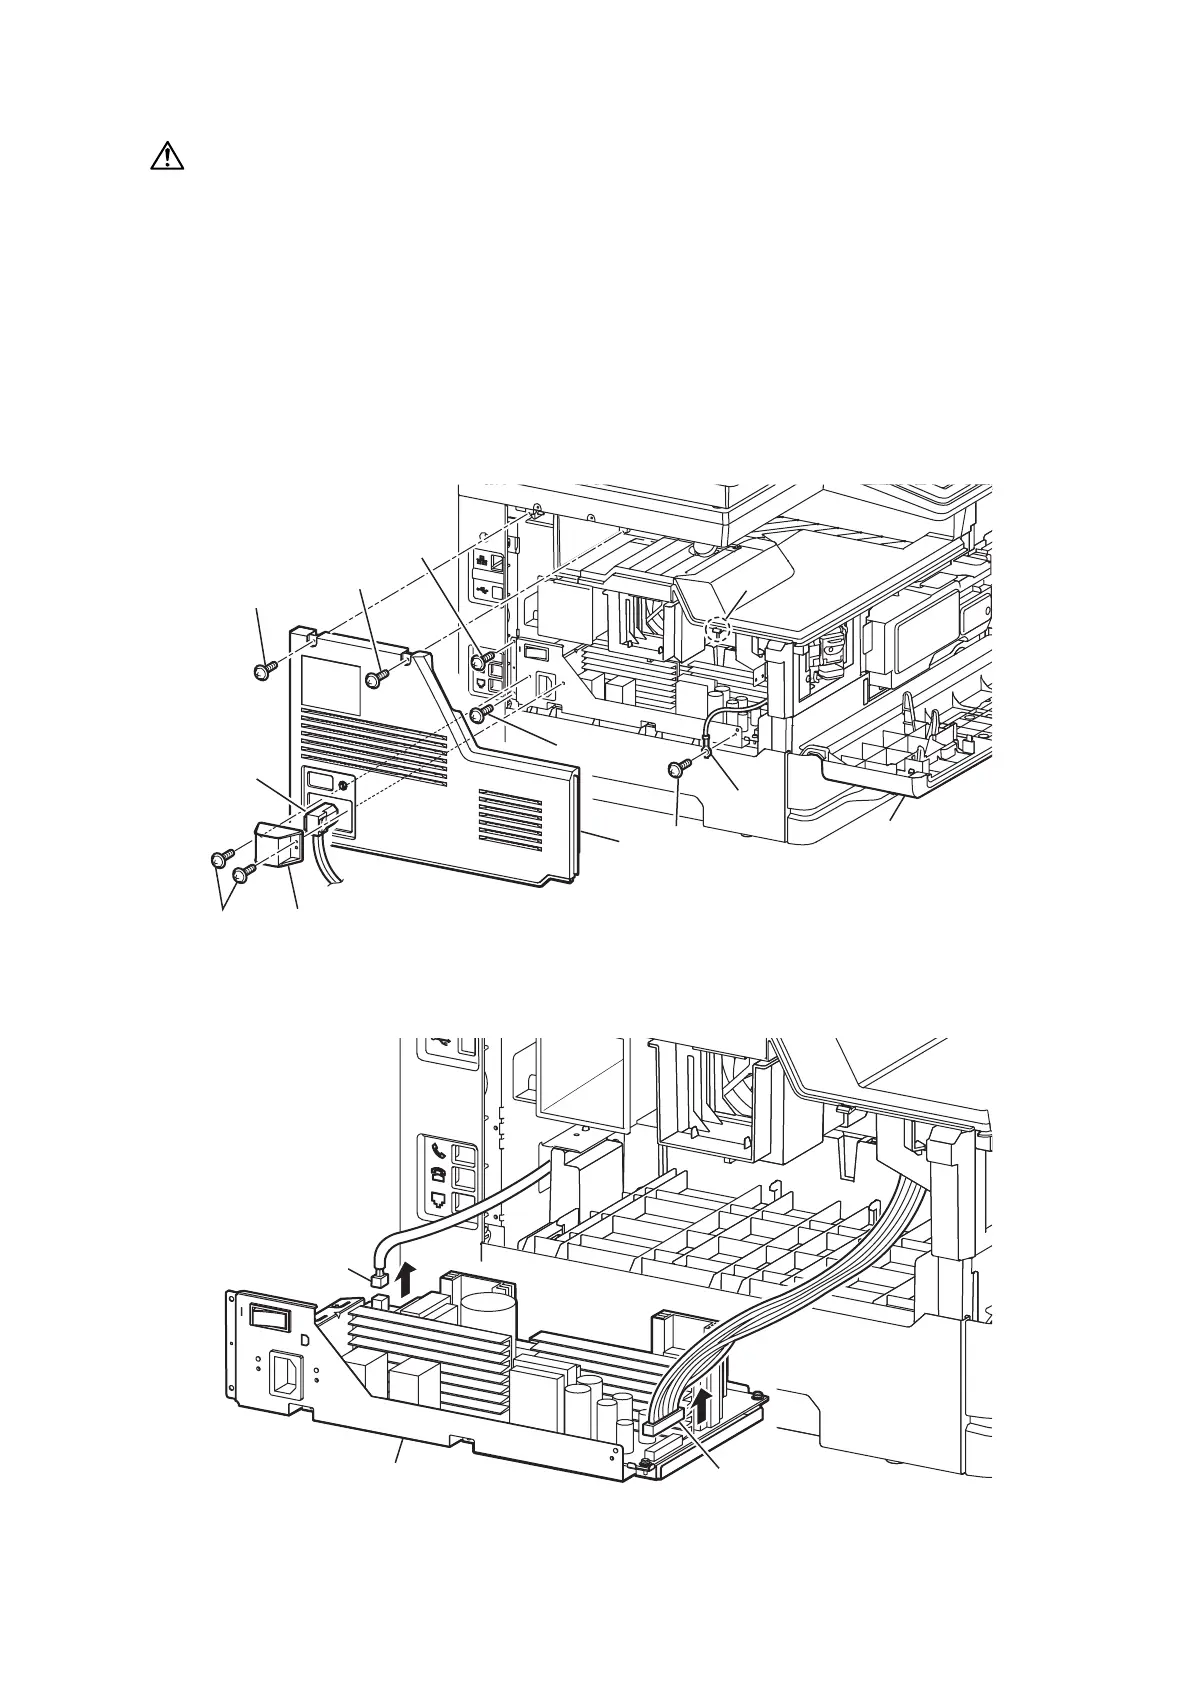
PCB PSU
CAUTION
• When you dsiassemble this unit, rst press the power button on the pannel after you have remoed the
power cable.
• Do not touch the components mounded on the PSU PCB and the heat sinks to avoid the risk of electri-
cal shock.
1. Remove two screws [1] and remove the Cover cable [2].
2. Remove the power cord [3].
3. Remove two screws [4].
4. Open the Cover front [5].
5. Remove the upper part of the Cover left [7] while releasing the hook [6] and remove the Cover left [7].
6. Remove one screw [8] and remove the ground wire. (MFX-3595 only)
7. Remove two screws [10].
>
@
>
@
>
@
>
@
>
@
>
@
>
@
>
@
>
@
>
@
>
@
>
@
8. Pull out the PCB PSU [11] a little.
9. Disconnect two connectors [12], then remove the PCB PSU [11].
>
@
>
@
>
@
Important
When assembling the Cover left, insert in the lower part hook first.

 Loading...