EasyManuals Logo

Muratec MFX-3595 User Manual

Muratec MFX-3595
406 pages
To Next Page IconTo Next Page
To Previous Page IconTo Previous Page
Page #382 background imageLoading...
Page #382 background image
5-90
PCB CST
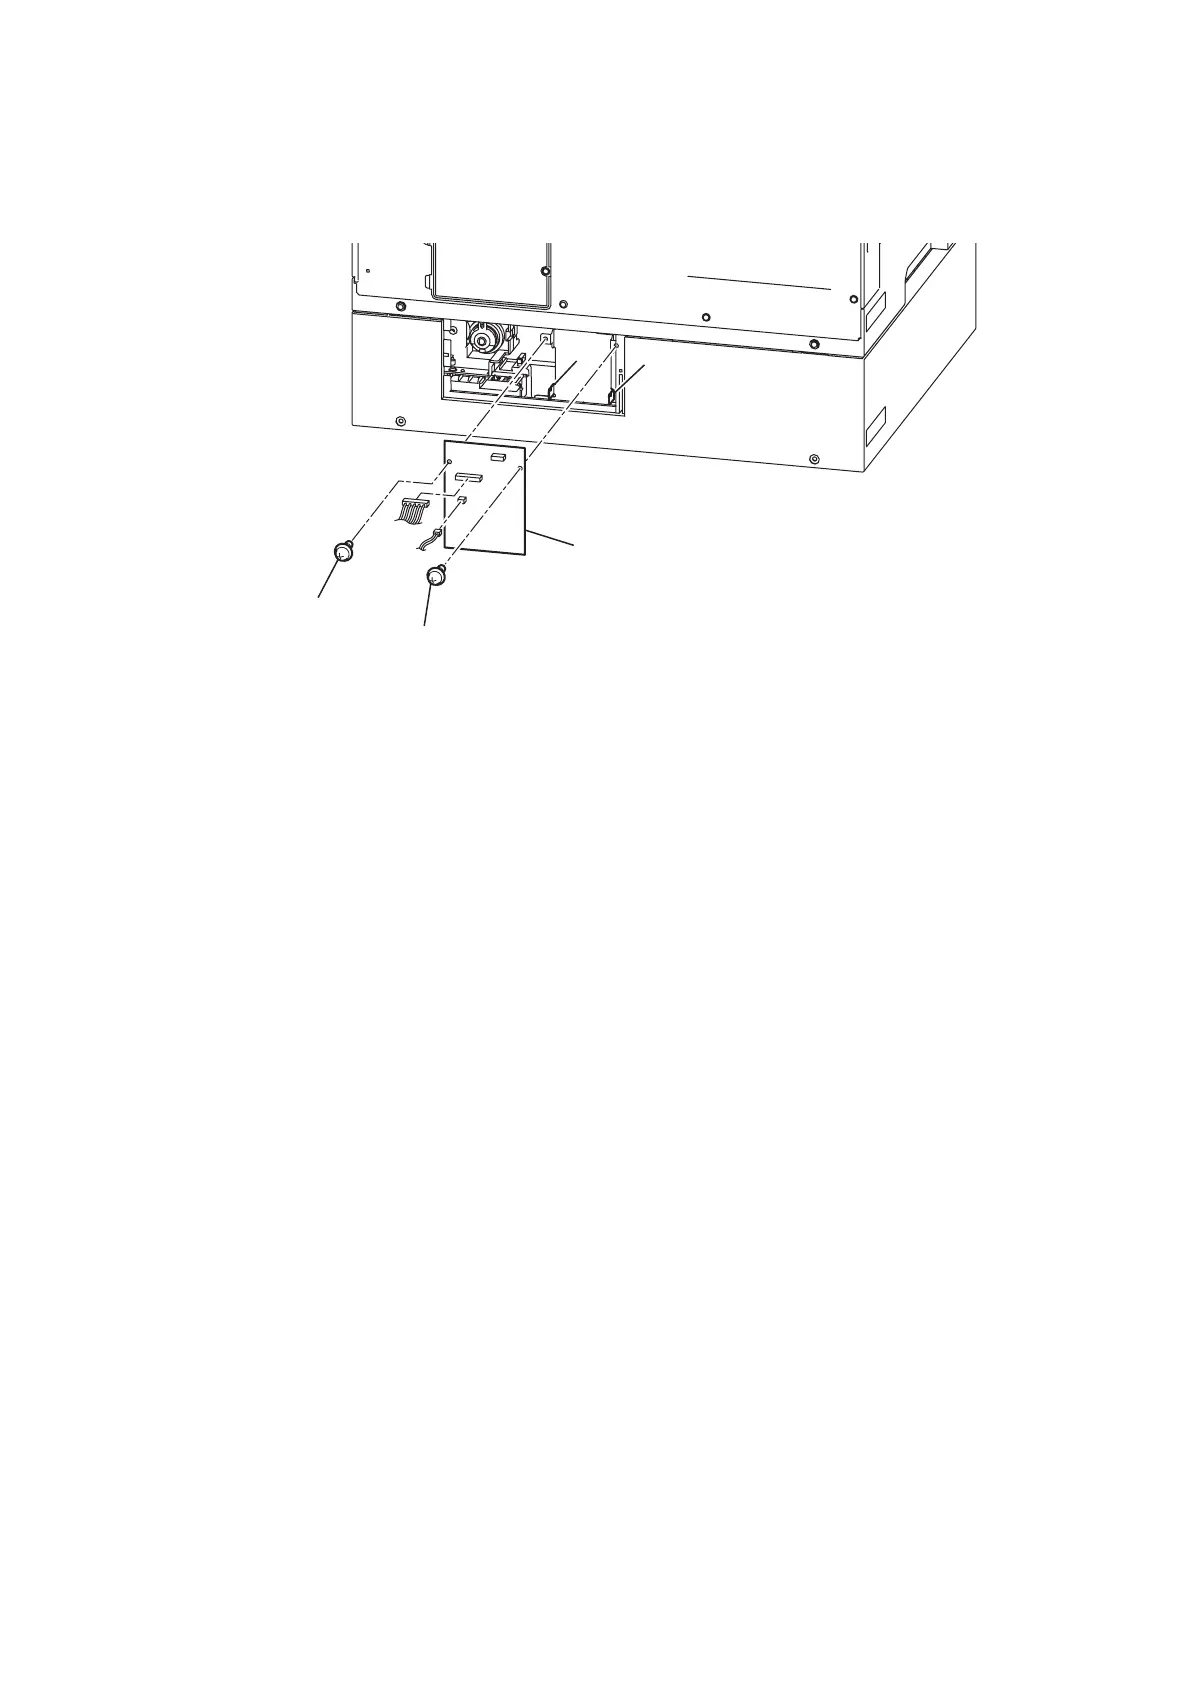
1. Remove the Cover back OP. (See “Replacement of CLUTCH CST” on page 5-89.)
2. Disconnect all the PCB CST [1] connectors.
3. Remove two screws [2] and remove the PCB CST [1].
4. Reverse the procedure to assemble.
[
2
]
[
2
]
[
1
]
[
3
]
[
3
]
Important
When assembling the PCB CST, insert it in the Frame PCB OP notch [3].

Table of Contents

Questions and Answers:

Question and Answer IconNeed help?

Do you have a question about the Muratec MFX-3595 and is the answer not in the manual?

Muratec MFX-3595 Specifications

General IconGeneral
BrandMuratec
ModelMFX-3595
CategoryAll in One Printer
LanguageEnglish

Related product manuals