5-76
OPC DRUM
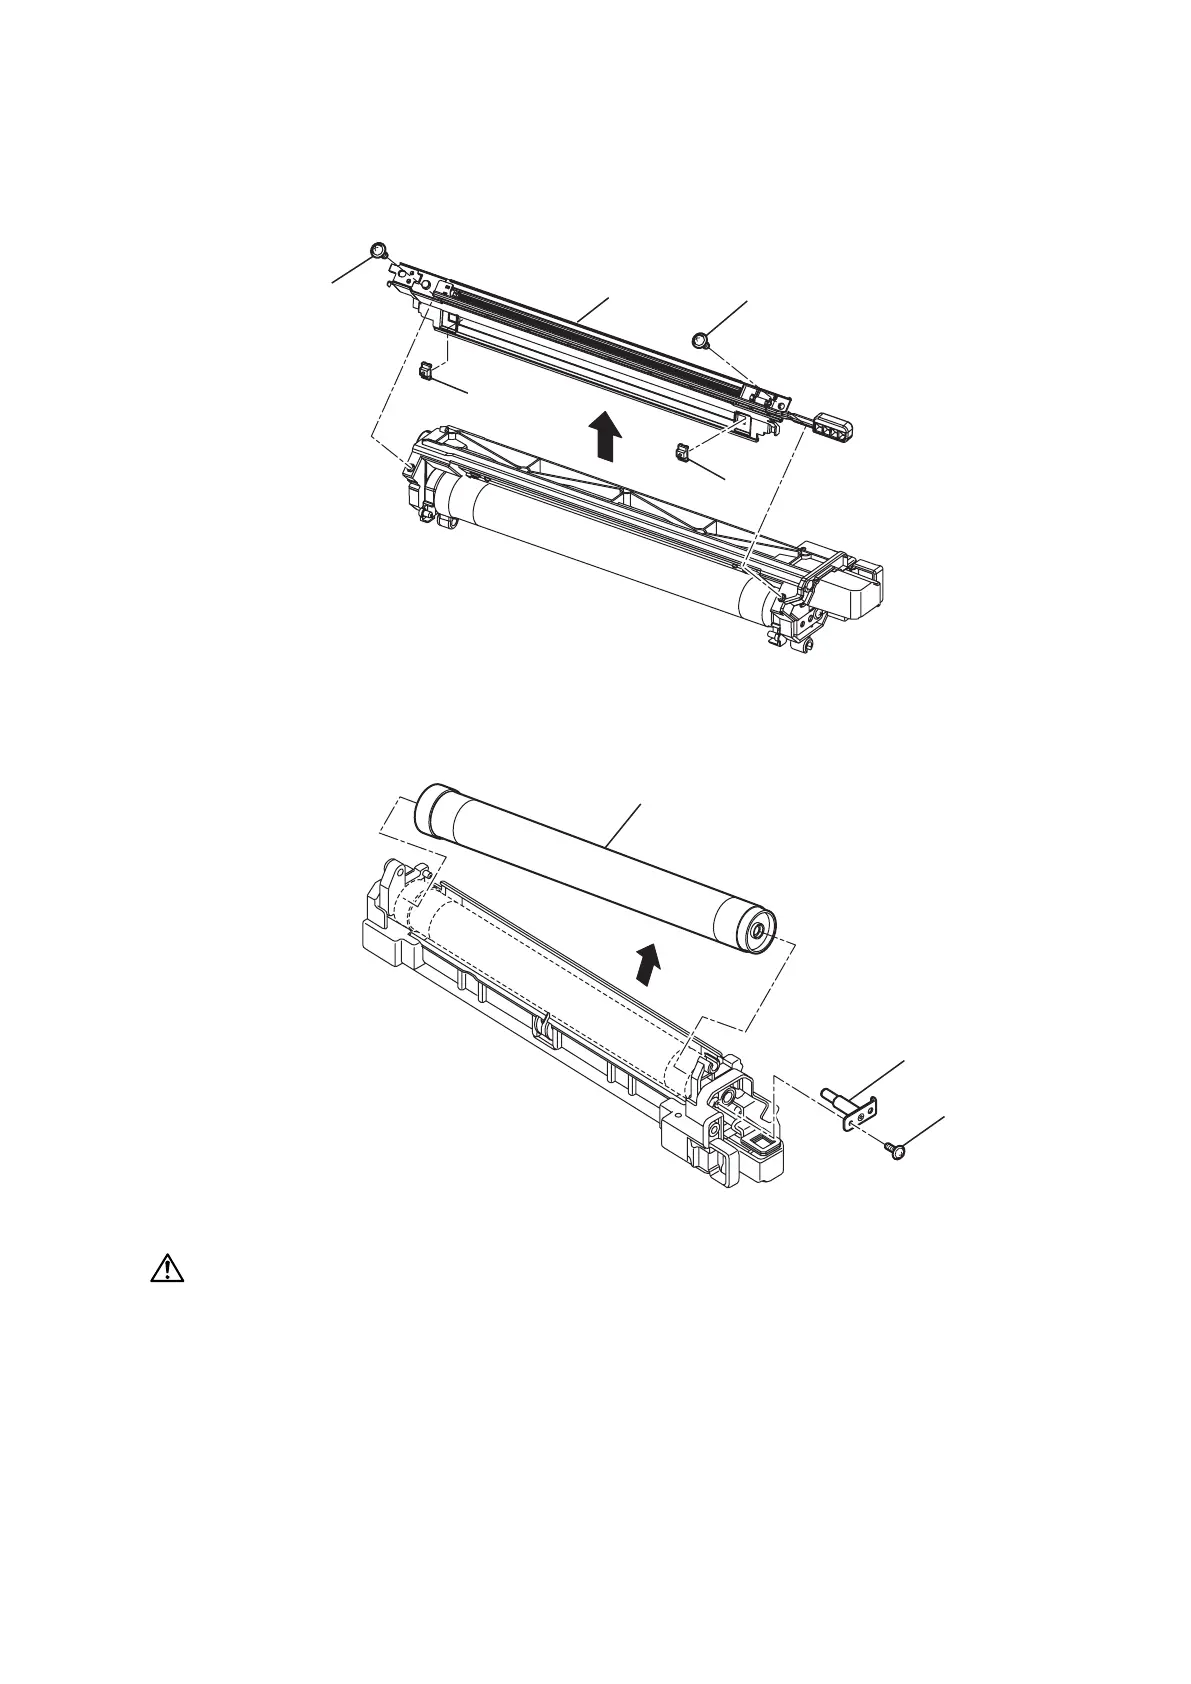
1. Remove the Drum unit from the Drum cartridge. (See “DRUM CARTRIDGE” on page 5-75.)
2. Remove two screws [1], then remove the Assy charger [2].
* Two pieces of PIECE LPH B [3] are in between the Assy charger and can easily fall off.
Make sure you do not lose the Piece LPH B and take note not to mistake when assembling.
[
1
]
[
1
]
[
3
]
[
3
]
[
2
]
3. Remove one screw [4] then remove the Bracket shaft OPC assy [5].
4. Supporting the OPC DRUM [6] with hands keep it from dropping out, then slide and lift it to remove.
[
5
]
[
4
]
[
6
]
CAUTION
• Make sure there are no mistakes when assembling the Piece LPH B.
• Do not touch the OPC drum with your bare hands.
• If the OPC drum is removed, cover it with a black cloth.
• Do not touch or damage the OPC drum surface.
Important
• Manually turn the OPC drum towards the rotation direction after replacing the OPC drum.
If the resistance is strong, disassemble it again and apply a small amount of toner as lubricant to the
edge of the Blade Cleaner.
• When the OPC drum is removed, Piece LPH B can easily fall off. Please be careful not to lose it.