Wireless Module for the UTM9S
559
ProSecure Unified Threat Management (UTM) Appliance
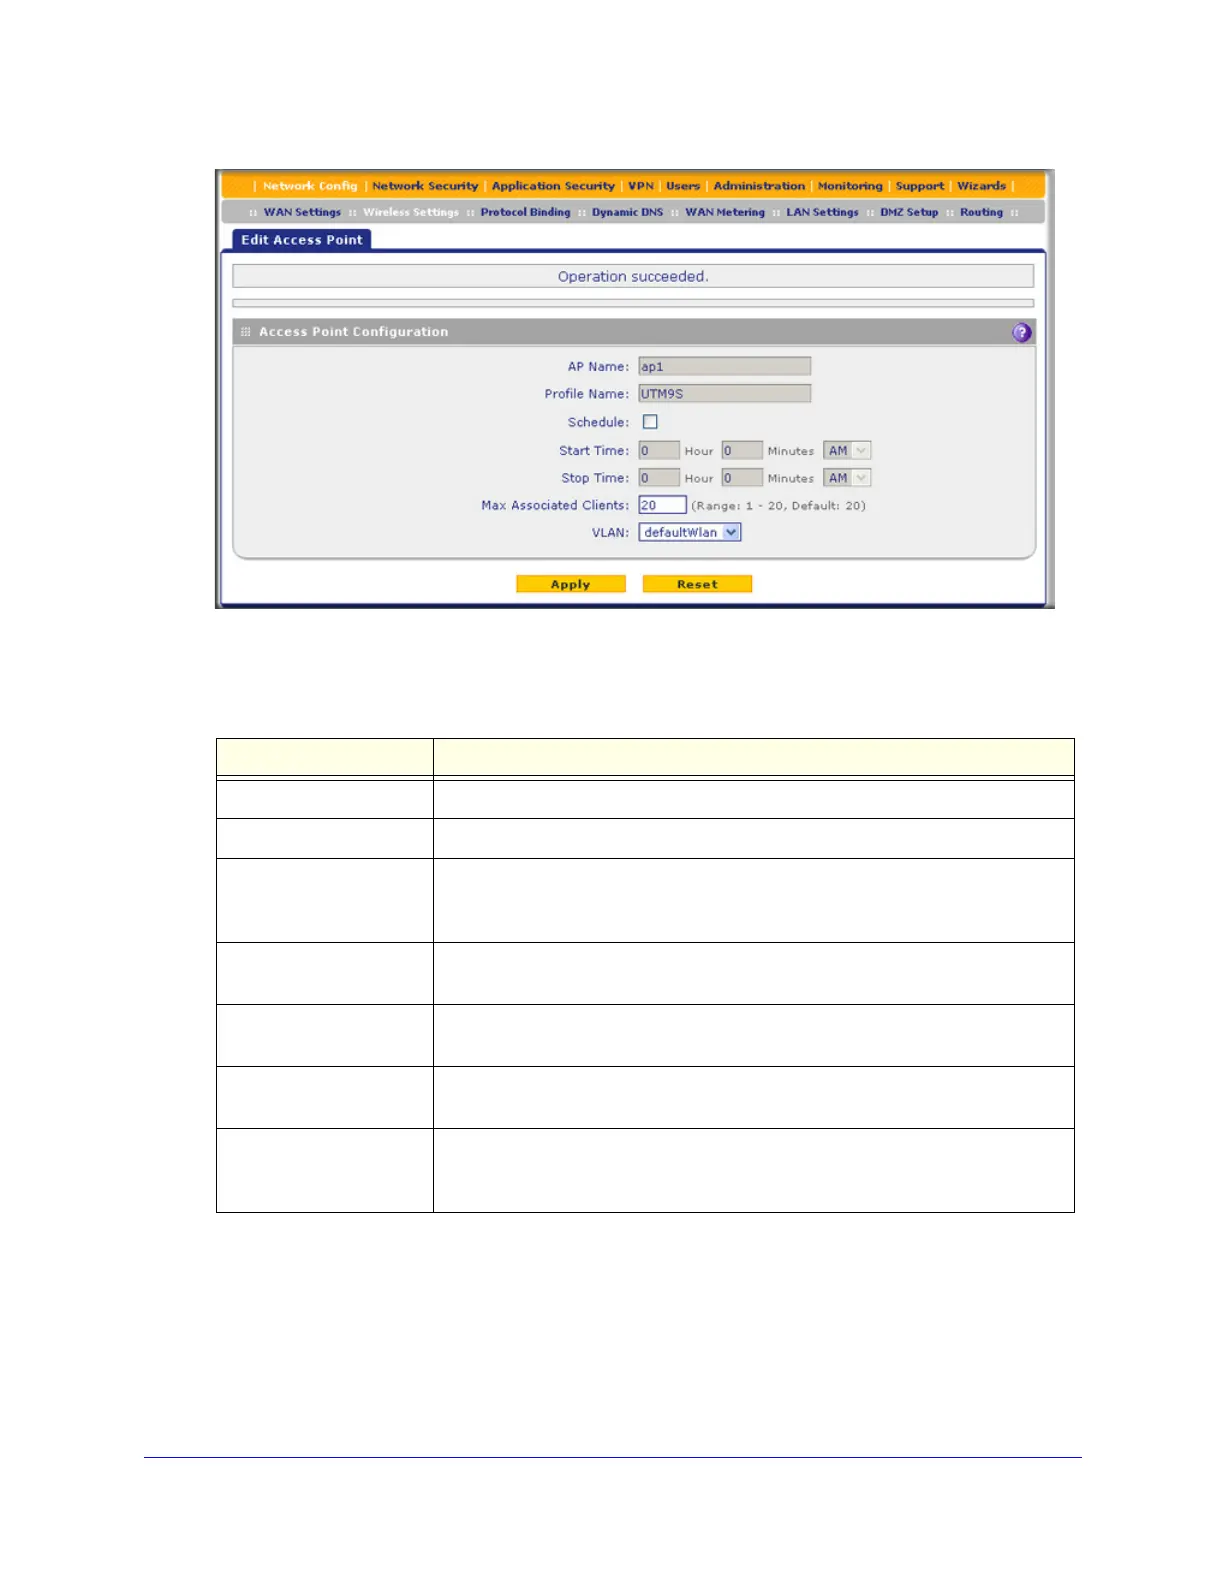
Figure 327.
3. Specify the settings as explained in the following table:
4. Click Apply to save your settings. The access point is updated in the List Of Available
Access Points table.
To enable or disable the access point:
1. On the Access Point screen (see Figure 326 on page 558), select the check box to the
left of the access point.
Table 147. Edit Access Point screen settings
Settings Description
AP Name The name for the access point is ap1. You cannot change this name.
Profile Name The name for the profile is UTM9S. You cannot change this name.
Schedule To enable the timer, select the Schedule check box. When the timer is enabled,
the access point is turned off from the start time until the stop time. To disable
the timer, clear the check box.
Start Time Specify the start hour in the Hours field and the start minute in the Minutes field,
and then select AM or PM from the drop-down list.
Stop Time Specify the stop hour in the Hours field and the stop minute in the Minutes field,
and then select AM or PM from the drop-down list.
Max Associated Clients Enter the maximum number (1 to 20) of clients that can be associated with the
access point.
VLAN From the drop-down list, select the VLAN to which the access point should be
allocated. The default VLAN is defaultWLAN. For information about how to
configure VLANs, see Configure a VLAN Profile on page 96.