Printing an image
120
Browse Window
Photo printing
1 Select an image in the browse window that you want to print,
and then select [Print] from the [File] menu, or click the [Print]
icon on the toolbar.
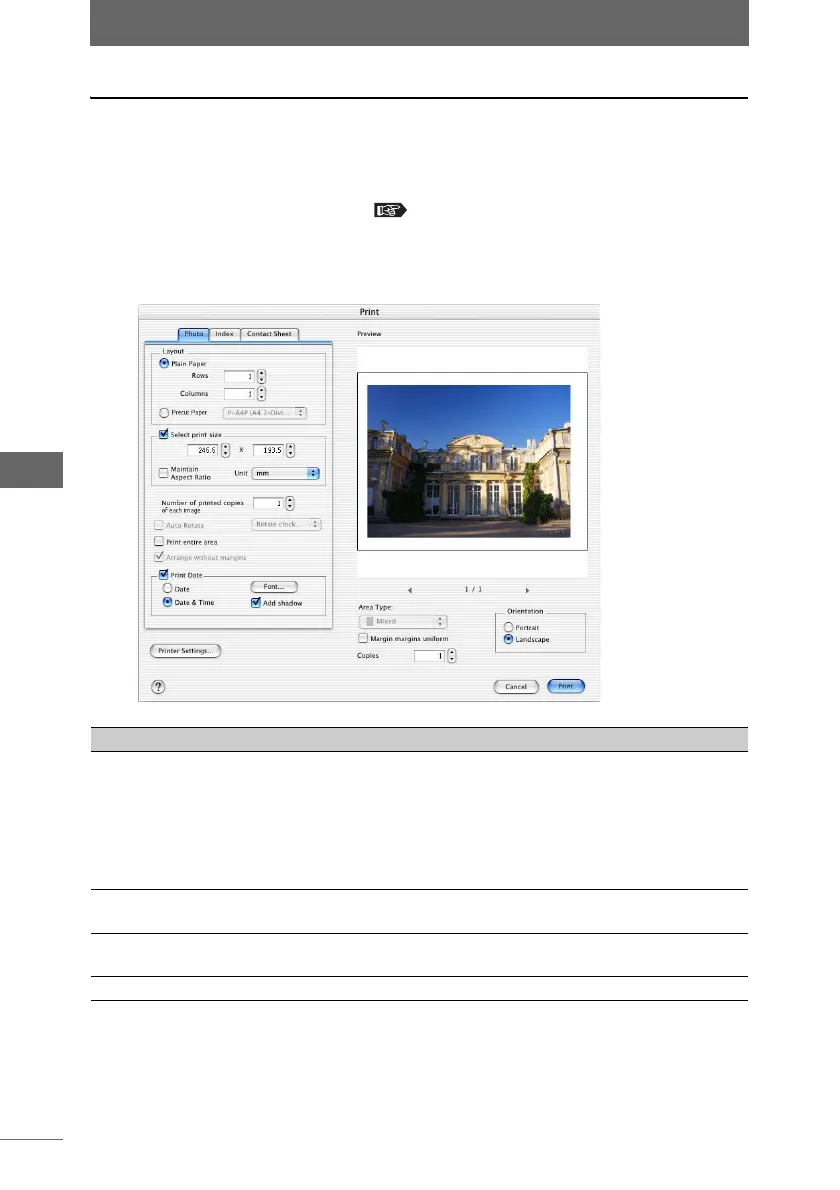
The [Print] dialog box appears. “[Print] dialog box” P.116
2 Select the [Photo] tab.
[Photo] tab page in the [Print] dialog box
Item Description
Layout Select the type of paper and configure the layout.
• Plain Paper:
Select the print layout by specifying the number of rows
and columns (1-4).
• Pre-cut Paper:
Select the pre-cut paper layout ([P-A4P (A4 2-Division)]
or [P-A4L (A4 4-Division)]) for Olympus printers.
Select print size Check this box and enter the size to change the size of the
printed image.
Maintain Aspect Ratio Check this box to change the size of the image while
maintaining the aspect ratio.
Unit Select [mm] or [inches].