Transferring images
36
Browse Window
Transferring images from the camera
Images can be transferred from the camera to the computer by a USB cable or
IEEE1394 (FireWire) cable. Only Olympus digital cameras can be used to transfer
images to OLYMPUS Studio.
1 Turn on the camera and set the PC mode of the camera to
[STORAGE].
2 Connect the camera to the computer with a USB or IEEE1394
(FireWire) cable.
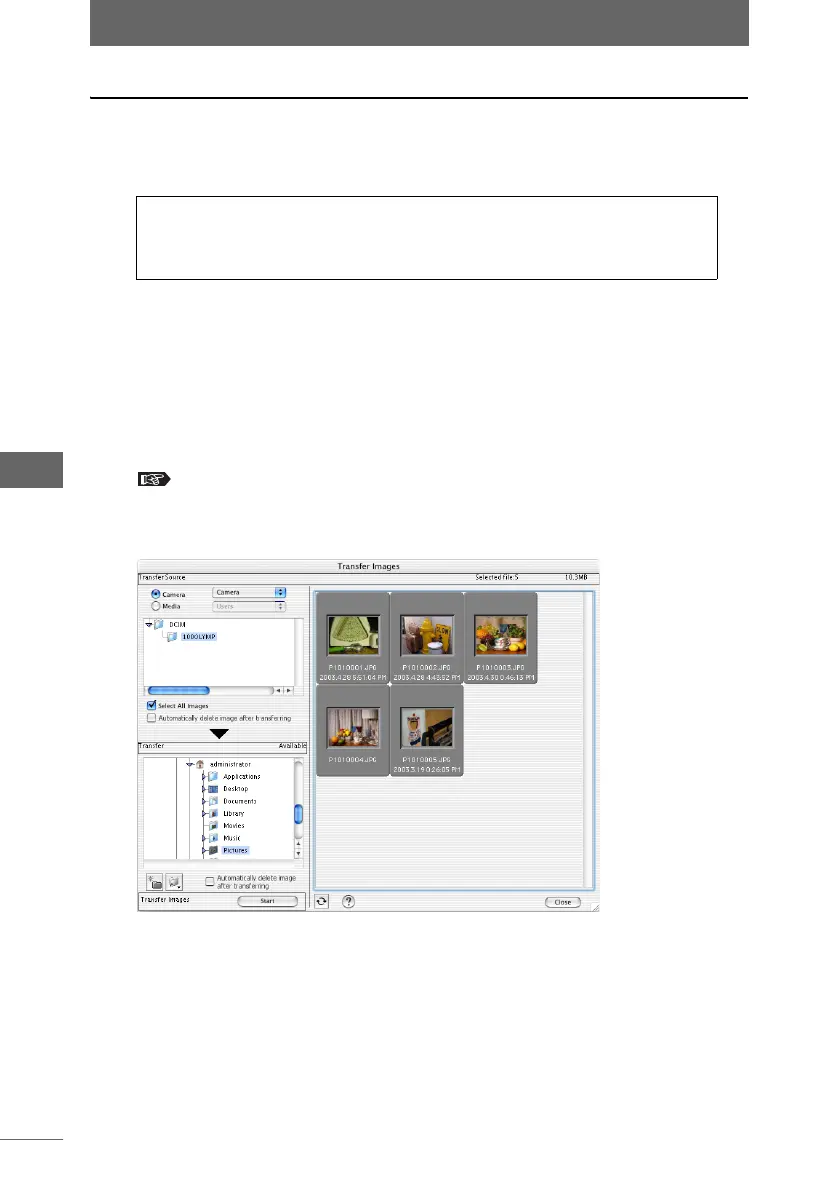
3 Select [Get Image] from the [Tools] menu of the browse window
or click the [Get Image] icon on the toolbar.
“Image display” P.42
The [Transfer Images] dialog box appears.
4 Click [Camera] from [Transfer Source].
If several cameras are connected, select the desired source camera ID ([Camera
#1], [Camera #2], ...) from the pull-down list.
A list of subfolders in the [DCIM] folder appears in the transfer source folder tree.
For details on camera mode operations and connecting the
camera to the computer, or removing the camera from the
computer, refer to “Starting OLYMPUS Studio” P.24.
[Transfer Images] dialog box