Camera Control Window
208
Camera Control Window
Using the preview area
The image shot with the camera is displayed in the preview area. This area can be
used to preview the image before transferring it to the computer.
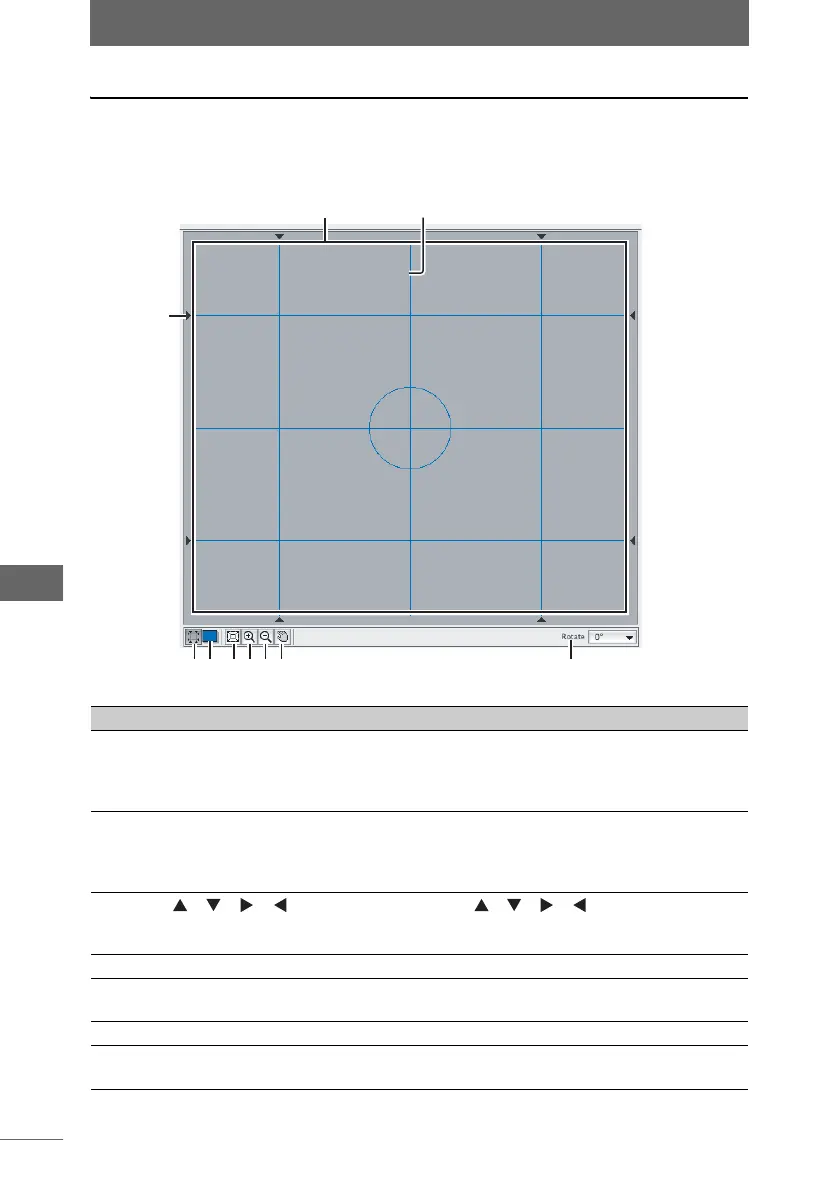
Preview area
Number Item Description
1 Preview Image When the [AF Shooting] or [Shooting] button are
clicked or the shutter button on the camera is pressed
to shoot an image, the image is displayed in the
preview area.
2 Grid The grid refers to the vertical and horizontal lines
displayed on the image. The [Grid Display] button in
the preview area can be used to show or hide the
grid.
3 [] [] [] []
marks
You can drag the [ ] [ ] [ ] [ ] marks to move the
position of the grid. If these marks are not displayed
on the grid, the grid cannot be moved.
4 [Grid Display] Shows or hides the grid.
5 [Grid Color] Selects the color of the grid. Click the [Grid Color]
button to display the dialog box for color selection.
6 [Fit image to screen] The images is displayed to fit the entire preview area.
7 [Zoom Out Mode] The cursor changes to the magnifying glass (–). Click
the image to zoom out.
1
45 6789 10
3
2