Using sorting checkmarks
63
Browse Window
Canceling a sorting checkmark
1 Click the sorting checkmark you want to cancel.
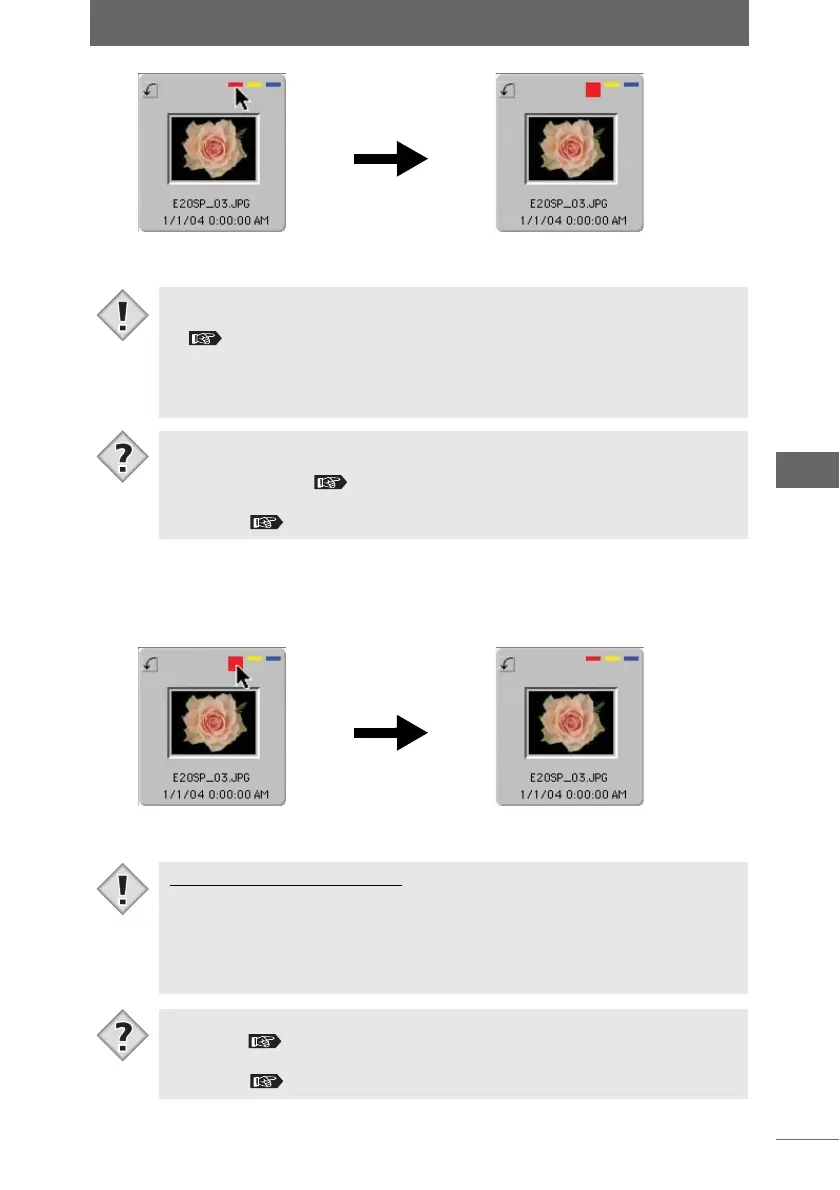
Click a sorting
checkmark
Sorted image
• If the sorting checkmarks are not displayed on the thumbnail border, select
[Thumbnail List Items > Sorting Checkmark] from the [View] menu.
“Setting thumbnail border display items” P.53
• Only one type of sorting checkmark can be added to an image.
• Sorting checkmarks cannot be changed or added to images on read-only
media (such as a CD-ROM).
• In the single image view area, a sorting checkmark can be added to an image
displayed in single image view by using the sorting checkmark icons at the top
right of that area. “View Mode” P.44
• A sorting checkmark can also be added from the tool palette in Full Screen
Display. “Full Screen Display” P.55
Sorted image
The sorting checkmark
is canceled
Sorting checkmark data files
• The sorting checkmark information is stored in a data file. This data file is
created automatically when a sorting checkmark is added, and the file is stored
in the folder containing the image with the sorting checkmark.
• Please note that when deleting a sorting checkmark data file with different
application software, the sorting checkmark attached to the image disappears.
• The sorting checkmark icons can be customized with your favorite color or
symbol. “Setting the [Sorting Checkmark] tab” P.262
• The data files that contain the sorting checkmark information can be deleted all
at once. “Setting the [Sorting Checkmark] tab” P.262
Note
Tips
Note
Tips