2 Basic repair procedures Chapter E: Basic repair procedures
140 Planmeca PlanMill 40 Technical manual
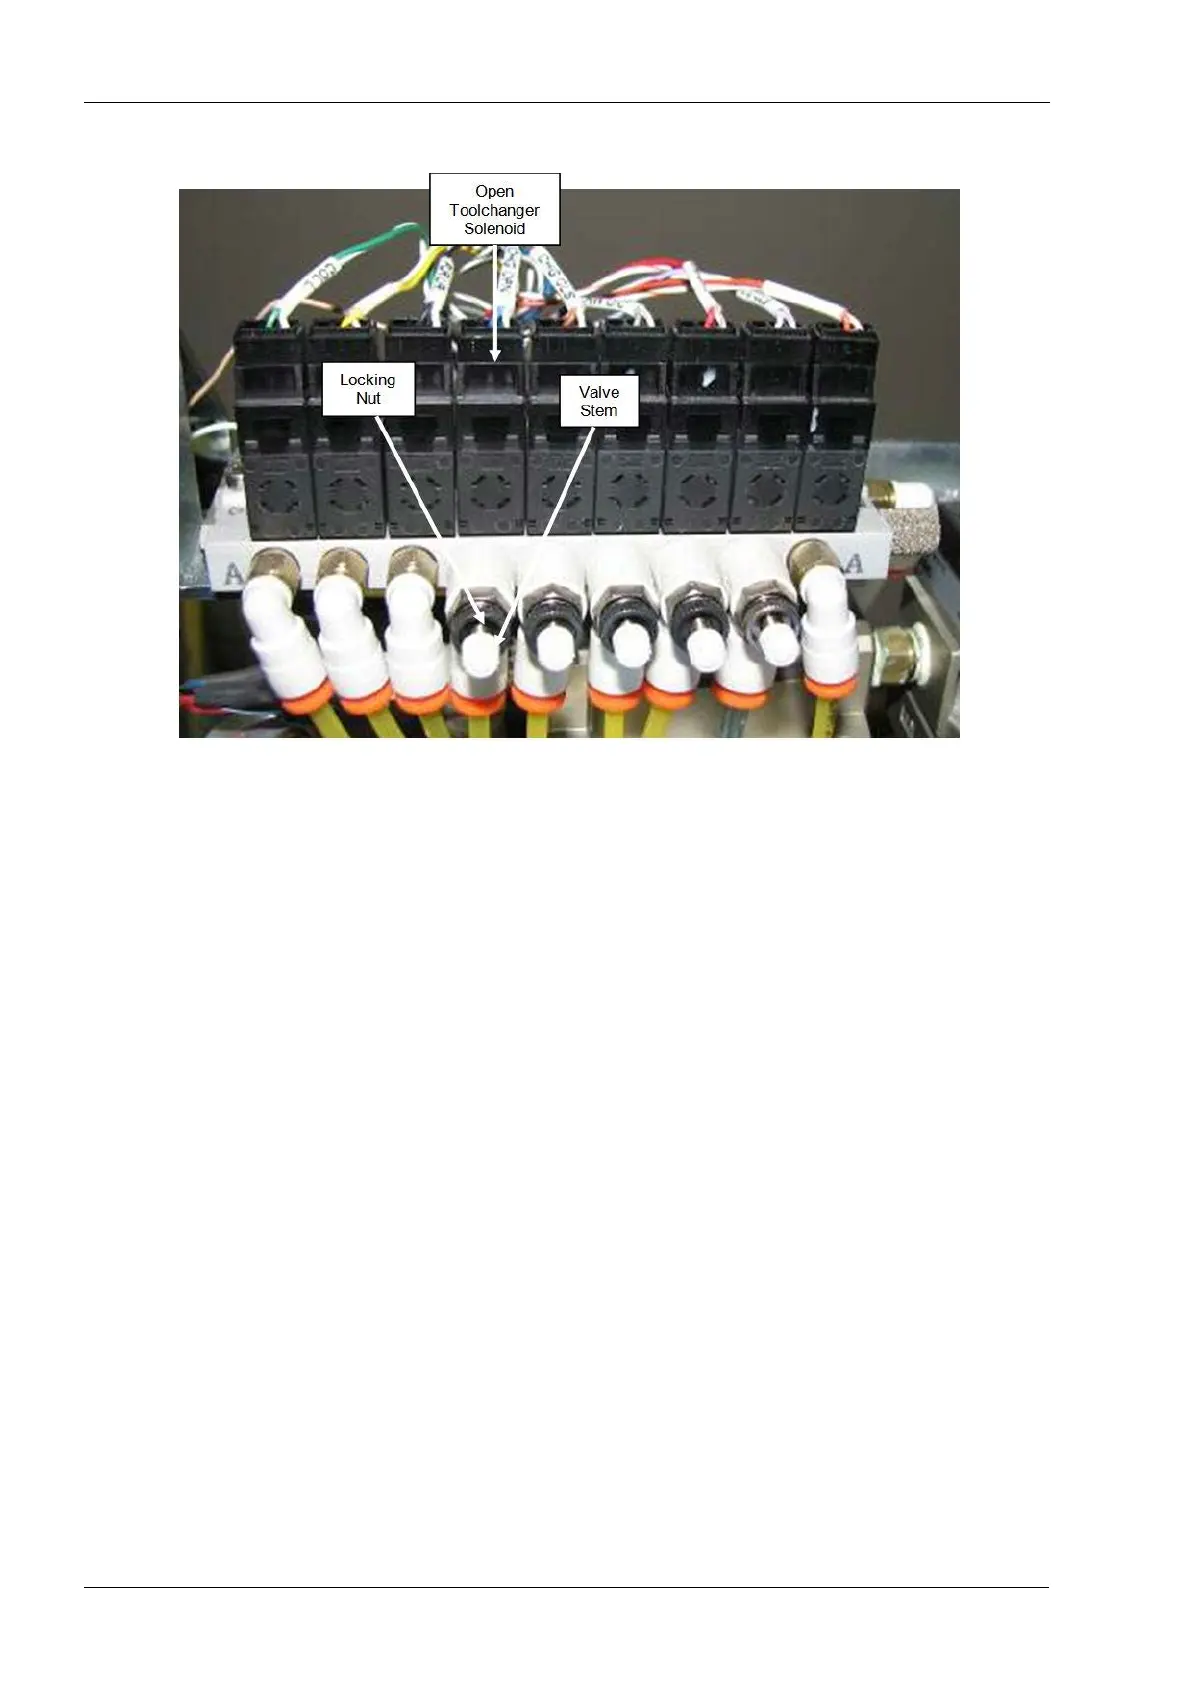
Figure 144: Tool changer valve adjustment
2. Use the High Level console to open and close the tool changer multiple times and
evaluate the Close actuation speed.
3. If the Close action is still too fast, reduce the flow at the open tool changer solenoid by
rotating the valve stem clockwise approximately ½ turn.
4. Evaluate the Close speed and repeat as needed. Lock the valve stem with locking nut
when finished.
2.5.4 If the close action is too slow proceed as follows.
1. Reset the open tool changer valve stem to a good starting position by releasing the
locking nut and turning the valve stem counter-clockwise until valve is fully closed.
Then open the valve 3 full turns.
2. Use the High Level console to open and close the tool changer multiple times and
evaluate the Close actuation speed.
3. If the Close action is still too slow, reduce the flow at the open tool changer solenoid
by rotating the valve stem counter-clockwise approximately ½ turn.
4. Evaluate the Close action speed and repeat as needed. Lock the valve stem with
locking nut when finished.
2.6 Tool changer closed sensor adjustment
1. It may be necessary to check and adjust the tool changer closed sensor due to it
becoming loose or tool changer repair or replacement.
2. If the tool changer closed senor needs adjusted some form of the warning shown
below may be displayed.