2 Basic repair procedures Chapter E: Basic repair procedures
144 Planmeca PlanMill 40 Technical manual
10. Upon the successful initialization of the mill continue to the next step.
11. Use the AXES POSITIONS controls in the HIGH LEVEL, TECHNICIAN CONSOLE to
raise the Z-axis to the top.
12. Use MECHANICAL CONTROL to OPEN LID.
DO NOT CLOSE THE LID!
13. Disconnect the Y-axis servo motor cable.
14. Tighten the tool changer closed sensor clamp screw.
15. Reconnect the Y-axis servo motor cable and tighten the jackscrews.
16. Close the lid.
17. Touch the REINITIALIZE SYSTEM button and insure the mill fully initializes (the lid
LED lights stay green).
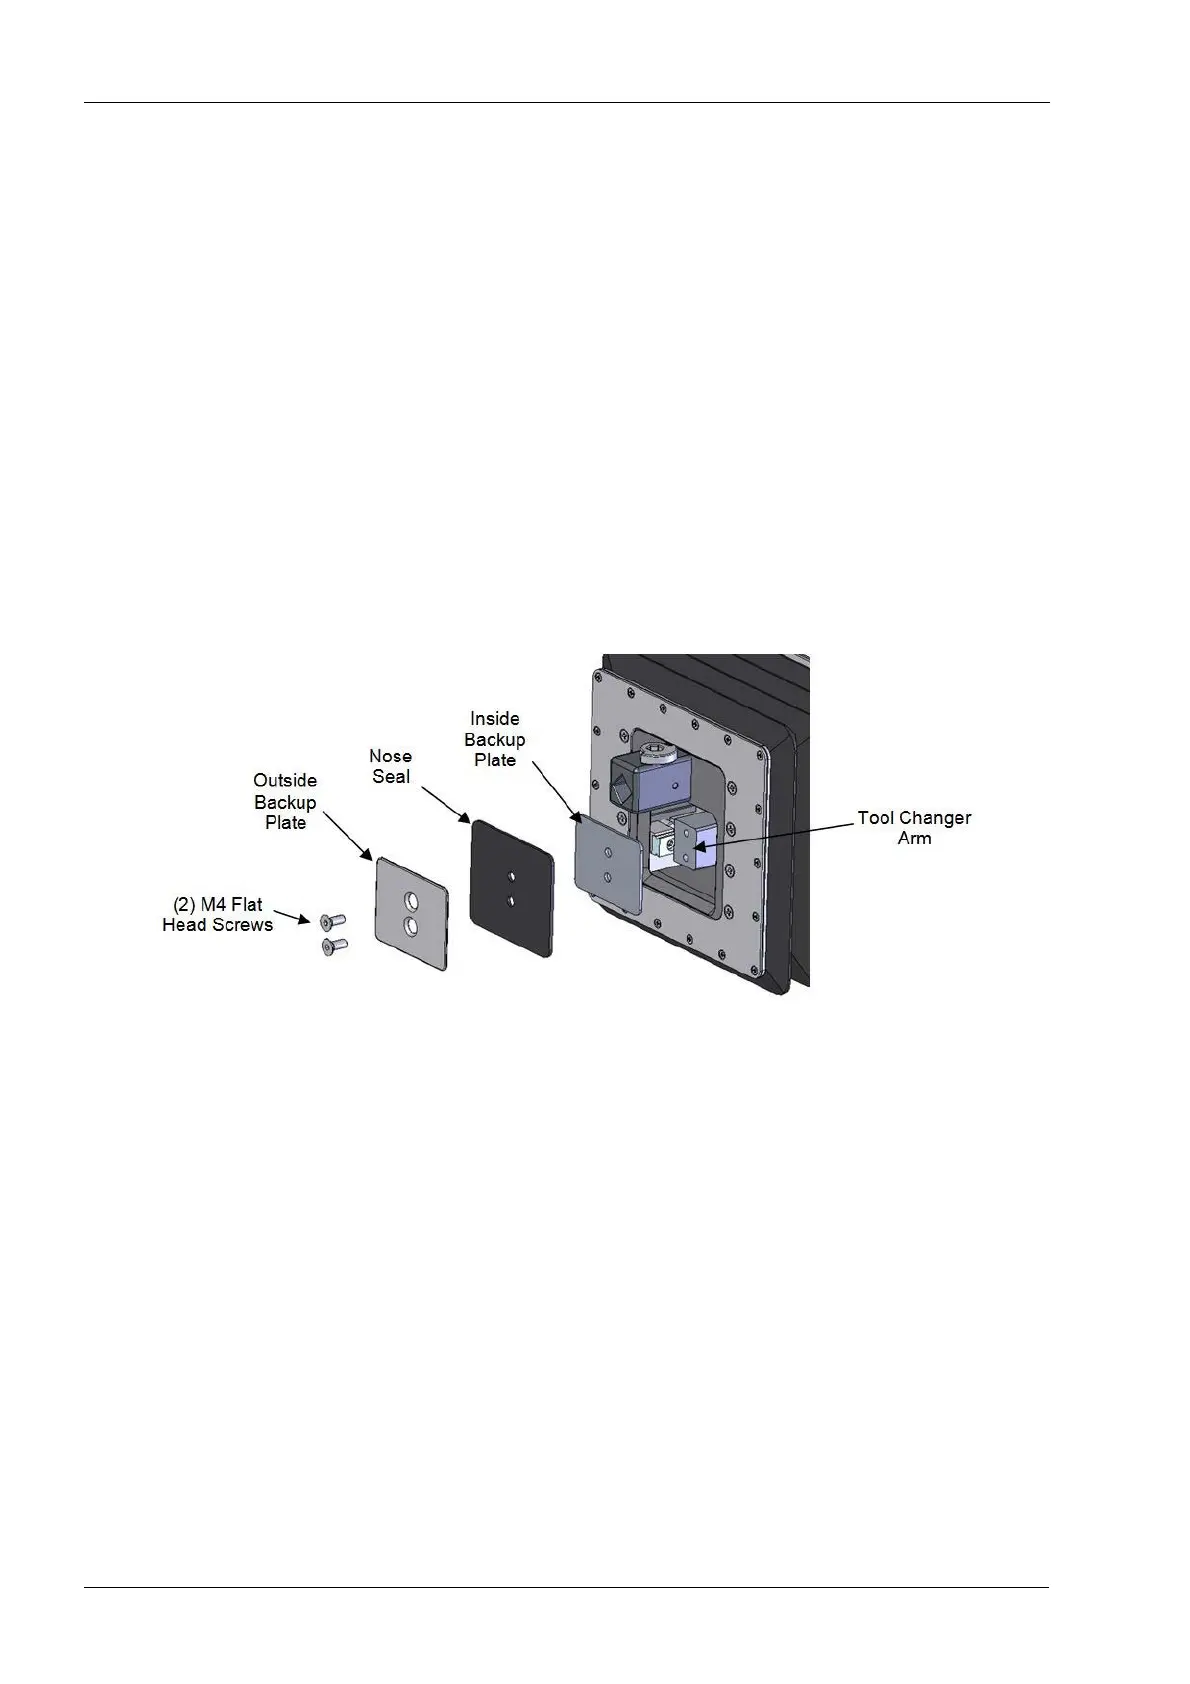
2.7 Nose seal
Figure 152: Nose seal replacement
Tools required
• 2.5 mm Allen key
Removal
1. On mill screen touch Maintenance Icon.
2. Select Advanced and enter passcode.
3. Select Technician Console.
4. Select High Level button.
5. Select the Mechanical Control box.
6. Select Open Tool Changer button.
7. Select the Axis Positions box.
8. Raise the Z-axis to the top of its travel using the up arrows.
9. Return to the Mechanical Control window and select the Open Lid button.
10. Remove the two flat head screws securing the rubber nose seal and inner and outer
backup plates.
11. Remove the plates and rubber seal.