2 Basic repair procedures Chapter E: Basic repair procedures
176 Planmeca PlanMill 40 Technical manual
2.13.5 X-axis home sensor
It will be necessary to remove the LCD display if right axis sensor needs removal.
Replacement, adjustment or disturbance of a Home Sensor or the associated flag
requires subsequent complete calibration of mill.
Removal
1. Disconnect the home sensor electrical connector from the interconnect board.
2. Remove the two M3 screws securing the home sensor to the carriage.
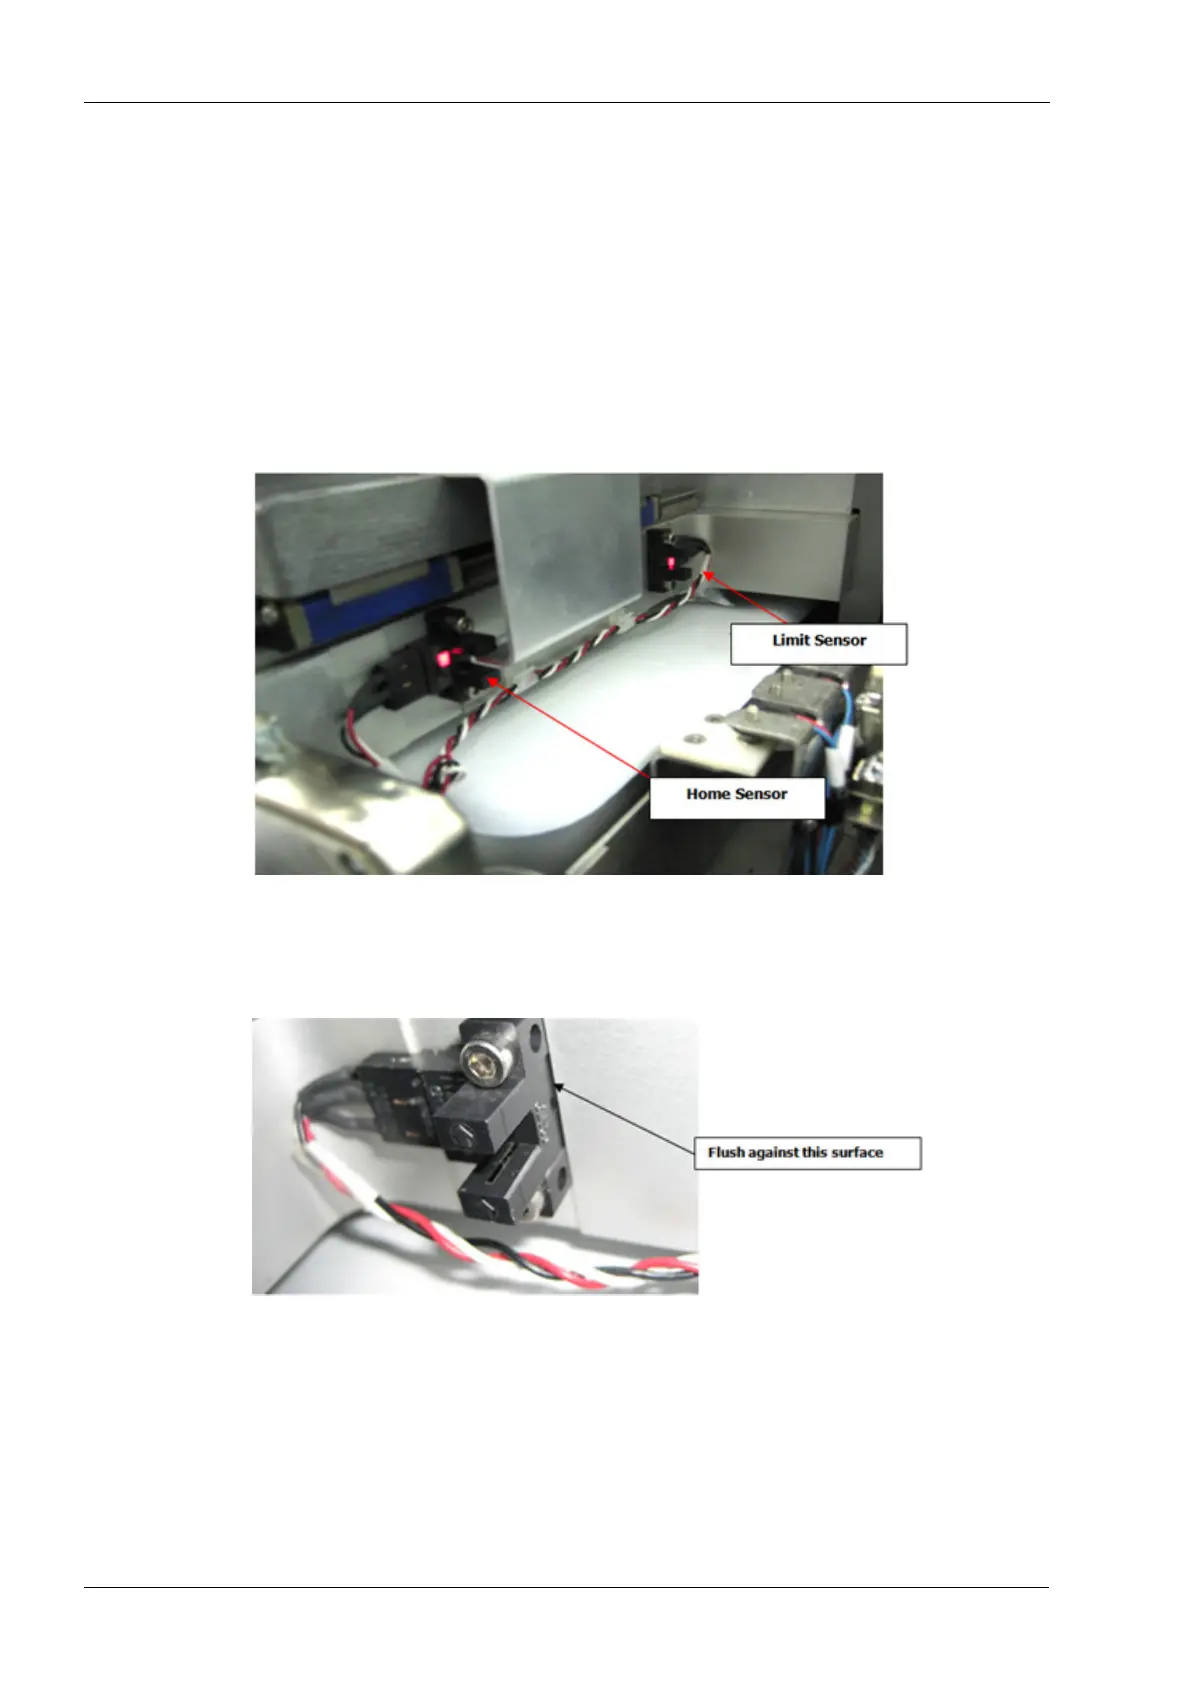
Figure 189: X-axis home and limit sensors
Install
1. Position the home sensor flush against the shoulder etched into the carriage.
Figure 190: X-axis home sensor installation
2. Secure with two M3 screws.
3. Connect home sensor electrical connector to the interconnect board.
4. Perform complete mill calibration procedure, see Chapter C: "Calibration" on page 49.
5. Install covers.
Verify
1. Make sure the mill initializes and homes correctly.