Chapter E: Basic repair procedures 2 Basic repair procedures
Technical manual Planmeca PlanMill 40 147
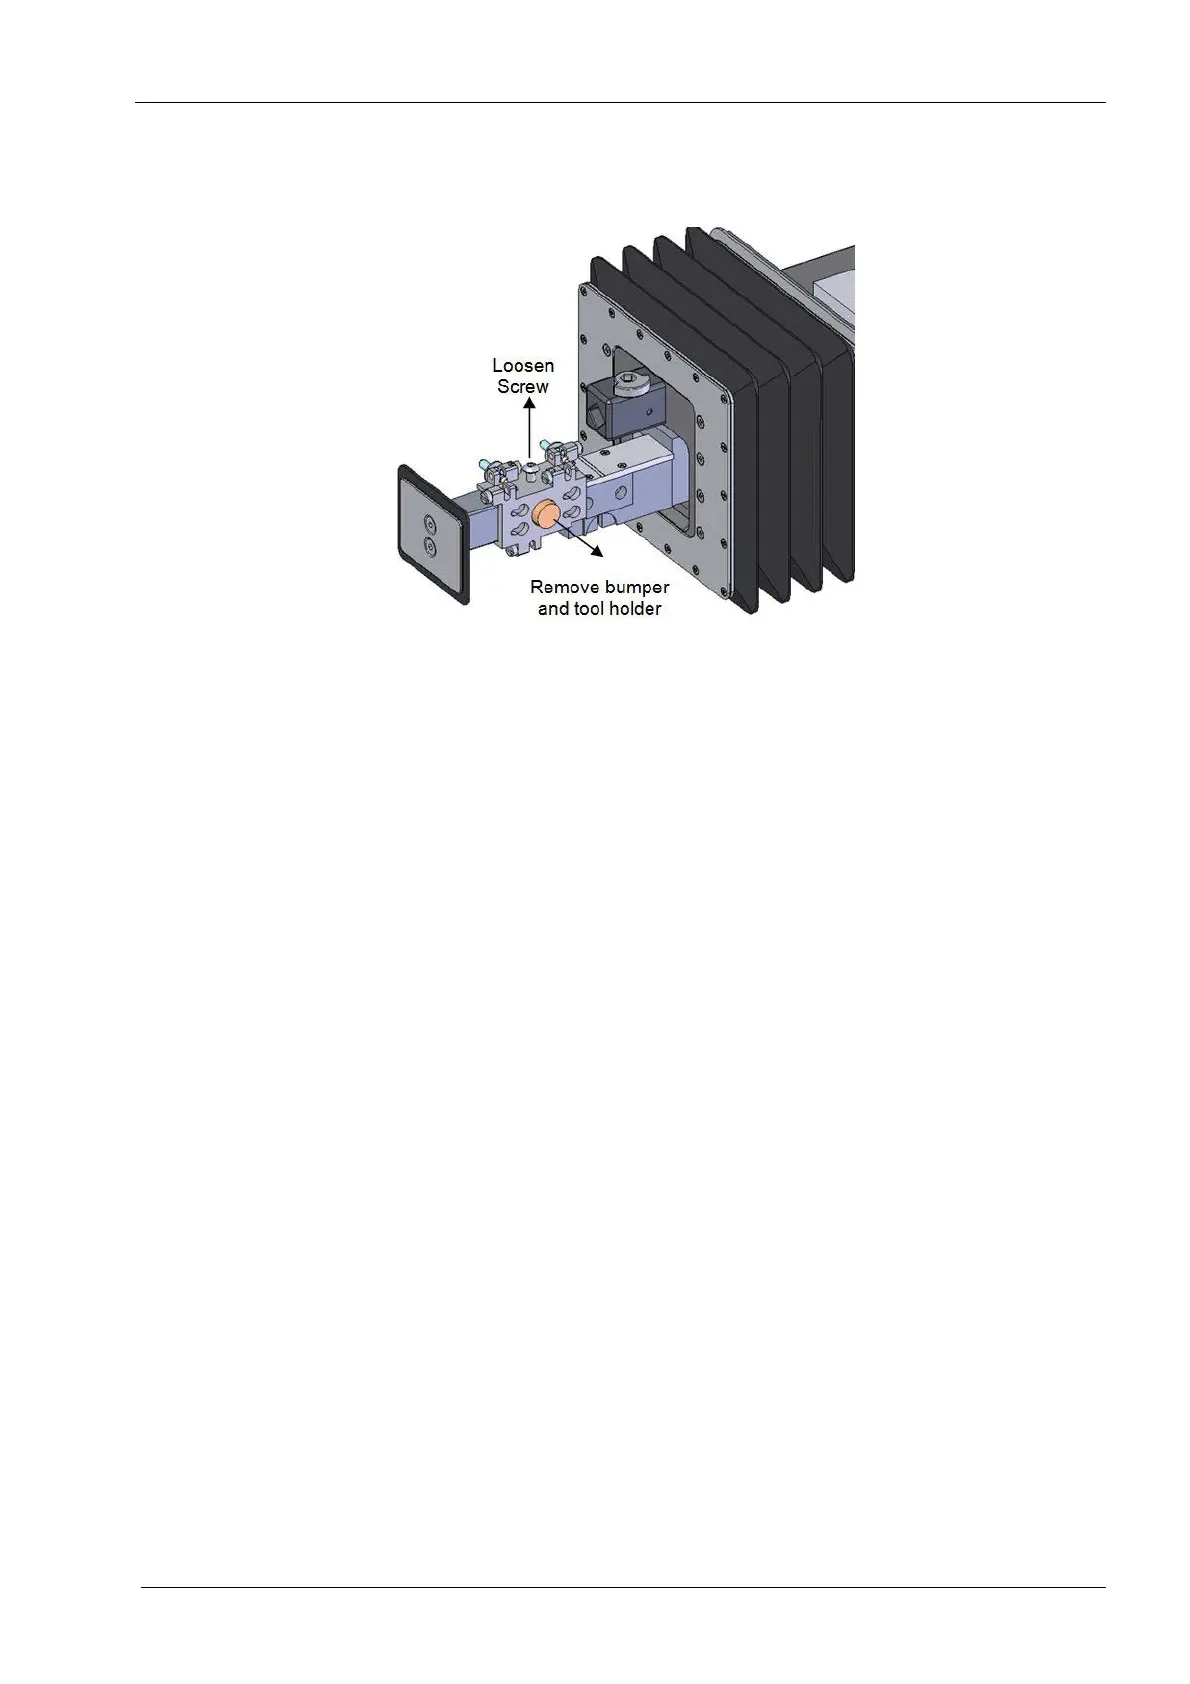
2.9 Tool holder
Figure 155: Tool holder repalcement
Replacement of a tool holder (6-pack) requires subsequent completion of mill
calibration procedure, see Chapter C: "Calibration" on page 49.
Tools required
• 2.5 mm Allen key
Removal
1. Use Advanced (enter code), Verify Tools to verify that there aren't any tools in the
collets or the tool holder then close the lid. Remove tools wit Replace Tools if needed.
2. Select Technician Console.
3. Select High Level button.
4. Select the Mechanical Control box.
5. Select Open Tool Changer button.
6. Select the Axis Positions box.
7. Raise the Z-axis to the top of its travel using the up arrows.
8. Return to the Mechanical Control window and select the Open Lid button.
9. Remove the button head screw and remove tool holder from arm.
Install
1. Place the new tool holder and the tool changer arm and secure the button head screw
on top of the tool holder.
Be sure to seat the tool holder back and to the left of the tool changer arm, when tightening
the screw.
2. Complete mill calibration, refer to the Chapter C: "Calibration" on page 49.