2 Basic repair procedures Chapter E: Basic repair procedures
146 Planmeca PlanMill 40 Technical manual
Install
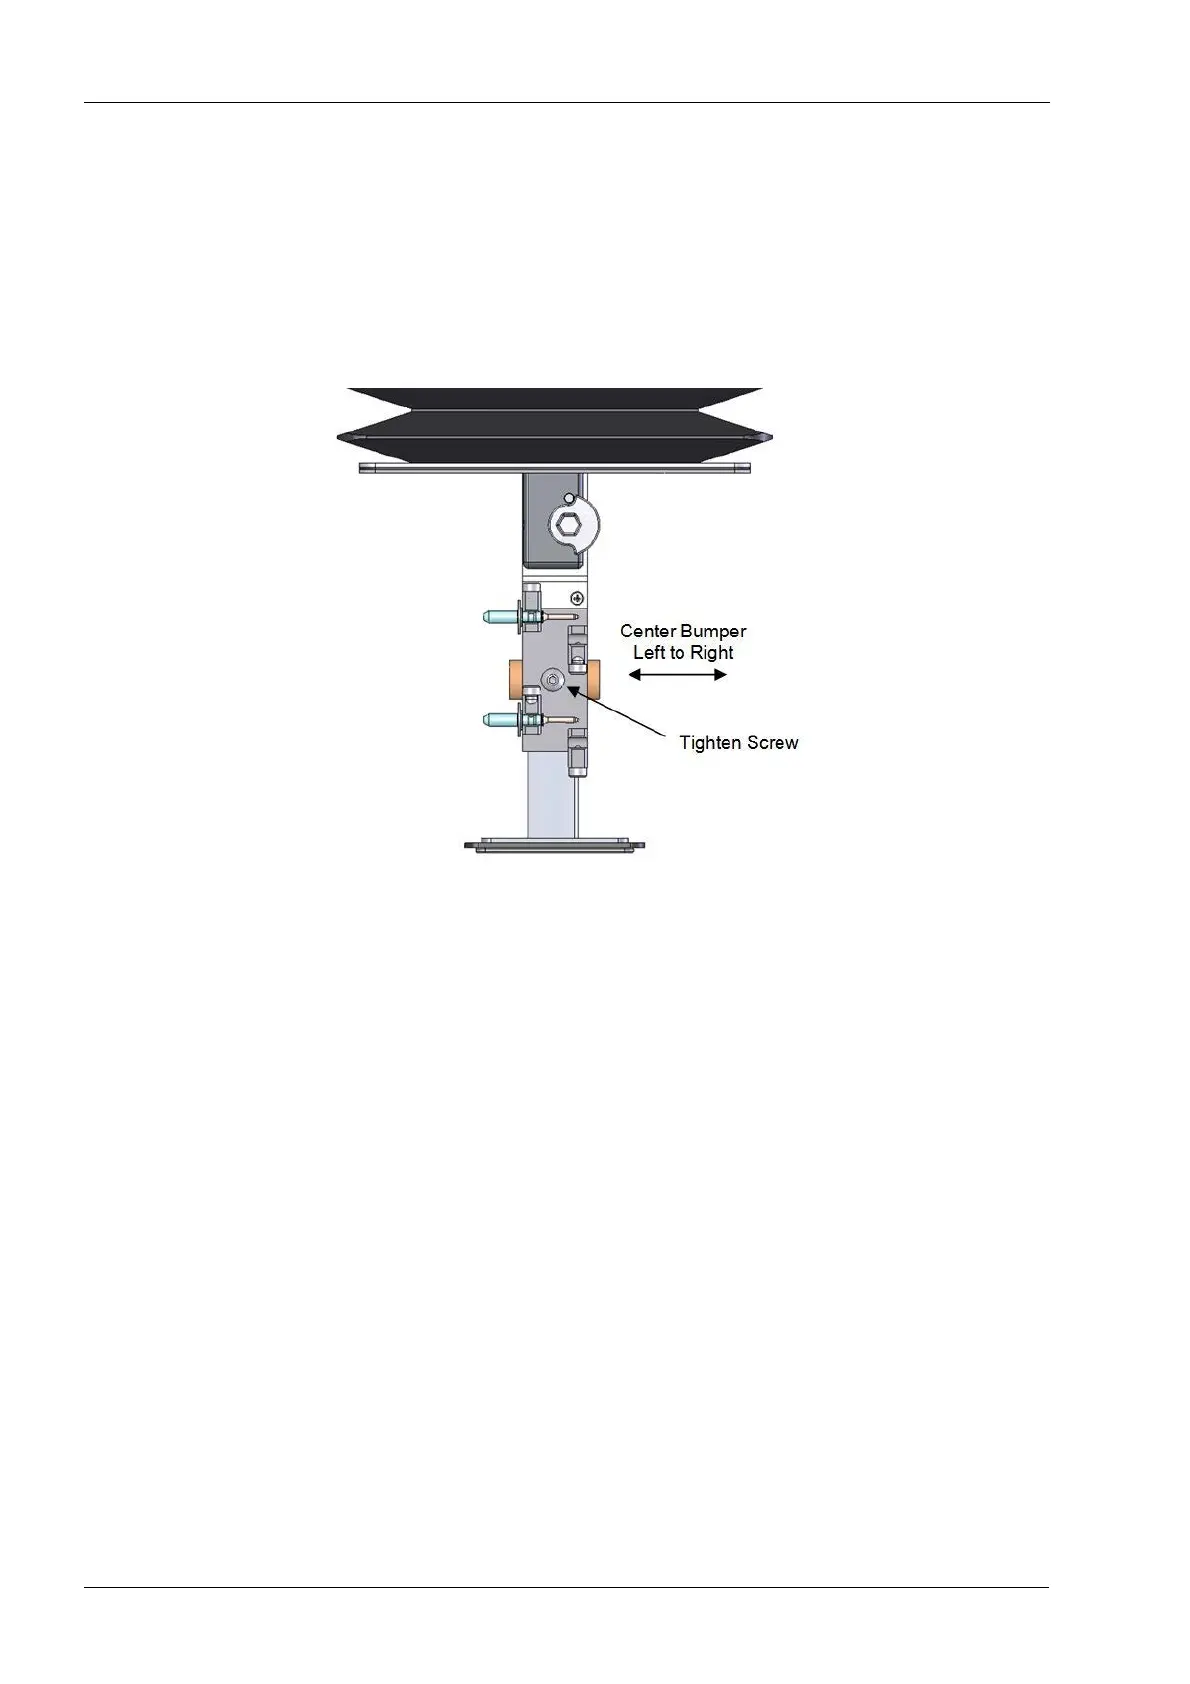
1. Position new tool bumper into the hole on the tool changer arm, center the bumper left
and right using the top of the tool holder as reference.
It is very important to center the bumper to the tool holder (6-pack) and not to the tool
changer arm itself as the arm is slightly offset but the holder is not.
Figure 154: Install bumper centered left to right
2. Ensure the tool bumper is properly located and tighten the button head screw on top
of the tool holder.
Verify
Drop off and pick up tools in each pocket to ensure 6 pack alignment.