2 Maintenance procedures Chapter B: Preventive maintenance
32 Planmeca PlanMill 40 Technical manual
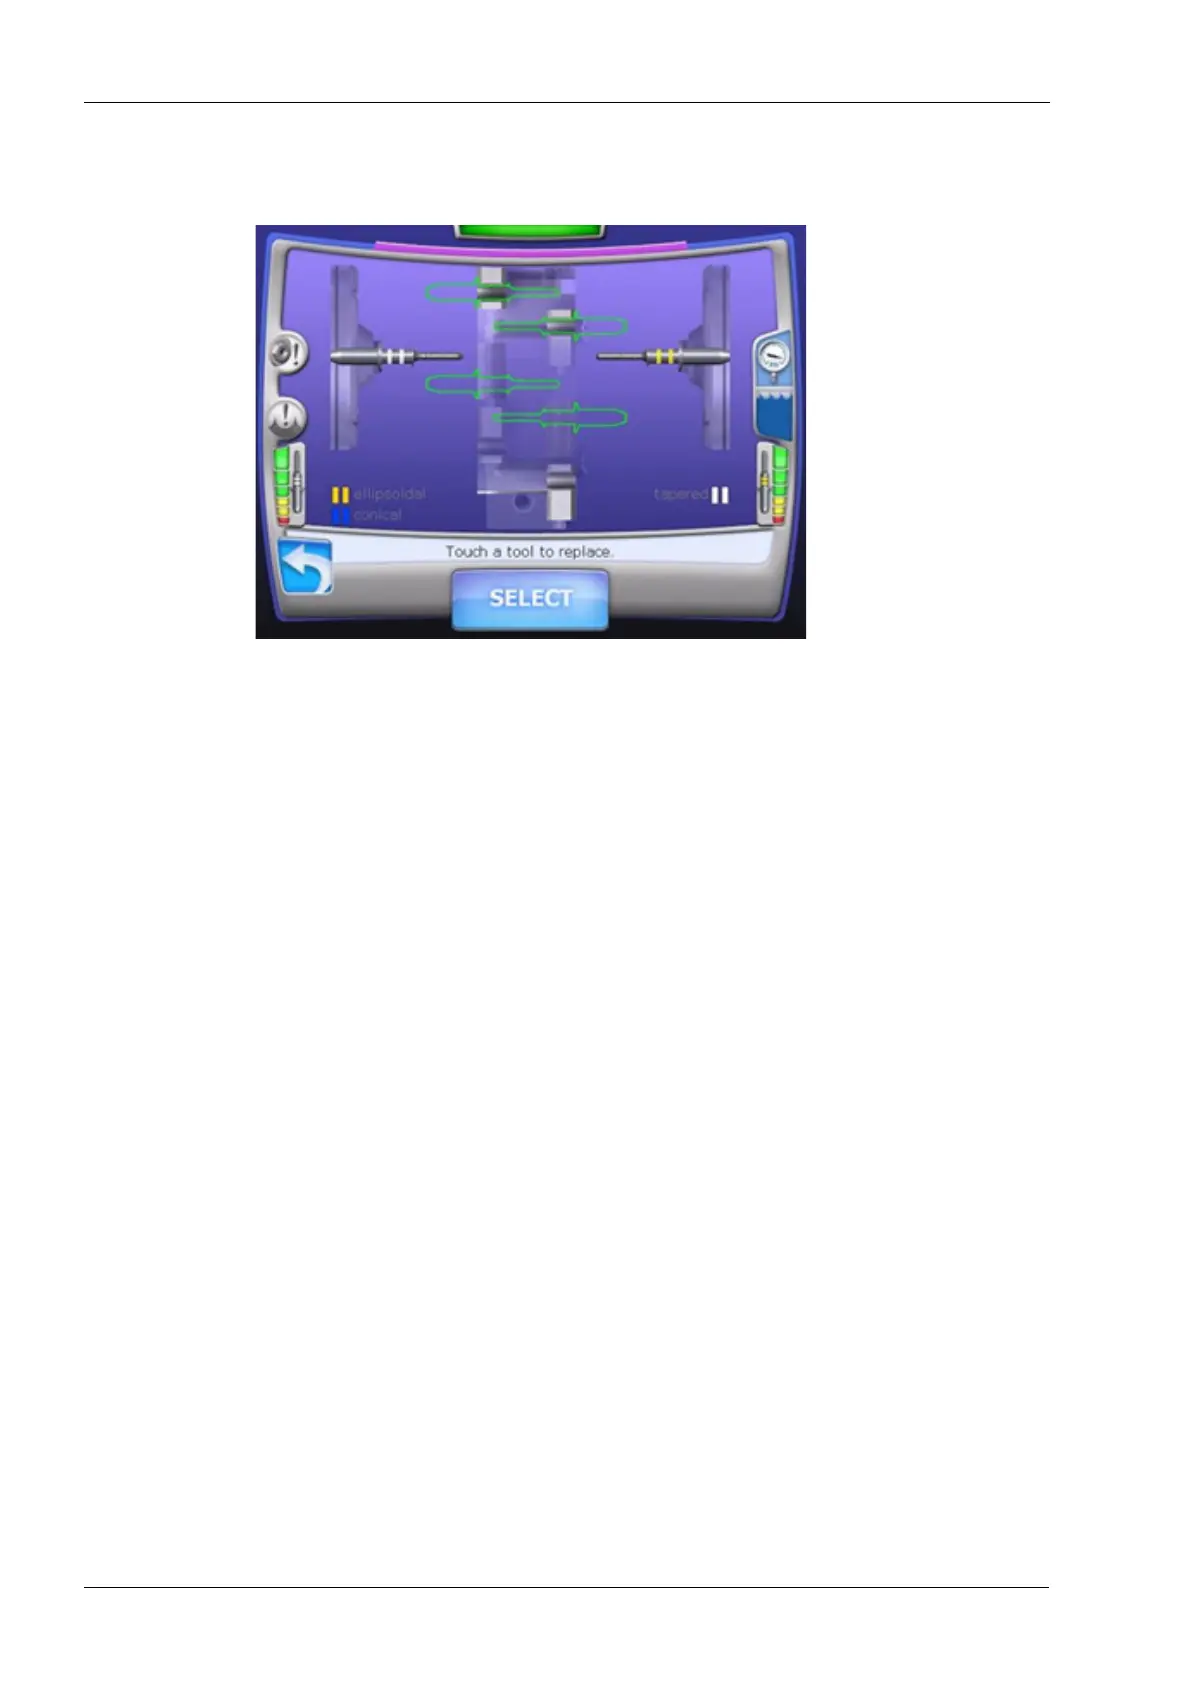
10. The tool changer will open, seat the tool and then profile the tool. If it is successful the
display will look like in the following figure.
Figure 23: Replace tool
11. Use the Replace Tool function to load the Ellipsoidal burr back into left side.
12. Repeat steps 4 through 11 for the right side.
If known good burrs from the Touch Probe Calibration Kit are being used and the tool
profiler repeatedly fails to profile a burr properly, it may be necessary to replace the tool
profiler. Replacement of the tool profiler requires Tool Profiler Calibration and Origin
Calibration to be performed.
13. The Tool profiler verification procedure is now complete.
2.4 Inspecting tool changer 6-pack, bumper and nose seal for damage or
wear
The tool changer 6-pack, which holds the extra tools (burrs), is located on the tool changer
arm. The bumper, which is used to seat the tools in the spindle collets when changing
tools, is mounted in the tool changer arm. The nose seal, which prevents the grinding
solution from entering the Y-axis assembly, is mounted between two backing plates and
attached to the end of the tool changer arm. If damage or wear is observed refer to section
2.7 "Nose seal" on page 144 and section 2.9 "Tool holder" on page 147 for repair
instructions.
1. Select the Maintenance Icon in the lower left corner of the display.
2. Select Advanced and enter passcode 1234.
3. Select Verify Tools.