Chapter E: Basic repair procedures 2 Basic repair procedures
Technical manual Planmeca PlanMill 40 143
Do not close the lid!
2.6.2 Adjusting tool changer close sensor position
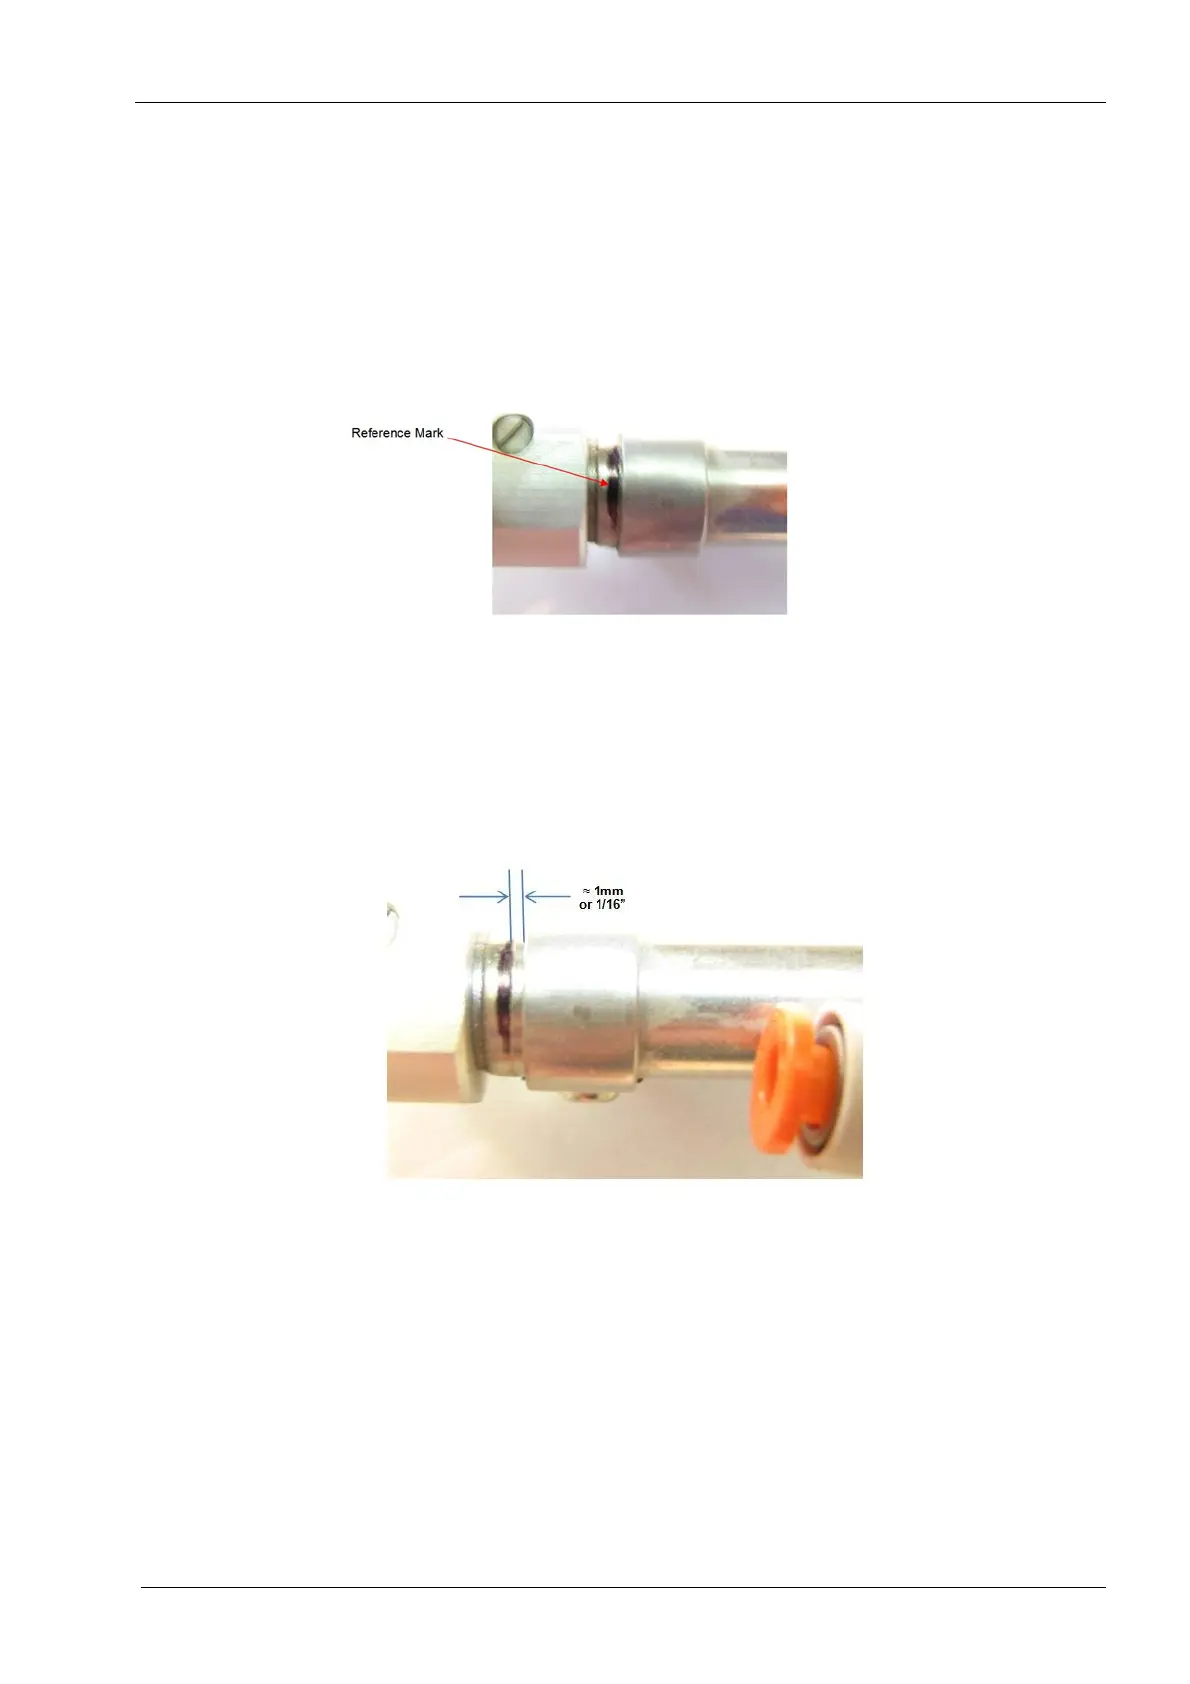
1. At the back of the Y-axis observe the position of the tool changer closed sensor. It is
advisable to apply a reference mark on the tool changer cylinder at the tool changer
closed sensor mounting clamp with a fine tip sharpie if one is available as shown
below.
Figure 150: Adjusting the close sensor position
2. Using a small flat blade screwdriver unscrew the jackscrews on the Y-axis servo
motor cable connector and disconnect the cable.
3. Using a small Philips screwdriver loosen the tool changer closed sensor mounting
clamp screw sufficiently to allow the clamp to be moved along the cylinder with a
medium effort.
4. Apply force to the clamp and move the sensor toward the front of the mill
approximately 1 mm or 1/16”.
Figure 151: Adjusting the close sensor position
5. Reconnect the Y-axis servo motor cable.
6. Close the lid.
7. Touch the REINITIALIZE SYSTEM button.
8. If the mill fully initializes and the lid LED lights stay green, the tool changer closed
sensor is now properly positioned.
9. If the mill fails to initialize, move the sensor’s position again and select Yes to re-
initialize. Repeat as necessary. See note below.
Total adjustment/movement of the sensor should NOT exceed 6 mm or ¼”. If the sensor
has been adjusted to this limit and the error still occurs, then the sensor position is not the
source of the error. Return to the Chapter D: "Troubleshooting" on page 71 of this manual
and continue troubleshooting.