Chapter C: Calibration 6 Refine 2 calibration
Technical manual Planmeca PlanMill 40 69
6 Refine 2 calibration
Refine 2 calibration is required when the calculated offsets based on the measured results
of the calibration bar do not meet the acceptance criteria. Refer to previous section for
detailed instructions about measuring the calibration bar and calculating the offsets.
1. Touch Gear button in lower left corner.
2. Touch Advanced, then enter password
3. Touch Tech Console --> Select --> Calibration Console -->Calibration tab.
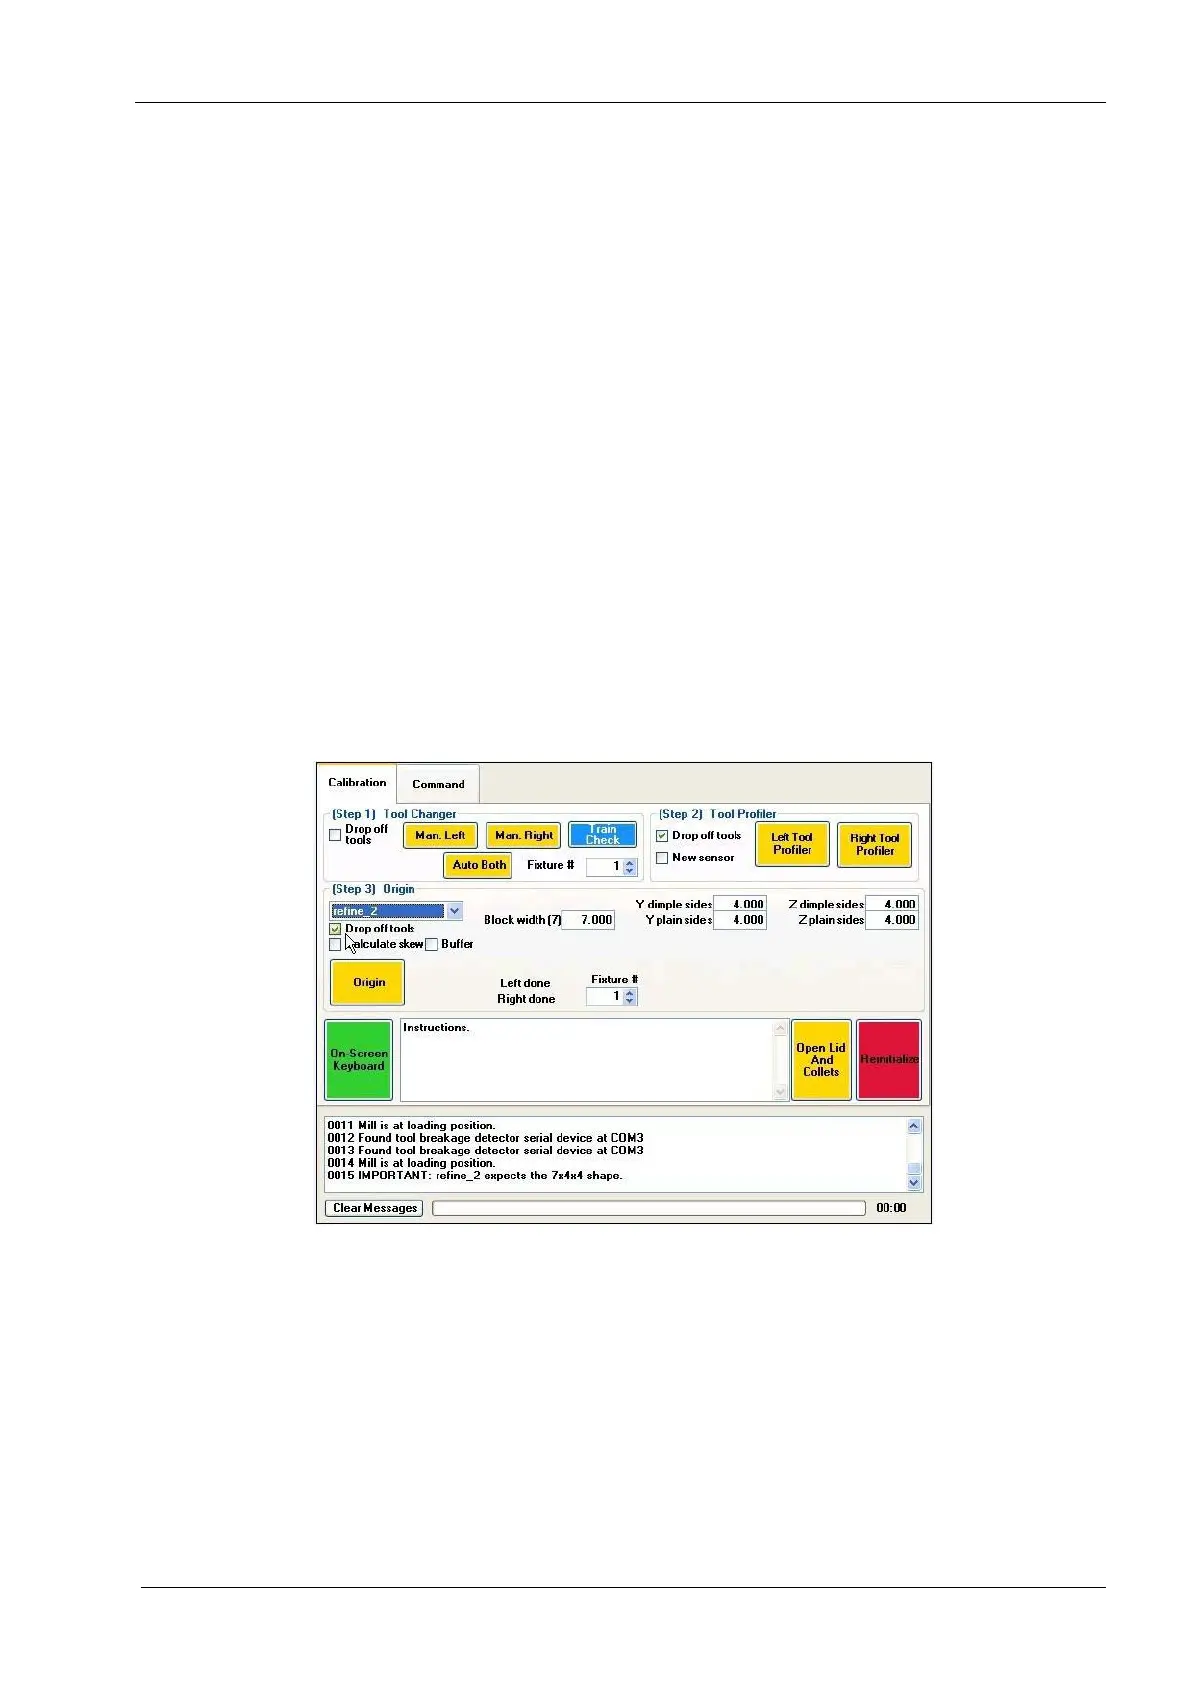
4. On the Calibration tab, go to Step 3 and select refine_2 from the drop down box.
Boxes from the W, Y and Z offsets will now be available to edit.
5. Press and hold the Origin button until the button turns green and wait for homing to
complete.
6. Using a keyboard and mouse or the on-screen keyboard (go to the Command tab and
touch the Keyboard button to activate the on-screen keyboard), enter the recorded
measurements for the W, Y and Z offsets.
If W = Block width (7) is outside the tolerances, enter it first without changing Y and Z, then
re-mill the calibration bar. Adjusting the W contributes also to Y and Z and therefore
correcting and fixing W first will ease the calibration.
Figure 65: Enter Calibration Bar Measurements
7. Press the Origin button again to complete the calibration procedure. Wait for homing.
8. Select the Command tab and press the Close button to exit.
9. Go to the main screen by selecting Exit Console and then Back.
10. Select Finished Jobs list from the main screen. Select Refine Calibration Ellisoidal +
Ellipsoidal and re-mill the calibration bar.
11. Once the calibration bar is re-milled, record and measure the W, Y and Z offsets.
12. Repeat this procedure until the calibration bar is within tolerance. This is usually
achieved in two to three bars.