Chapter A: General and technical data 7 Mechanical design
Technical manual Planmeca PlanMill 40 15
7 Mechanical design
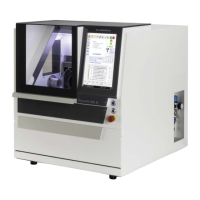
The PlanMill 40 is composed of a number of sub-assemblies. Each sub-assembly is
relatively self-contained in form and function. The major sub-assemblies include the
motion base, electronics box (often referred to as the E-box), circulations system,
pneumatics system, and the enclosure.
7.1 Motion base
The motion base of the milling unit includes the physical structure and various
components to allow for four linear positioning axes, a tool changer, two automatic
chucking spindles, and a grinding chamber. This structure is supported and isolated from
the rest of the machine by four rubber isolation dampers to minimize external vibrations to
the rest of the machine and to minimize any effects of an uneven support surface.
Each axis utilises four precision linear bearings mounted to two linear rails. The bearings
are mounted on a common carriage which is translated along the linear rails via a servo
motor and ball screw assembly. Each of these components is of high precision and
provides the ability to precisely position the axis with micron-level accuracy. Additionally,
the preload of the bearings and ball screw was specifically selected to provide the stiffness
required to maintain positional accuracy. The servo motor is directly coupled to the ball
screw and utilizes an encoder which allows for closed loop control to ensure long term
positional repeatability.
Two of the axes share a common rail and support horizontally opposed spindles, these
axes are referred to as the X-left and X-right axes. The electrically-driven spindles are of
precision design and incorporate a pneumatically controlled chucking feature used in the
tool changing operations. Each spindle is held in a custom built housing mounted to each
X carriage. This housing provides a path for coolant to be delivered from outside the grind
chamber to the tips of the grinding tools located in the collet of each spindle. Each spindle
is driven by a high speed brushless DC motor coupled directly to the spindle. Pressurized
air is supplied to the motor for cooling the motor bearings. This air flows from the motor to
the spindle where it cools the bearings in the spindle and exits the spindle out through the
collet. This provides an additional benefit of pressurizing the interior of the spindle thus
preventing coolant from entering the spindle during the grinding process.
A tool changer is located within the structural tube making up the Y-axis. This tool changer
is oriented along the longitudinal axis of the tube and is pneumatically extended and
retracted upon command. When retracted, it is safely protected against moisture and
debris from the grinding process. When extended, a 6-pack tool holder is presented
allowing placement and retrieval of three grinding tools per spindle. Additionally, an optical
profile sensor is made available for determining the actual length and diameter of an
individual tool. A two position mandrel holder is positioned above the tool changer. This
mandrel holder allows the operator to install a block of restorative material for grinding in
either the horizontal or vertical orientation. This whole assembly is translated up and down
via the Z-axis assembly.
Each axis is oriented towards the origin of the machine. The origin is located at the centre
of the front face of a mandrel installed in the mandrel holder. It can be thought of as the
intersection point of the X-Y, Y-Z, and X-Z planes. The grind c
hamber encloses this area
and
provides a means to contain the coolant while allowing each axis the ability to freely
translate its full range of motion. An automatically opening lid is provided on top of the
grind chamber to allow access by the operator. Additionally, the top of the grind chamber
is illuminated with different colours to provide an easily identifiable state of the machine to
the operator.
 Loading...
