Chapter C: Calibration 5 Verifying calibration
Technical manual Planmeca PlanMill 40 67
5 Verifying calibration
Verifying calibration includes milling a block using a preloaded calibration job and then
measuring specified dimensions.
Tools required
• digital micrometer
• IPS Empress I12 Block
• 2 ellipsoidal burrs
• USB keyboard (helpful but not required, on-screen keyboard may be used also)
• mouse (helpful but not required)
Milling the calibration job
1. From the main screen, select Calibration Jobs and press enter.
2. Select Refine Calibration Ellipsoidal + Ellipsoidal. If you can't find the calibration job
from there, check Finished Jobs.
The system may prompt you to put in the correct burs for milling the calibration block. These
should be Ellipsoidal on the left and Ellipsoidal on the right.
Calibration jobs should be milled only with new ellipsoidal burrs.
3. Verify that the burs being used are correct and new ones. Replace them if necessary.
4. Start the restoration and use the block size indicated for this milling.
5. Mill the calibration block.
6. After the calibration block has been milled the lid will open automatically. The screen
will display “Milling is Complete”.
7. Remove the restoration then close the lid.
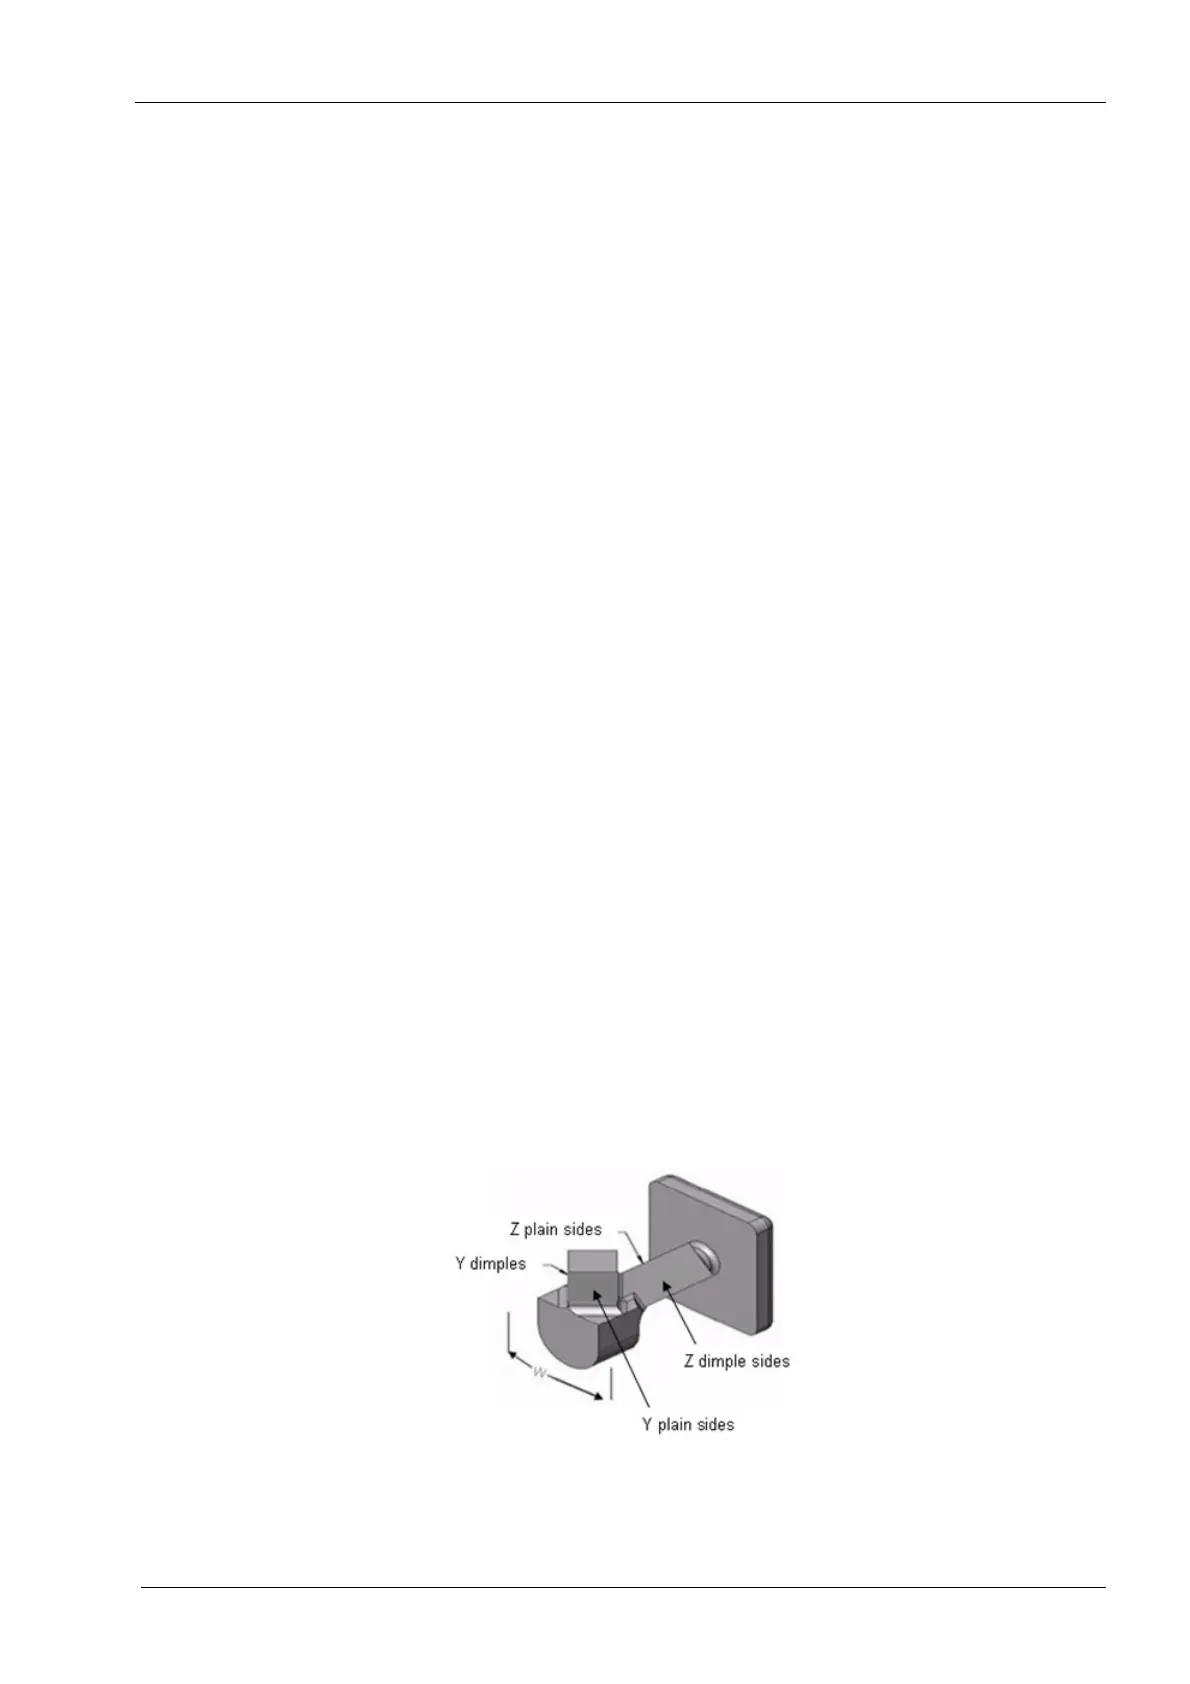
8. Using a micrometer, measure the pair of values for the Y offset (Y dimple sides & Y
plain sides), the pair of values for the Z offset (Z dimple sides & Z plain sides), and the
bar width (W).
Figure 64: Calibration bar