Chapter C: Calibration 2 Tool changer calibration
Technical manual Planmeca PlanMill 40 51
2 Tool changer calibration
The following procedure is used to align the tool changer with the spindles to allow for
proper pickup and drop off of the tools into each of the 6 tool holder pockets. Auto tool
changer calibration automatically calibrates the tool changer using the Tool Holder
Calibration Fixture, the 2 Calibration Pins and the Calibrator with its cables.
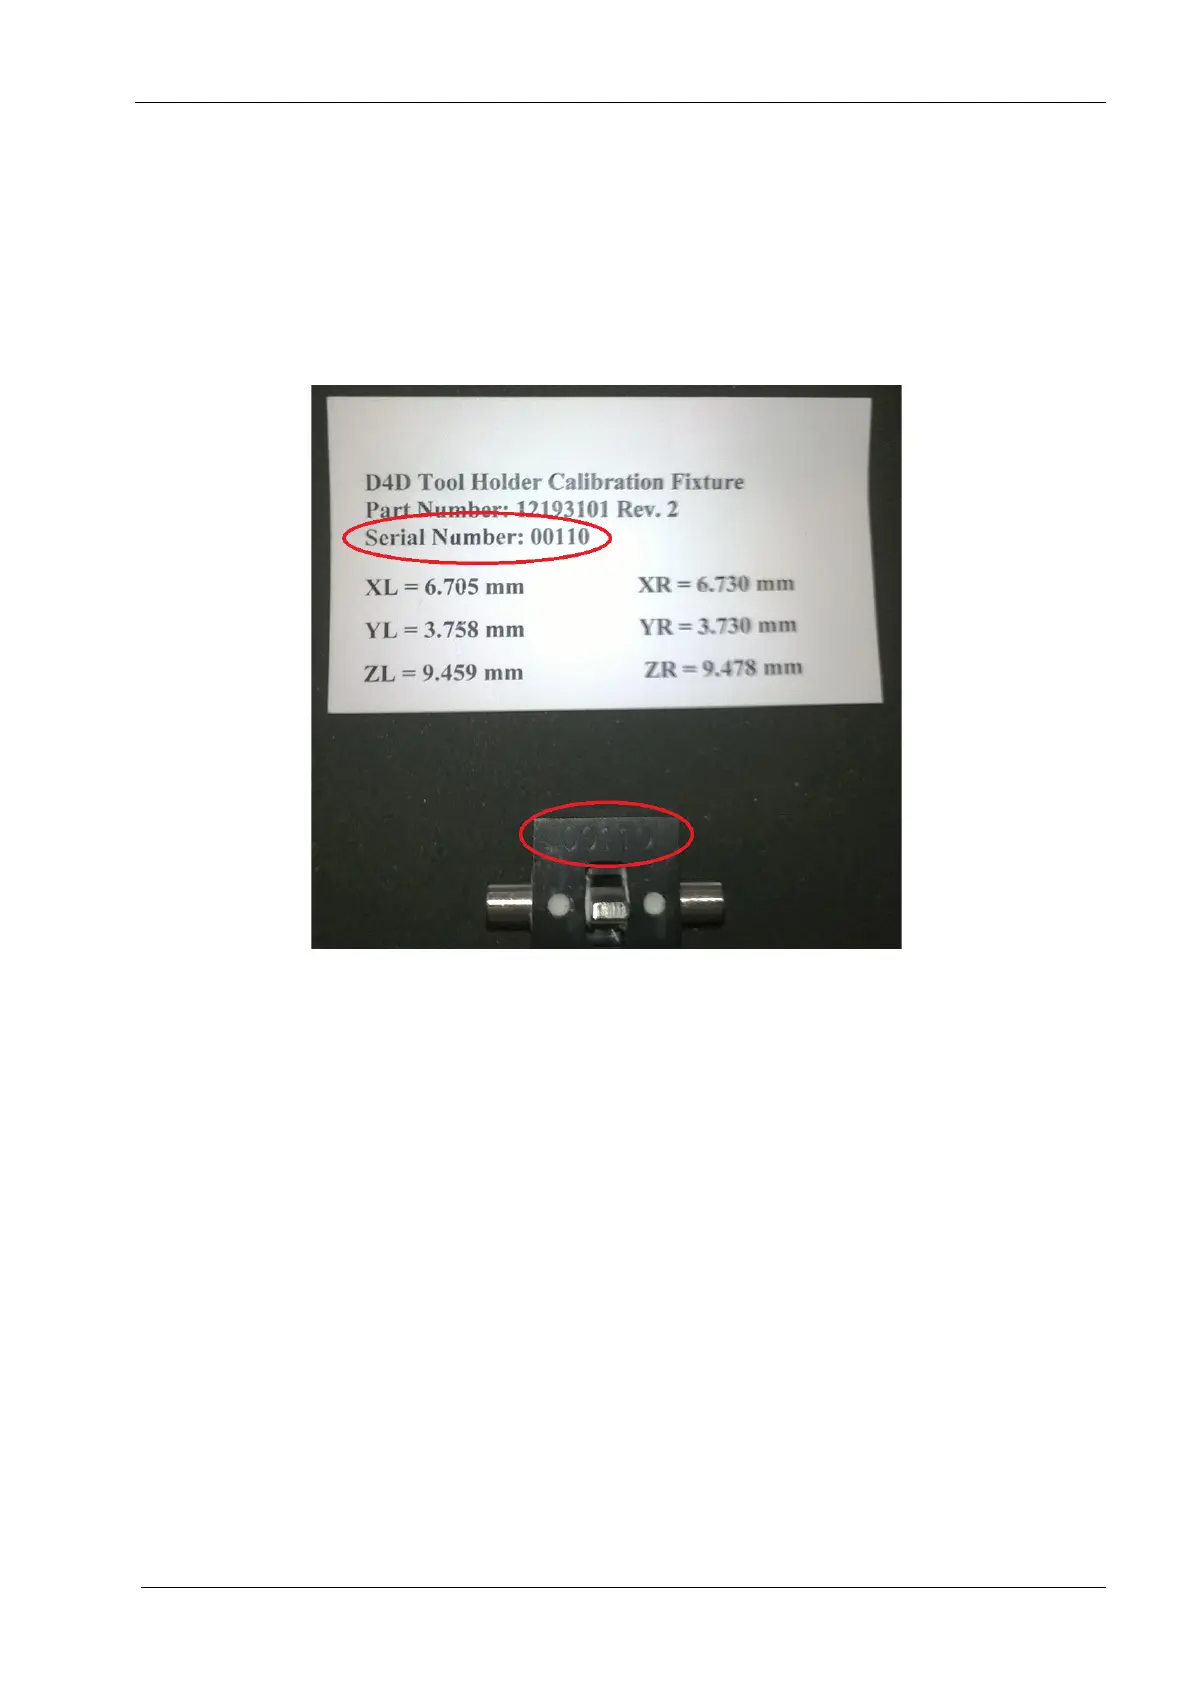
Each Tool Holder Calibration Fixture has a controlled serial number, which the user will
enter when requested during the tool changer calibration process.
Figure 42: Example of Tool Holder Calibration Fixture serial number
Performing this calibration procedure will necessitate performing the rest of the calibration
steps, listed in 1 "Overview" on page 49.
Before beginning, inspect the tool holder on the tool changer to make sure it is not skewed
or cannot be moved easily. The tool holder should be tight and secure before beginning.
1. Start the PlanMill 40 application if it is not running.
2. On the mill screen, touch Maintenance icon in the lower left corner.
3. From the Mill Options screen, select Advanced.
4. Enter the passcode.
5. Select Technician Console.
6. Select Calibration Console.