Getting Acquainted
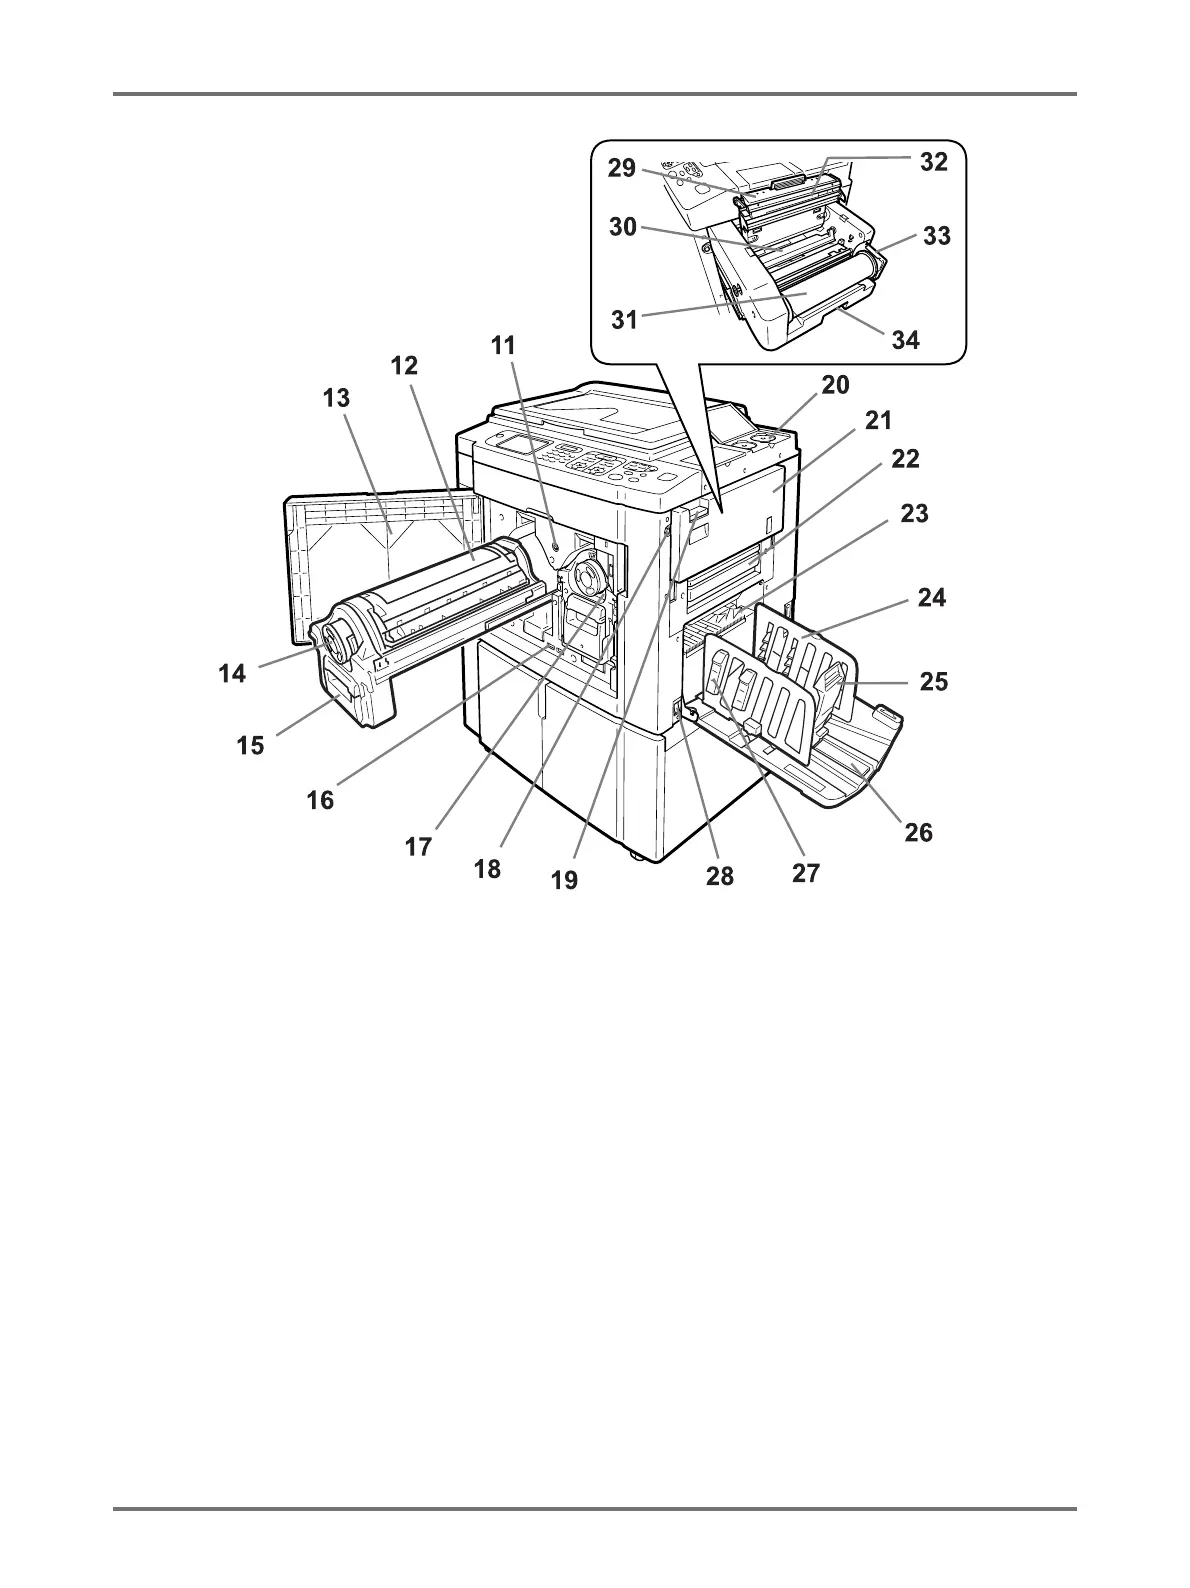
Function and Name of Each Part
19
11) Print Drum Release Button ()p.250)
Unlocks the Print Drum for removal.
12) Print Drum 1 ()p.250)
13) Front Cover
14) Ink Cartridge ()p.246)
15) Print Drum Handle ()p.250)
16) Counter
Counts the number of copies (total print counter) and the
number of made masters (master counter).
17) Print Drum 2 ()p.250)
18) Master Making Unit Release Button ()p.243)
Unlocks the Master Making Unit for removal.
19) Master Making Unit Removal Lever ()p.243)
Grasp the lever to open Master Making Unit Removal
cover.
20) Ink Cartridge Cap Holder ()p.247)
Secure the Ink Cartridge cap.
21) Master Making Unit Removal Cover ()p.243)
Once the cover is open, the Master Making Unit can be
removed.
22) Master Disposal Box 2 ()p.248)
23) Paper Ejection Wing ()p.122)
Automatically adjusts to keep printed paper neatly
stacked.
24) Receiving Tray Paper Guides ()p.35)
Aligns printed paper neatly.
Slide according to the width of paper to be printed.
25) Paper Stopper ()p.35)
Slide to adjust to the length of print paper size.
26) Paper Receiving Tray ()p.35)
Printed copies are output to this tray.
27) Paper Arranger ()p.35)
Press to open for aligning printed paper.
28) Power Switch ()p.33)
29) Master Making Unit Cover ()p.243)
Open and close to install Master Roll.
30) Master Guide Flap ()p.244)
31) Master Roll ()p.243)
32) Thermal Print Head ()p.257)
33) Master Roll Holder ()p.244)
34) Master Making Unit Lever ()p.243)
Use the lever to pull out the Master Making Unit.