10.5
Date Code 20120126 Instruction Manual SEL-2032 Communications Processor
Testing and Troubleshooting
Calibration
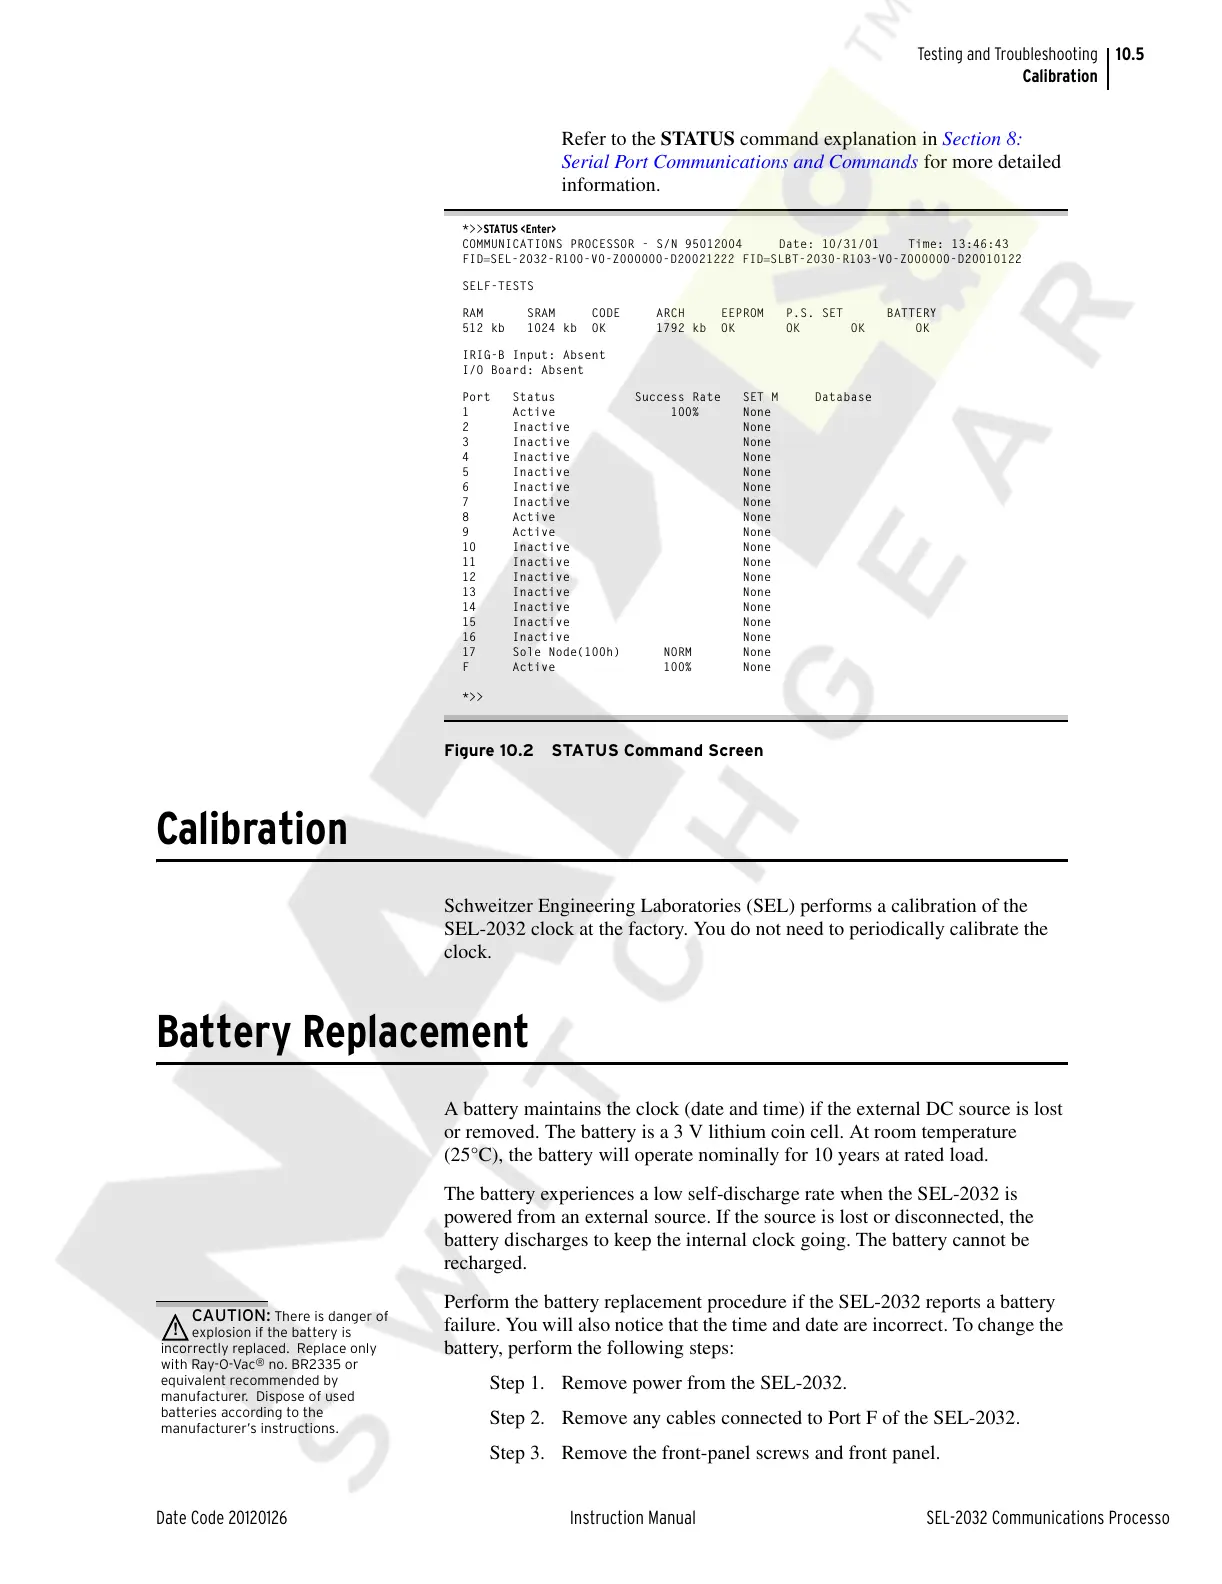
Refer to the STATUS command explanation in Section 8:
Serial Port Communications and Commands for more detailed
information.
*>>STATUS <Enter>
COMMUNICATIONS PROCESSOR - S/N 95012004 Date: 10/31/01 Time: 13:46:43
FIDSEL-2032-R100-V0-Z000000-D20021222 FIDSLBT-2030-R103-V0-Z000000-D20010122
SELF-TESTS
RAM SRAM CODE ARCH EEPROM P.S. SET BATTERY
512 kb 1024 kb OK 1792 kb OK OK OK OK
IRIG-B Input: Absent
I/O Board: Absent
Port Status Success Rate SET M Database
1 Active 100% None
2 Inactive None
3 Inactive None
4 Inactive None
5 Inactive None
6 Inactive None
7 Inactive None
8 Active None
9 Active None
10 Inactive None
11 Inactive None
12 Inactive None
13 Inactive None
14 Inactive None
15 Inactive None
16 Inactive None
17 Sole Node(100h) NORM None
F Active 100% None
*>>
Figure 10.2 STATUS Command Screen
Calibration
Schweitzer Engineering Laboratories (SEL) performs a calibration of the
SEL-2032 clock at the factory. You do not need to periodically calibrate the
clock.
Battery Replacement
A battery maintains the clock (date and time) if the external DC source is lost
or removed. The battery is a 3 V lithium coin cell. At room temperature
(25°C), the battery will operate nominally for 10 years at rated load.
The battery experiences a low self-discharge rate when the SEL-2032 is
powered from an external source. If the source is lost or disconnected, the
battery discharges to keep the internal clock going. The battery cannot be
recharged.
CAUTION: There is danger of
explosion if the battery is
incorrectly replaced. Replace only
with Ray-O-Vac
®
no. BR2335 or
equivalent recommended by
manufacturer. Dispose of used
batteries according to the
manufacturer’s instructions.
Perform the battery replacement procedure if the SEL-2032 reports a battery
failure. You will also notice that the time and date are incorrect. To change the
battery, perform the following steps:
Step 1. Remove power from the SEL-2032.
Step 2. Remove any cables connected to Port F of the SEL-2032.
Step 3. Remove the front-panel screws and front panel.
Courtesy of NationalSwitchgear.com