2.18
SEL-2032 Communications Processor Instruction Manual Date Code 20120126
Installation
Getting Started
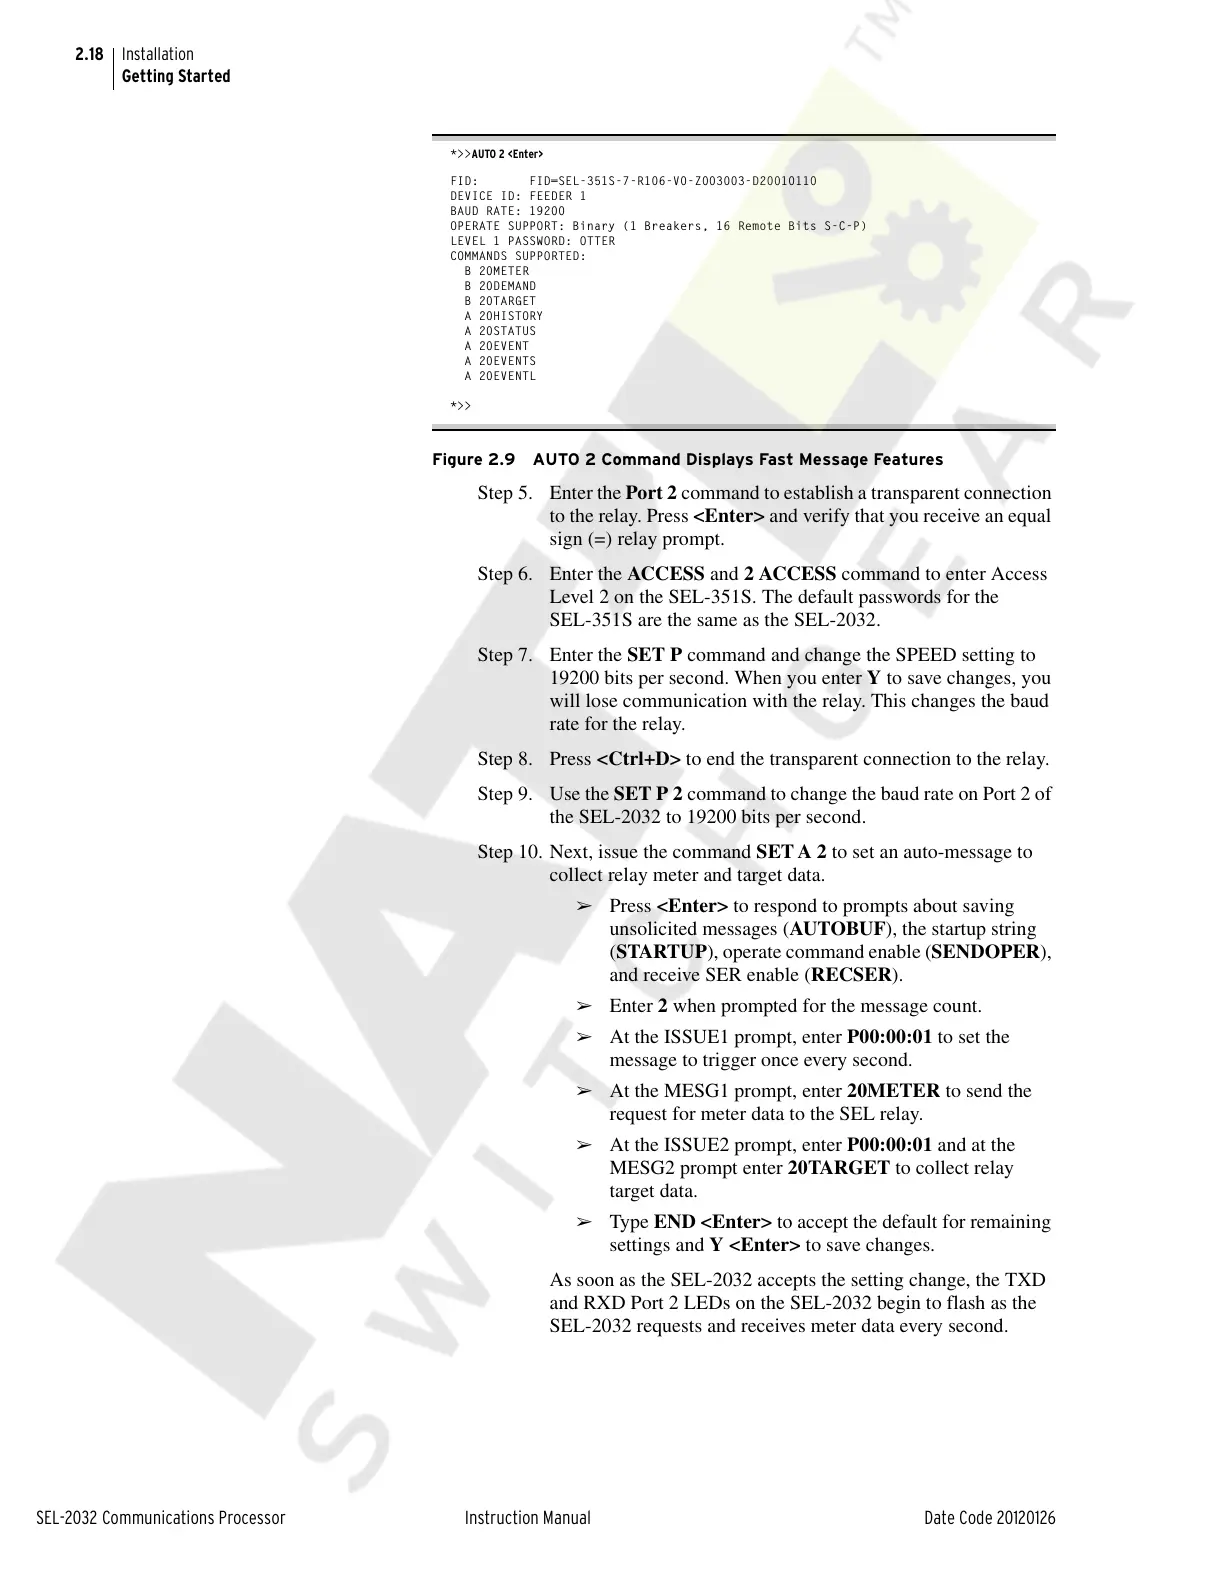
*>>AUTO 2 <Enter>
FID: FID=SEL-351S-7-R106-V0-Z003003-D20010110
DEVICE ID: FEEDER 1
BAUD RATE: 19200
OPERATE SUPPORT: Binary (1 Breakers, 16 Remote Bits S-C-P)
LEVEL 1 PASSWORD: OTTER
COMMANDS SUPPORTED:
B 20METER
B 20DEMAND
B 20TARGET
A 20HISTORY
A 20STATUS
A 20EVENT
A 20EVENTS
A 20EVENTL
*>>
Figure 2.9 AUTO 2 Command Displays Fast Message Features
Step 5. Enter the Port 2 command to establish a transparent connection
to the relay. Press <Enter> and verify that you receive an equal
sign (=) relay prompt.
Step 6. Enter the ACCESS and 2 ACCESS command to enter Access
Level 2 on the SEL-351S. The default passwords for the
SEL-351S are the same as the SEL-2032.
Step 7. Enter the SET P command and change the SPEED setting to
19200 bits per second. When you enter Y to save changes, you
will lose communication with the relay. This changes the baud
rate for the relay.
Step 8. Press <Ctrl+D> to end the transparent connection to the relay.
Step 9. Use the SET P 2 command to change the baud rate on Port 2 of
the SEL-2032 to 19200 bits per second.
Step 10. Next, issue the command SET A 2 to set an auto-message to
collect relay meter and target data.
➢ Press <Enter> to respond to prompts about saving
unsolicited messages (AUTOBUF), the startup string
(STARTUP), operate command enable (SENDOPER),
and receive SER enable (RECSER).
➢ Enter 2 when prompted for the message count.
➢ At the ISSUE1 prompt, enter P00:00:01 to set the
message to trigger once every second.
➢ At the MESG1 prompt, enter 20METER to send the
request for meter data to the SEL relay.
➢ At the ISSUE2 prompt, enter P00:00:01 and at the
MESG2 prompt enter 20TARGET to collect relay
target data.
➢ Type END <Enter> to accept the default for remaining
settings and Y <Enter> to save changes.
As soon as the SEL-2032 accepts the setting change, the TXD
and RXD Port 2 LEDs on the SEL-2032 begin to flash as the
SEL-2032 requests and receives meter data every second.
Courtesy of NationalSwitchgear.com