106
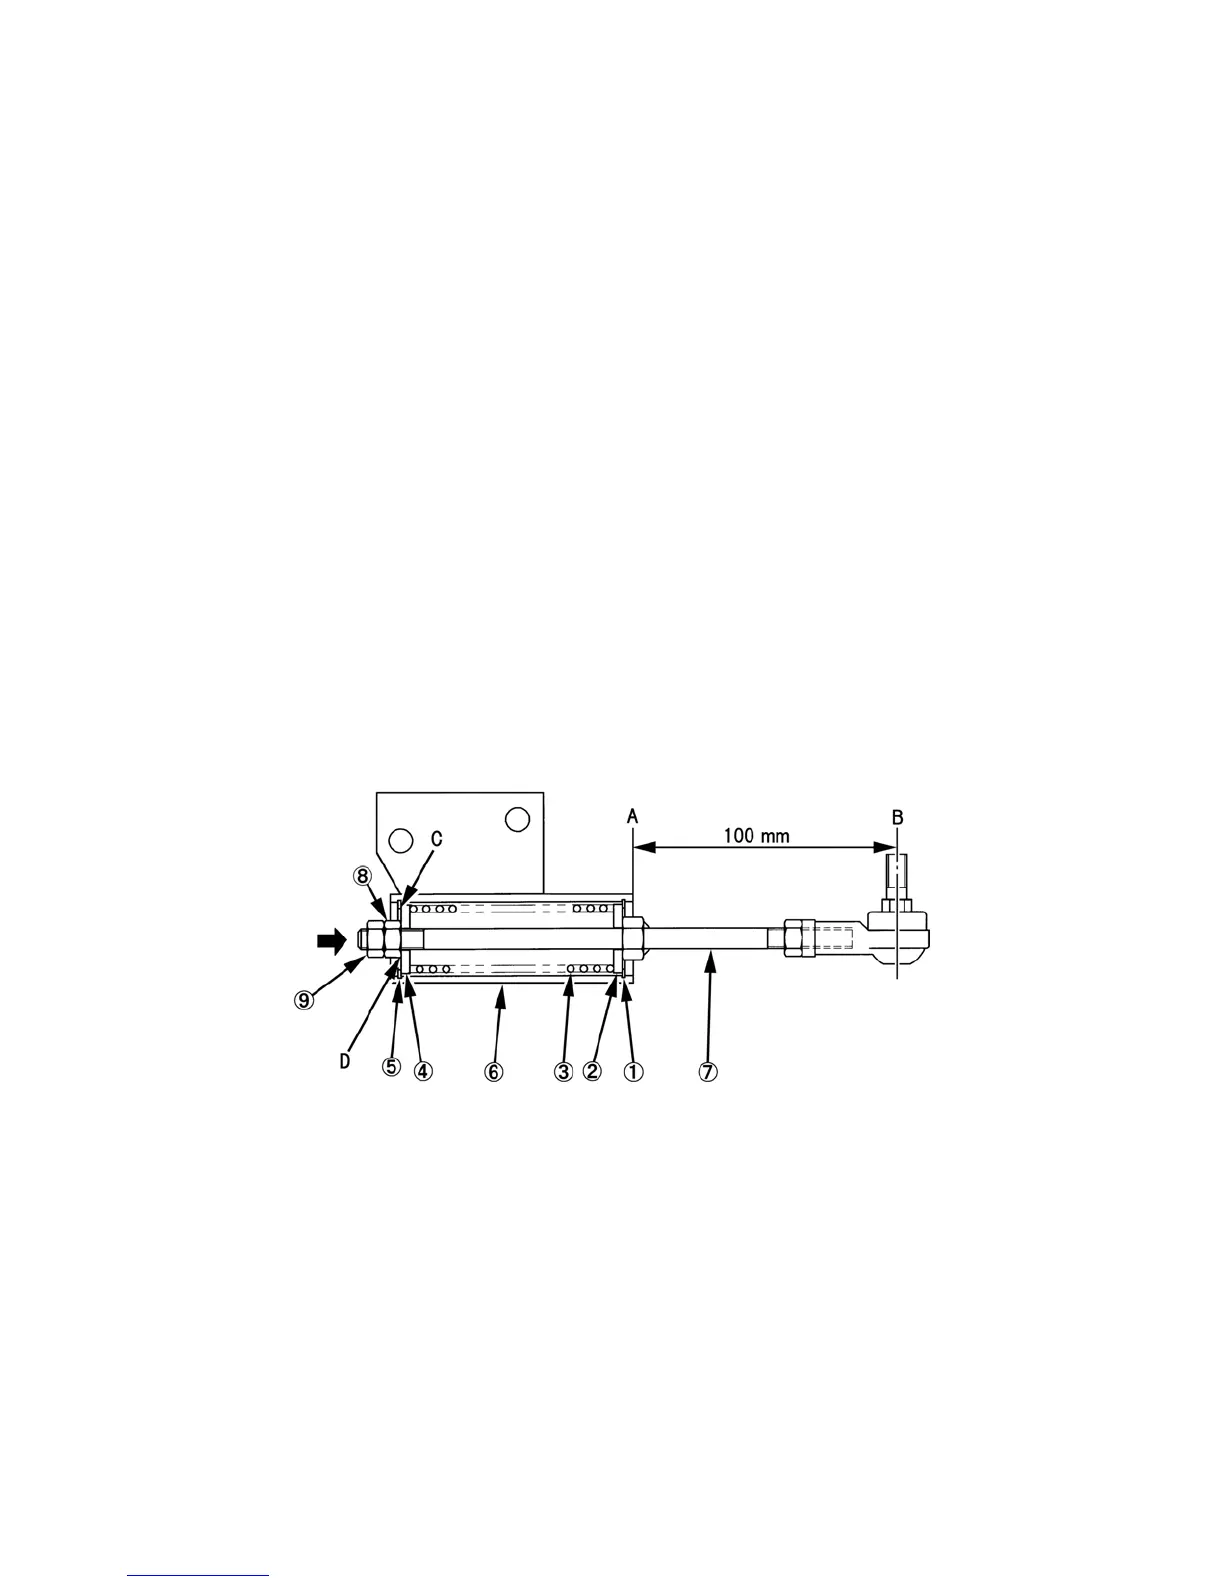
3) Centering Spring and Rod Assembly
If disassembled the centering spring from the rod,
install as follows:
1. Install the snap ring, 1, washer, 2, spring, 3, washer,
4, and snap ring, 5, in the spring holder, 6.
2. Install the rod, 7, through the washers, 2 and 4, and
spring, 3, in the spring holder, 6, with finger tight
the two nuts, 8 and 9.
3. Initial length of 100mm from spring holder bottom
surface “A” to center of rod end “B” is a starting
point.
NOTE: Additional adjustment may be needed after
installed to tractor.
Adjustment
1. Inspect the clearance : C between snap ring, 5, and
washer, 4, is less than 0.3mm while slightly push
(did not compressed the spring) the rod to arrow
mark direction.
2. Inspect the clearance : D between nut, 8, and
washer, 4, is nothing clearance while slightly push
(did not compressed the spring) the rod to opposite
arrow mark direction
397-1Y
1. Snap ring
2. Washer
3. Spring
4. Washer
5. Snap ring
6. Spring holder
7. Rod
8. Nut
9. Nut