170
3) Disassembly.
IMPORTANT:
1.
Never disassemble the control valve during the claim warranty term (1 year or 600 hours). If disassembled, claim
will not be accepted.
2.
When it should be unavoidably disassembled, handle it carefully since it is finished precisely.
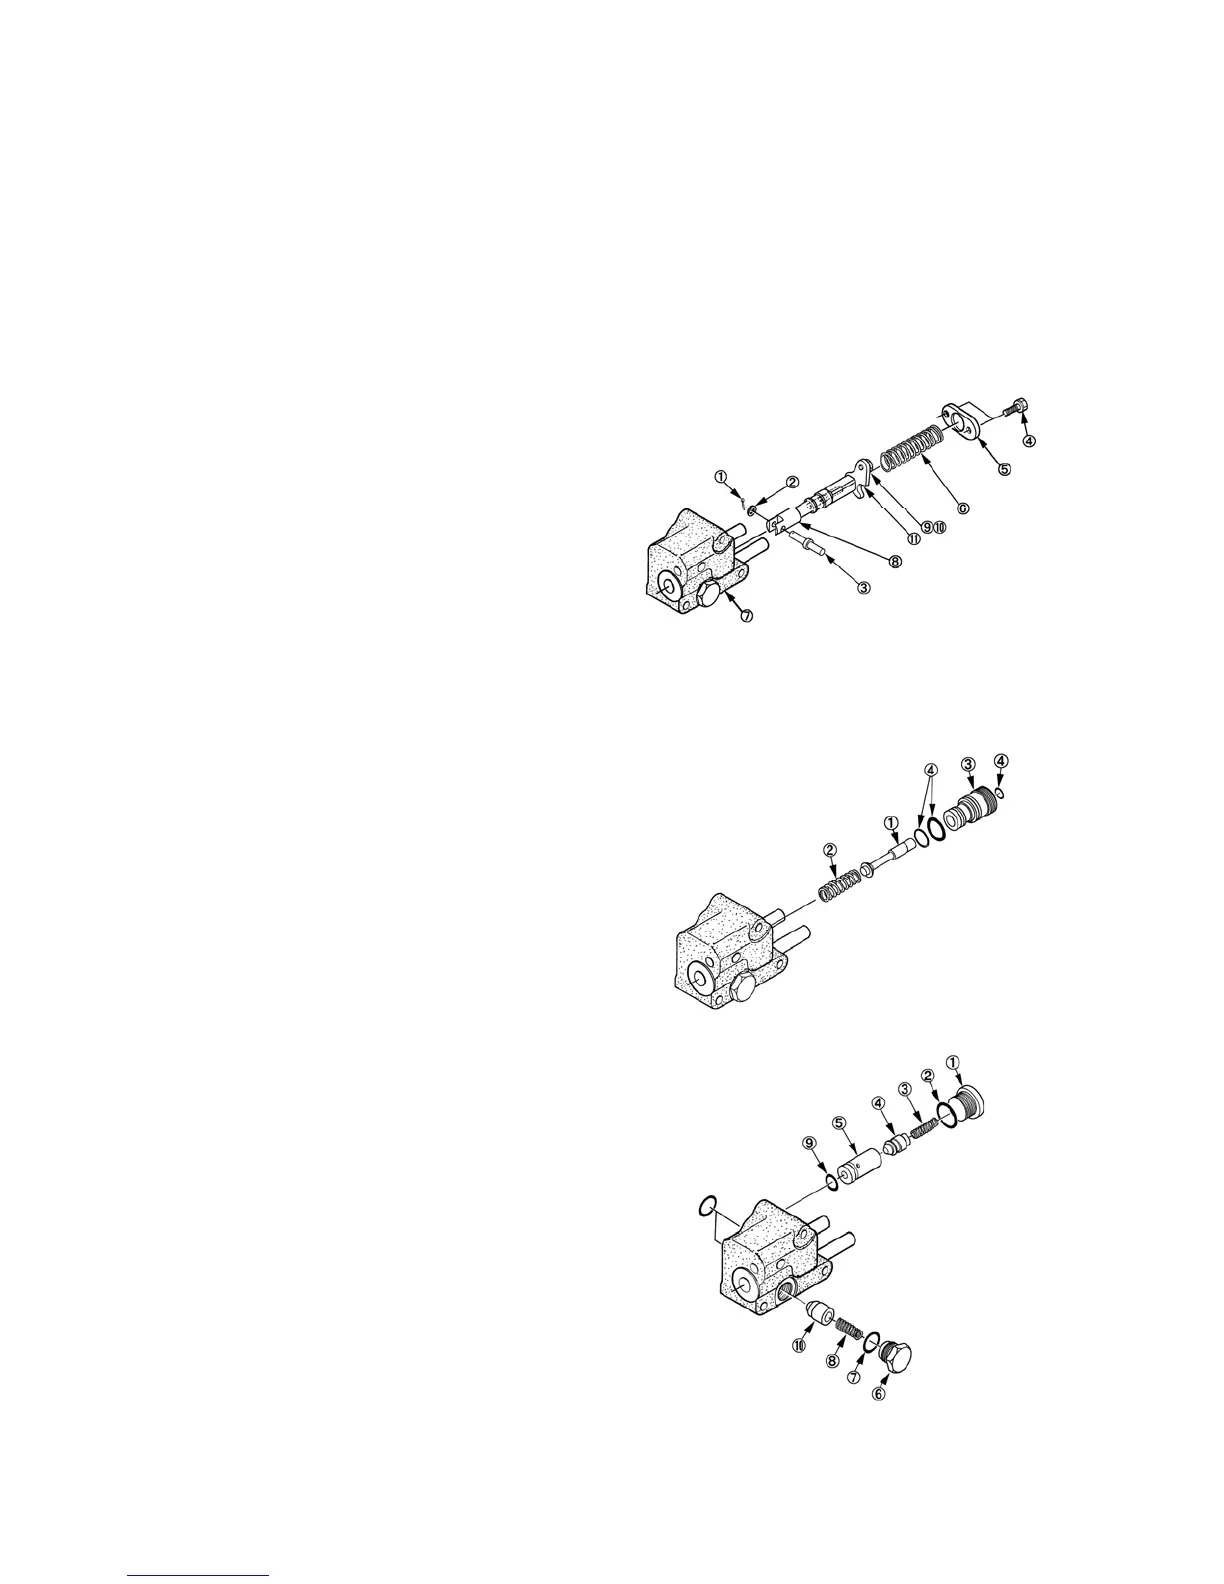
(1) Control valve spool.
① Remove the sprit pin, 1, washer, 2, and pin, 3,
from the spool, 8.
② Slide out the spool, 8, from the valve body, 7,
after remove the bolt, 4, cap, 5, and spring, 6.
NOTE:
Don't remove the plate(11), nut(10) and screw(9)
from the spool(8).
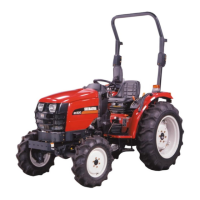
(2) Lowering valve
① Remove the valve seat, 3, by special tool.
② Remove the lowering valve spool, 1 and spring,
2, from the valve body.
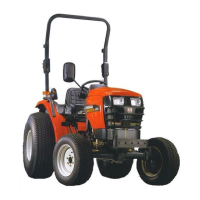
(3) Check valve・Shut-off valve.
① Remove the plug, 1, spring, 3, check valve, 4,
and valve seat, 5, from the valve body.
② Remove the plug, 6, spring, 8, and shut-off
valve, 10, from the valve body
.
493Y
494Y
495Y
1. Sprit pin
2. Washer
3. Pin
4. Bolt
5. Cap
6. Spring
7. Valv e bo d y
8. Spool
9. Screw
10. Nut
11. Plate
1. Lowering valve spool
2. Spring
3. Valve seat
4. O-ring
1. Plug
2. O-ring
3. Spring
4. Check valve
5. Valve seat
6. Plug
7. O-ring
8. Spring
9. O-ring
10. Shut-off
valve