194
11) FUEL LEVEL SENDING UNIT
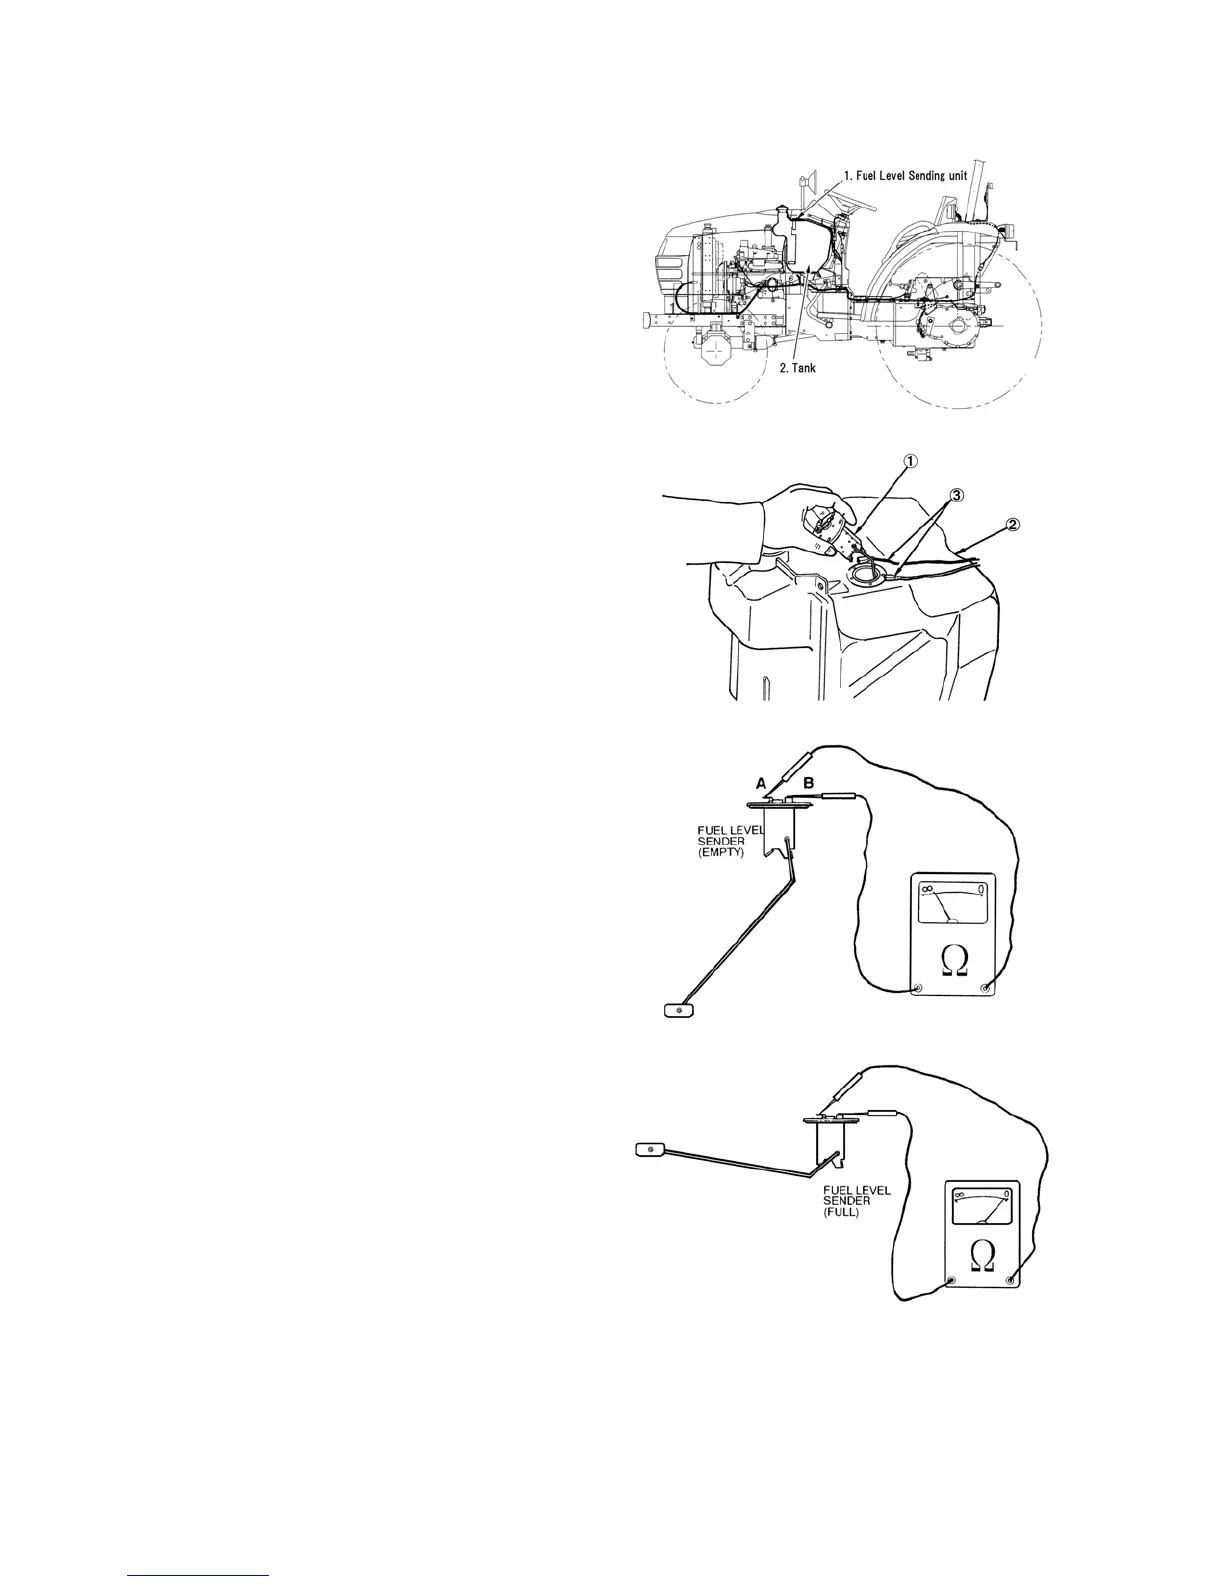
Description and Location
The fuel level sending unit, 1, is mounted on
top of the fuel tank, 2, and extends into the
tank. The sending unit utilizes a float the
raise and lowers with the fuel level inside
the tank. The float regulates a variable
resistance to ground, which translates into
movement of the fuel gauge on the
instrument panel. As the float lowers (fuel
being consumed) inside the tank, the ground
resistance increases, indicating less fuel on
the fuel gauge.
Removal
1. Disconnect the negative ( - ) battery
cable from the battery.
2. Disconnect the two wiring harness leads,
3, attached to the terminals on the fuel
level sending unit, 1. Be sure to make
note of what terminal each lead is
connected to for ease of installation.
3. Remove the five (5) retaining screws
that secure the sending unit, 1, to the
fuel tank, 2.
4. Carefully remove the sending unit, 1,
from the fuel tank, 2.
5. Remove and discard the sealing gasket
from the sending unit.
Fuel Level Sending Unit Testing
1. Using an ohmmeter, touch one test probe
to terminal "A" of the sending unit,
touch the other test probe to terminal
"B" of the sending unit. Observe the
reading on the ohmmeter.
2. With the sending unit float in the down
position (tank empty), the ohmmeter
should indicate between 103 and 117
ohms. If the ohmmeter reading is not
within these specifications, the sending
unit is defective and needs replaced.
3. With the sender in the up position (tank
full), the ohmmeter should indicate
between 0.8 and 5 ohms. If the
ohmmeter reading is not within these
specifications, the sending unit is
defective and needs replaced.
Installation
Assembly of the fuel level sending unit
generally follows the disassembly in reverse.
NOTE:
When attaching the wiring harness leads to
the fuel level sending unit, be sure the
Yellow/white wire is connected to the
insulated terminal (center) on the sending
unit.
538Y
539Y
540Y
541Y