124
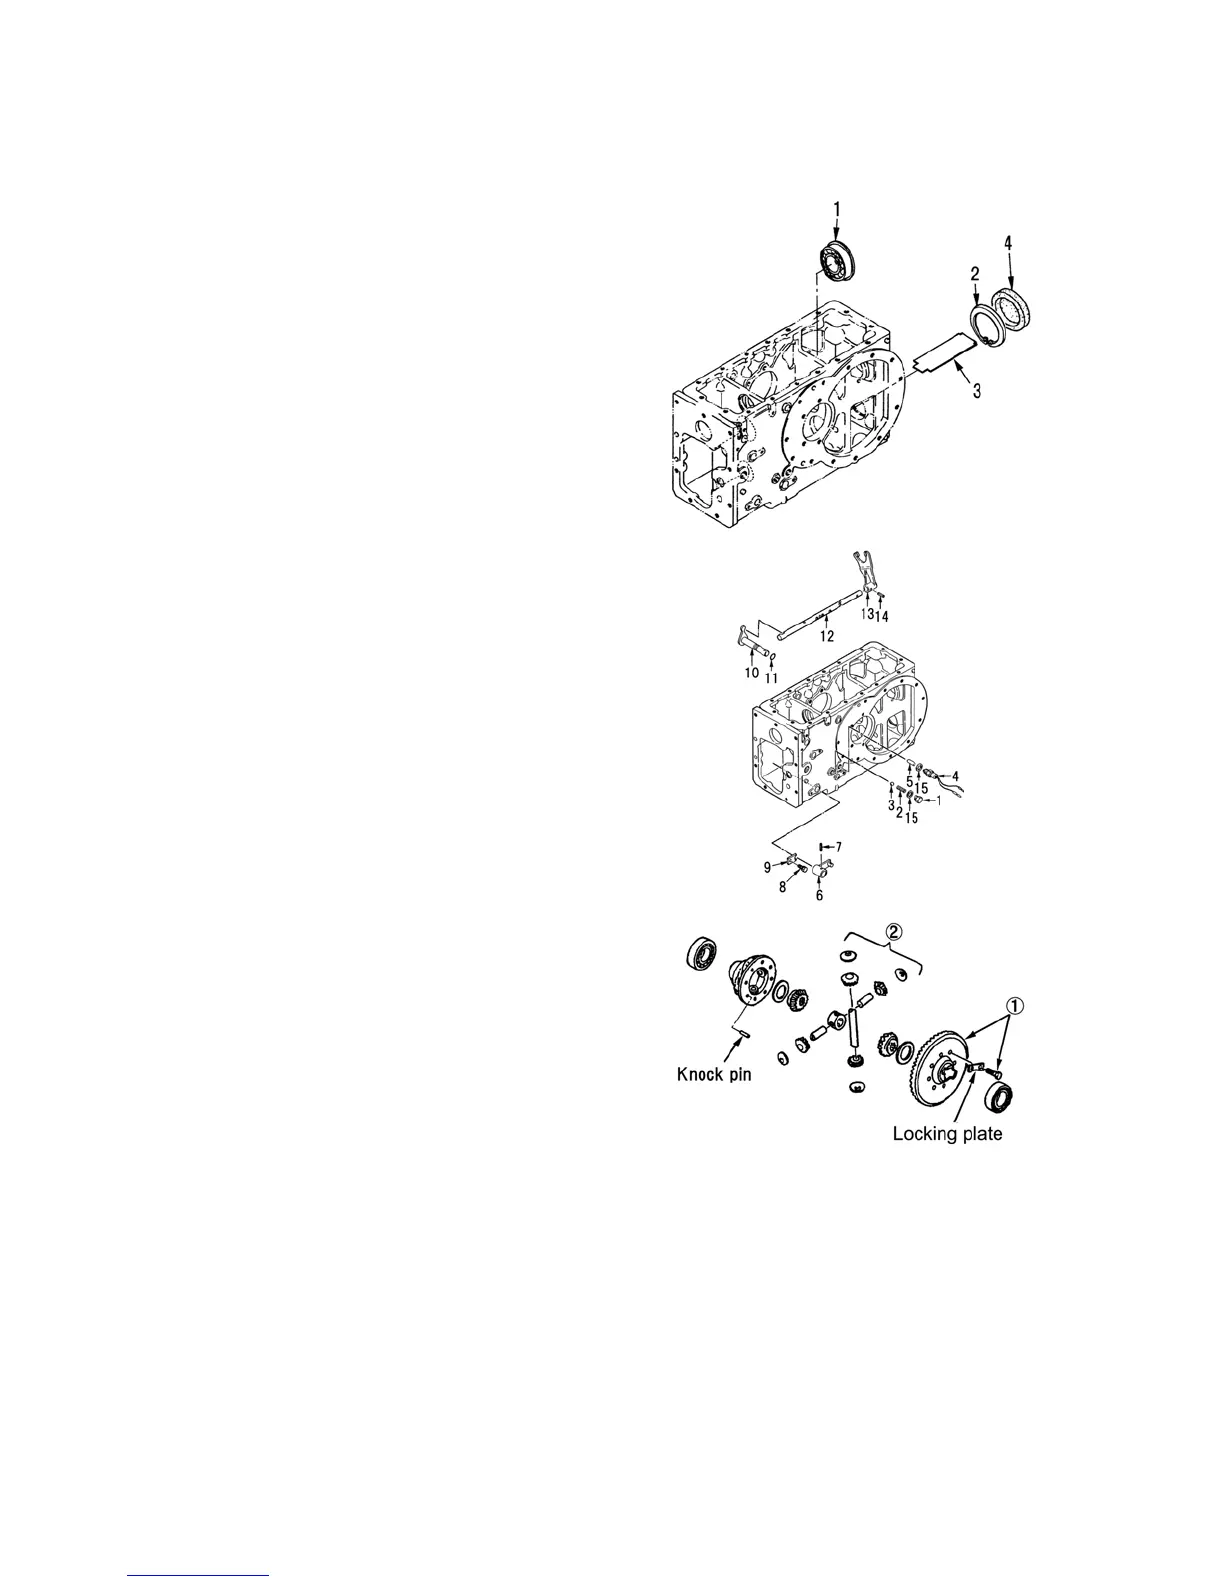
(8) Bearing support:9×3One speed PTO only
① Remove the seal cover, 4, bearing support, 3, snap
ring, 2, and bearing (6206NR), 1, from housing.
NOTE:
Since the bearing support is installed horizontally with
snap ring and therefore should be taken at the time
of reassembly.
1. Bearing(6206NR)
2. Snap ring(φ62)
3. Bearing support
4. Seal cover
(9) PTO Shifter rod.
① Drive out the roll pin, 14, from the PTO shifter
fork.
② Remove the bolt, 1, spring, 2, and steel ball, 3,
from the left side of the housing.
③ Remove the PTO safety switch, 4, and pin, 5, from
the left of the housing.
④ Drive out the roll pin, 7, from the change lever, 6,
and remove the change lever, 6.
⑤ Remove the bolt, 8, and plate, 9.
⑥ Remove the shift arm, 10, inward from housing.
⑦ Remove the shifter rod, 12, from housing.
(10) Bracket・Filter
① Remove the filters and bracket from housing.
(11) Differential ass’y
① Remove 8 bolts tightening the bevel gear and
separate the differential cage.
② Remove the knock pin and take out the gears,
thrust washers and shafts in the differential cage.
NOTE:
The factory installed ring gear bolts are coated with a
thread sealant on assembly and should not be reused.
On installation, use new bolts with locking plates.
420Y
421Y
422Y
2)Inspection
Refer to the description of “Transmission 2 for HST”for inspections.
3)Reassemble
Refer to the description of “Transmission 2 for HST”for reassembly.
 Loading...