42
9) Crankshaft
Inspection
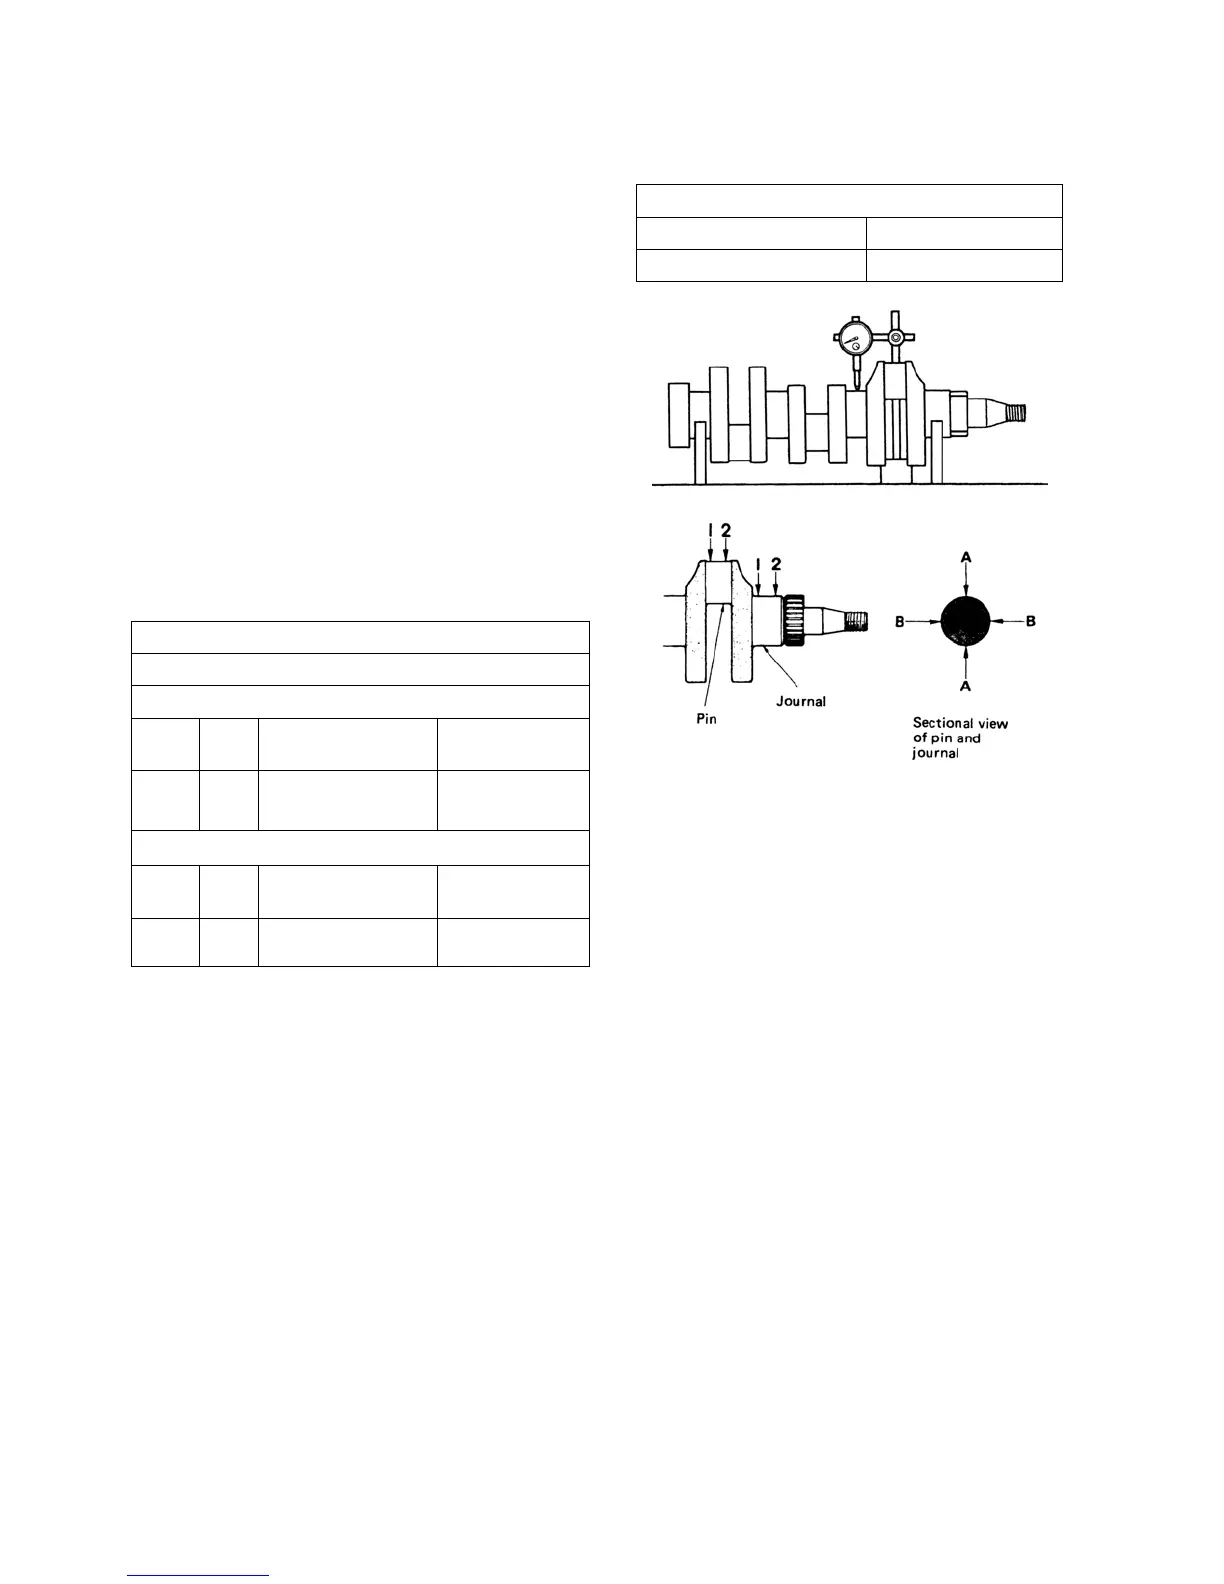
(1) To measure run-out of the crankshaft, support the
crankshaft using a V block as shown in the right figure,
apply a dial gauge to the crankshaft center journal, read
the indication on the dial gauge rotating the shaft one
turn gently. If the service limit is exceeded, correct or
replace.
(2) Check the crankshaft oil seal for damage or wear on the
contact surface and oil hole clogging.
(3) Check the crankshaft journal and pin for damage,
irregular wear (ellipticity, comicalness), and shaft
diameter. If service limit is exceeded replace the bearing
(bush) and/or crankshaft. Measure the dimensions of the
journal and pin in the AA and BB directions at the
position 1 and 2 avoiding the oil holes.
Crankshaft run-out (mm)
Standard assembling value Service limit
Less than 0.03 More than 0.06
133Y
134Y
Irregular wear limit of crankshaft journal and pin (mm)
More than 0.05
Shaft dia. At crankshaft journal
Model
Outside dia. Finishing
dimension
Repair value
N843 STD.
67.957-67.970 67.9
Shaft dia. At crankshaft pin (∅)
Model
Outside dia. Finishing
dimension
Repair value
N843 STD.
51.964-51.975
51.90
 Loading...