344
You can enable or disable macro attachments for each
switcher bank.
Setting and Canceling a Macro
Attachment
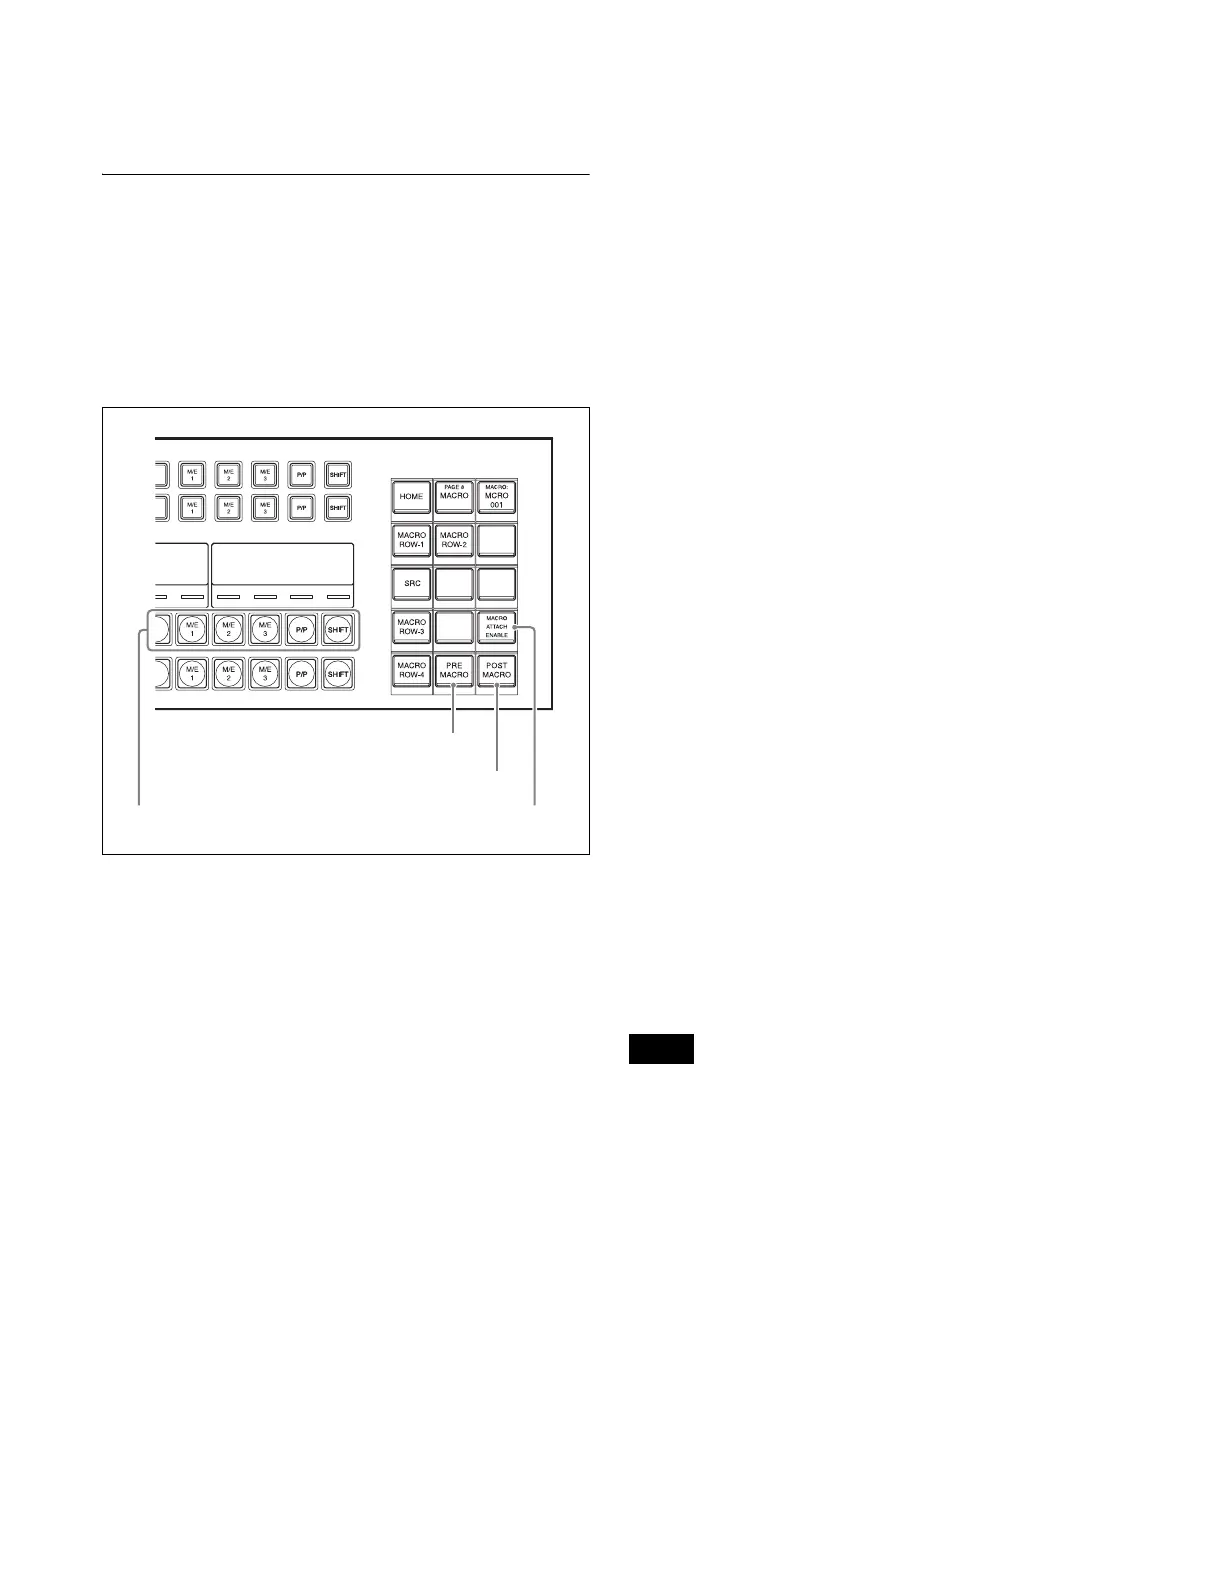
Setting a macro attachment to a button
This section describes setting a macro attachment to 3rd
row (background A bus) button in the cross-point control
block as an example.
Cross-point control block
1
Recall the macro register (1 to 250) that you want to
assign to the button.
For details about the method of operation, see “Macro
Operations (Numeric Keypad Control Block and
Utility/Shotbox Control Block)” (page 329) and
“Macro Operations (Flexi Pad Control Block)”
(page 334).
2
To set to pre macro mode, press and hold the [PRE
MACRO] button in the cross-point pad and press a 3rd
row cross-point button. To set to post macro mode, use
the [POST MACRO] button instead.
The selected cross-point button blinks amber, and the
register recalled in step 1 is assigned to the button.
If you make both pre macro and post macro
settings for the same button
The latter setting is enabled.
To set a macro attachment without changing
cross-points
When you set a macro attachment to a cross-point button,
you can make the setting without changing the bus cross-
points. You can make this setting in the Engineering Setup
>Panel >Operation >Macro menu (7326.6) (see page 395).
To set a macro attachment in macro only mode
1
Recall the macro register (1 to 250) that you want to
assign to the button.
For details about the method of operation, see “Macro
Operations (Numeric Keypad Control Block and
Utility/Shotbox Control Block)” (page 329) and
“Macro Operations (Flexi Pad Control Block)”
(page 334).
2
Press and hold the [PRE MACRO] and [POST
MACRO] buttons at the same time in the cross-point
pad and press a 3rd row cross-point button.
The selected cross-point button blinks green, and the
register recalled in step 1 is assigned to the button.
To check macro attachment settings
Press and hold the [PRE MACRO] button or [POST
MACRO] button. While the button is pressed, the buttons
for which a macro attachment is set blink as follows.
While the [PRE MACRO] button is pressed:
• Buttons set in pre macro mode: Blink amber
• Buttons set in macro only mode: Blink green
While the [POST MACRO] button is pressed:
• Buttons set in post macro mode: Blink amber
• Buttons set in macro only mode: Blink green
Setting a macro attachment to a fader lever
You can set a macro attachment to any particular position
of a fader lever in the transition control block.
• In macro only mode, it is not possible to set a macro
attachment.
• On a split fader, you can set a macro attachment to the
main fader lever (for background A bus).
1
Recall the macro register (1 to 250) that you want to
assign to a fader lever.
For details about the method of operation, see “Macro
Operations (Numeric Keypad Control Block and
Utility/Shotbox Control Block)” (page 329) and
“Macro Operations (Flexi Pad Control Block)”
(page 334).
2
Move the fader lever to the position where you want to
set the macro attachment.
PRE MACRO button
MACRO ATTACH ENABLE button3rd row
POST MACRO button
Notes

 Loading...


