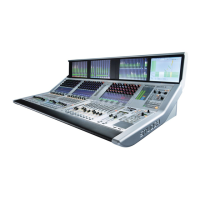
Vista 5 M3 Digital Mixing System
Meterbridge Installation 1
Document generated: 07.10.13
Vista 5 M3 Meterbridge Installation (Option)
Contents of the Kit • Meterbridge(22,32or42faderversion,dependingonyourconsole)
• 6screwsM4(2ofthemnotusedfor22-faderconsole)
• 1Cat5linkcable(approx.0.3m)
• 1Cat5linkcables(approx.0.6m)
• 2Cat5linkcable(approx.1m)
• 1DVIcable(approx.1.8m)
• 1Power-onlinkcableDB9(approx.0.7m)
• Thisinstallationinstructionsheet
Required Tools 2.5mmand3mmAllenkeys
Mechanical
Important For attaching the meterbridge to the console, you will need the assistance of
one or, even better, two additional person(s). Ask them to proceed with care
in order not to damage any surface or screen.
Switchtheconsoleoff,placeitinsuchawaythatitsrearsidecaneasilybe
accessed,andremoveanycablingfromtheconsole’srearsidethatmightget
inyourwayduringinstallation.
DisconnectandremovetheGCscreenfromtheconsole.Usea3mmAllen
key.Thisscreenwillnomorebeusedsinceoneofthemeterbridgescreens
isprovidedforthispurpose.
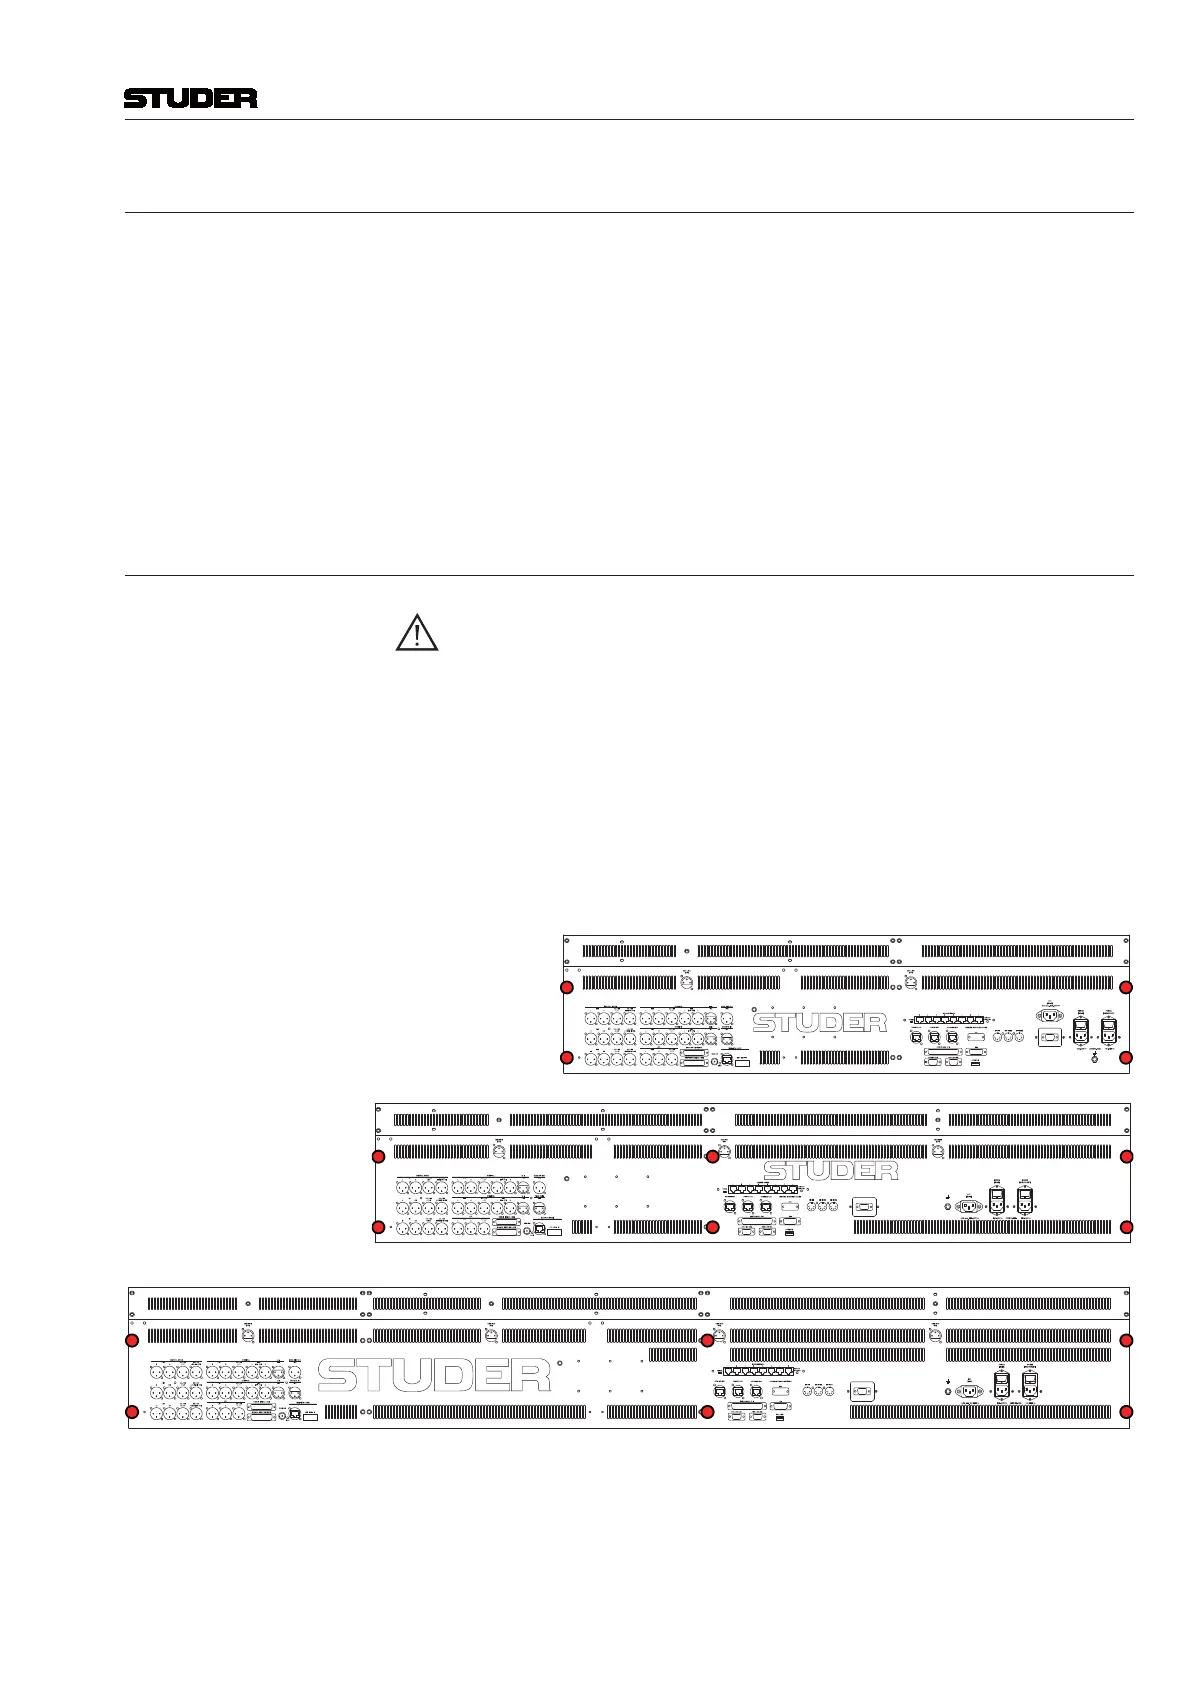
Removethe6countersunk-headscrews(4on22-faderversion)attherear
oftheconsole,markedinredinthepicturebelow.Usea2.5mmAllenkey.
Thesescrewswillnomorebeused.
22-Fader Console
32-Fader Console
42-Fader Console
Withyourassistant(s),setupthemeterbridgeattheconsole’srearside.Pro-
visionallyfixitattheextremeleftandrightwithoneofthenewscrewseach
intheupperoneofthetwoholes.Usea3mmAllenkey.Donottightenthese
screwscompletely.Theninserttheremainingnewscrewsandtightenthem
all(2ofthemnotusedonthe22-faderversion).