Disassembly
Service Manual 6-25
6.4.9 Main Drive Assembly (PL 9.1.7)
1. Remove the rear cover. (6.4.3)
2. Remove the fuser. (6.4.5)
3. Remove the LVPS. (6.4.7a)
4. Remove the fuser fan. (6.4.8)
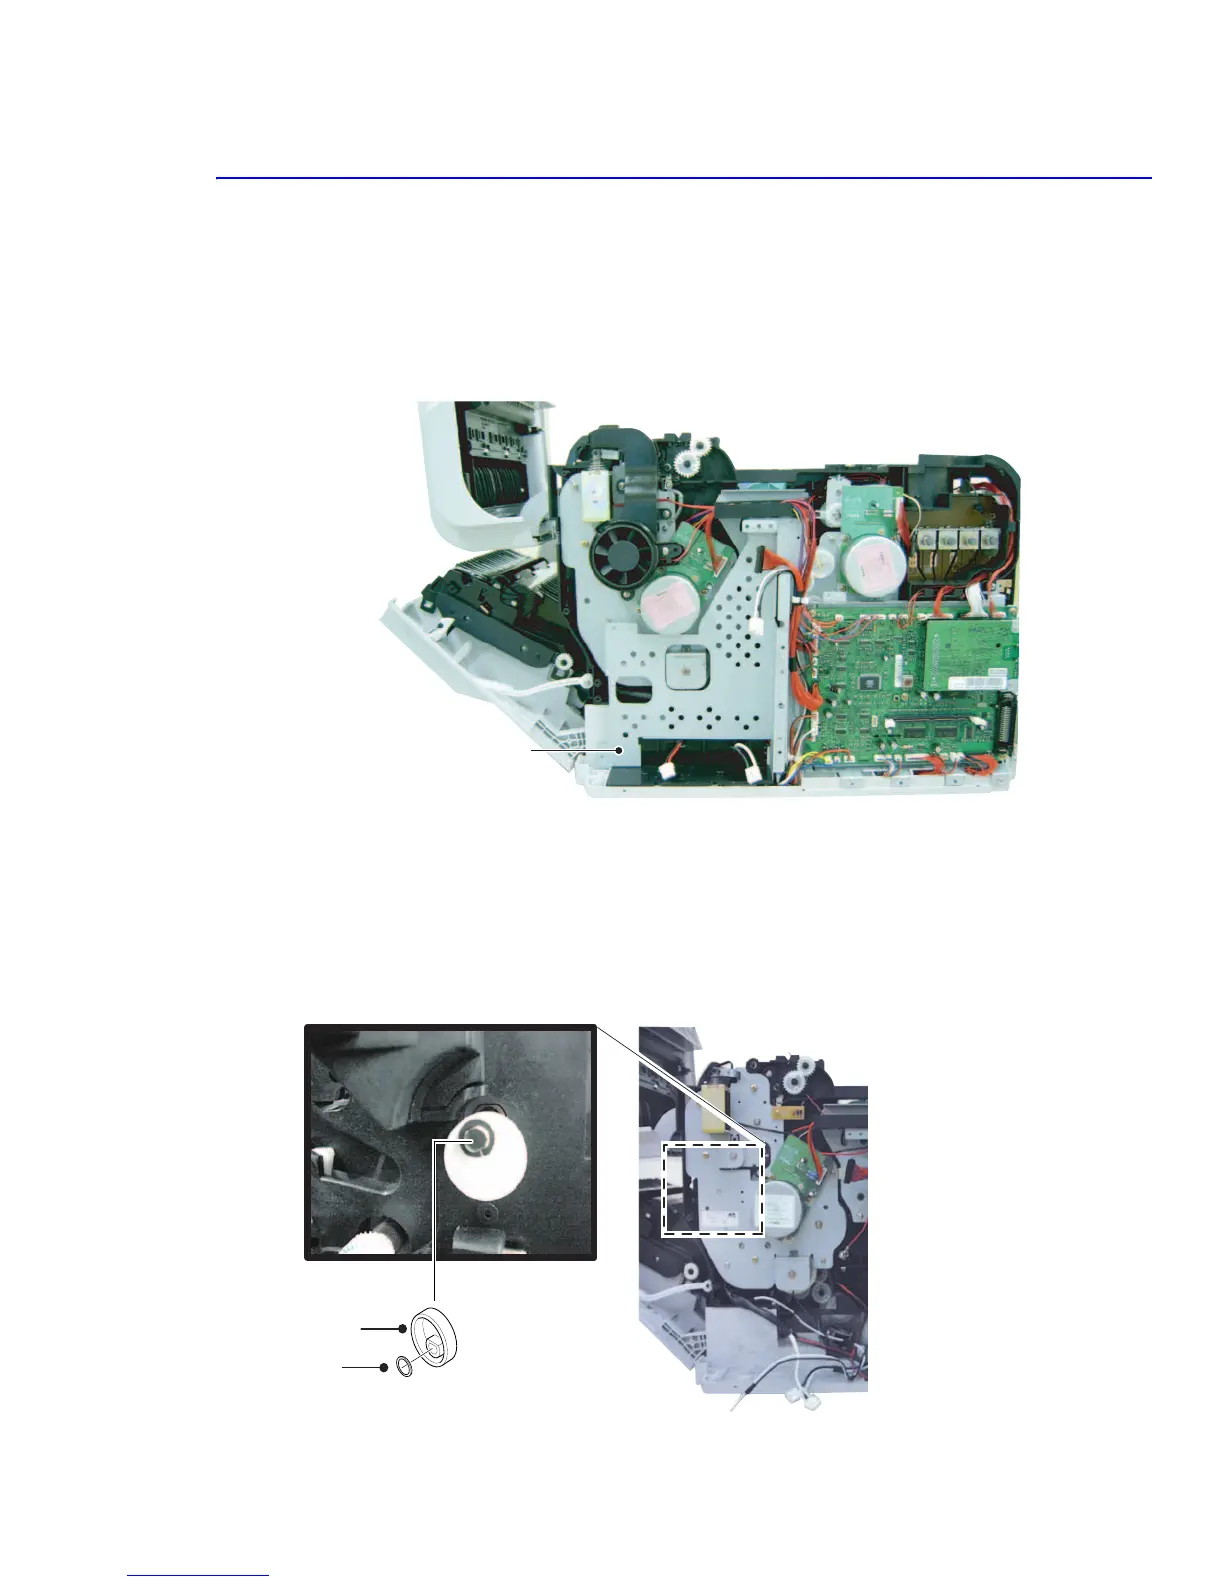
5. Remove all harnesses from the harness guides. Two harnesses need to be freed from the bottom of the bracket.
6. Remove the LVPS cover bracket.
7. Look inside the imaging unit cavity and locate the transfer roller (T2) cam.
Note
Place a piece of paper below the transfer roller (T2) cam to avoid dropping the split ring washer into
the drive gears.
8. Remove the split washer and then remove the transfer roller cam.
Bracket-Cover LVPS
Cam-Drive
Washer-Plain