Communication Settings
128
NetLinx Studio - Instruction Manual
4. Set the Serial Connection Options as required by the target Master.
5. Enter a User Name and Password if required by the target Master.
6. Click OK to close this dialog and return to the Master Communication Settings dialog, now indicating Serial as the
current connection configuration (FIG. 206).
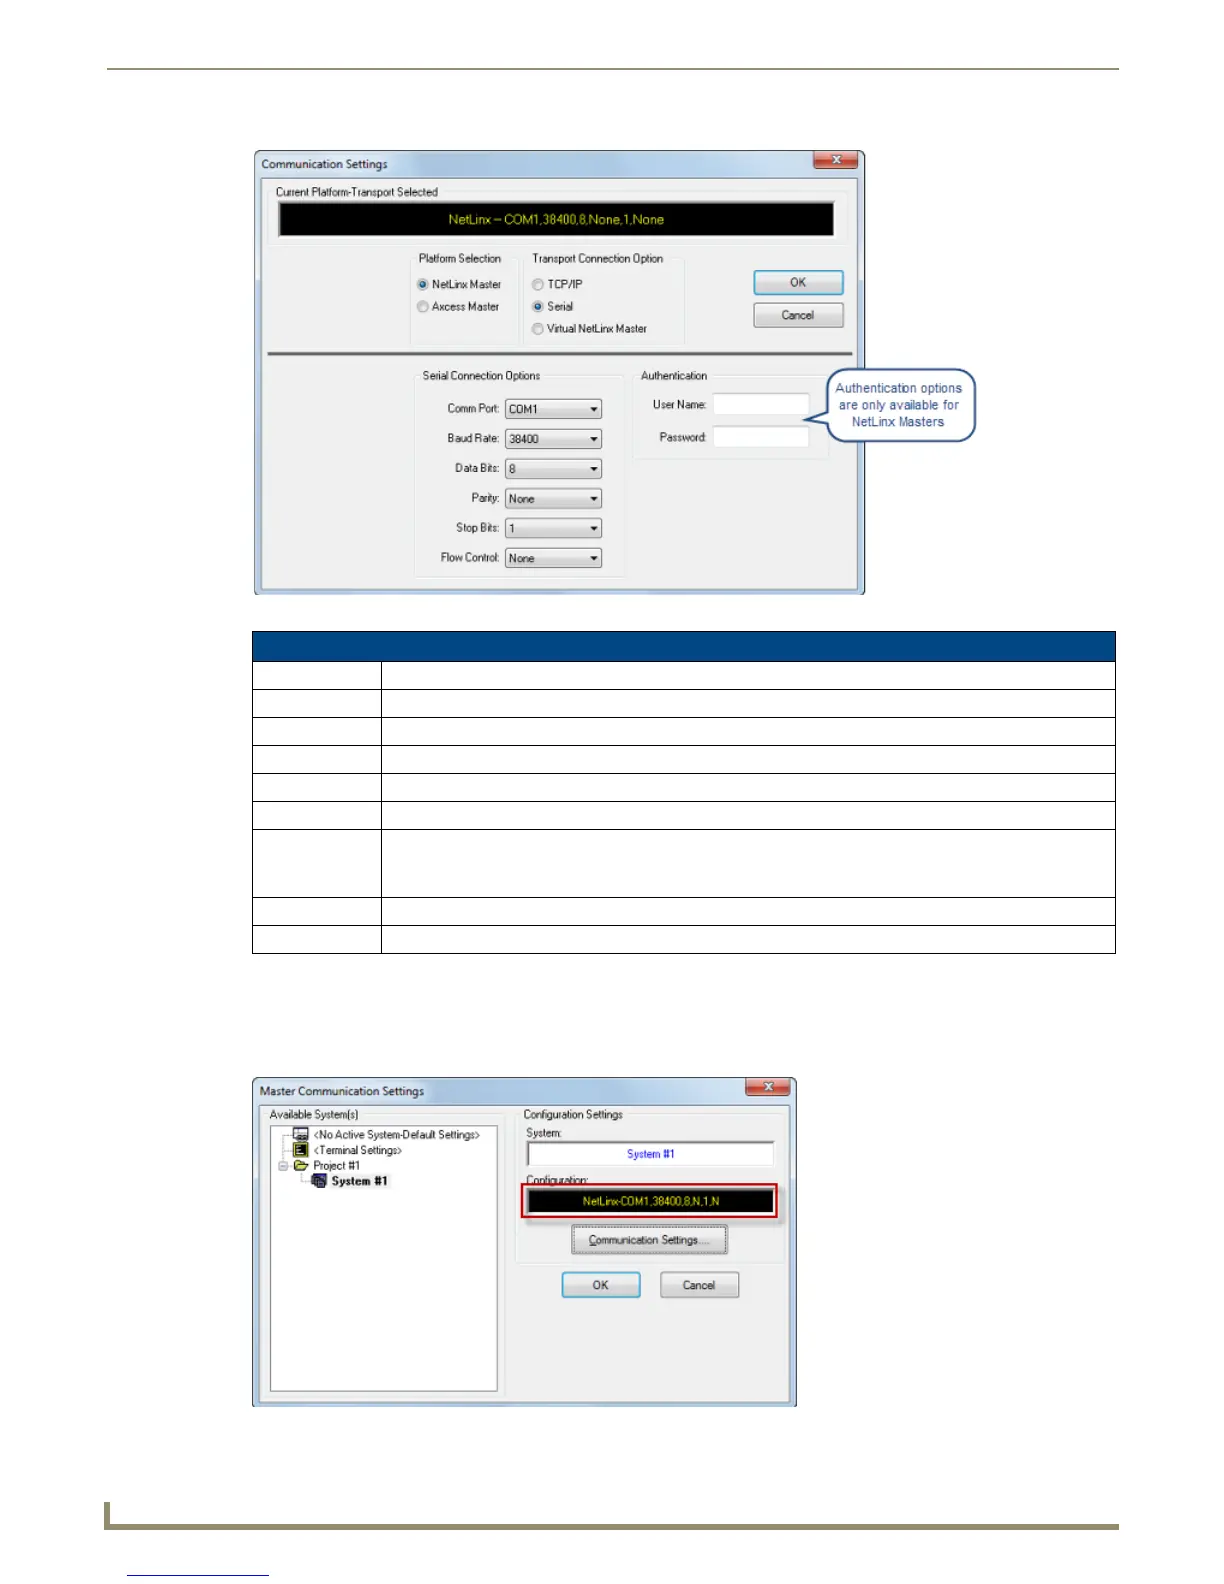
FIG. 202 Communication Settings dialog - Serial Settings
Communication Settings dialog - Serial Options
Comm Port: Select a COM port for serial communications from the drop-down list. Default = COM1.
Baud Rate: Select a baud rate for the selected COM port from the drop-down list. Default = 38400.
Data Bits: Specify a data bit setting from the drop-down list. Default = 8.
Parity: Specify a parity setting from the drop-down list. Default = None.
Stop Bits: Specify a stop bits setting from the drop-down list. Default = 1.
Flow Control: Specify a flow control setting from the drop-down list. Default = None.
Authentication: The Authentication options are only displayed if NetLinx Master is selected as the Platform Selection.
If the target NetLinx Master requires authentication, then enter the User Name and Password that will
in these fields. User Names and Passwords are case-sensitive.
OK: Click to save your changes and close this dialog.
Cancel: Click to discard your changes and close this dialog.
FIG. 203
Master Communication Settings dialog - Serial Configuration