Diagnostics Menu Options
175
NetLinx Studio - Instruction Manual
a. Click the Message Type option buttons (String or Command) to specify the type of message you are sending.
b. Click Send To Device to send the messages in the Message(s) to Send field to the specified device. If none of
the messages are selected (highlighted), all messages are sent. If you have selected a line or a range of lines,
only the selected messages will be sent.
6. Check the Messaging Options check boxes to Enable Asynchronous Notifications and/or Enable Internal
Diagnostic Messages.
Device Addressing
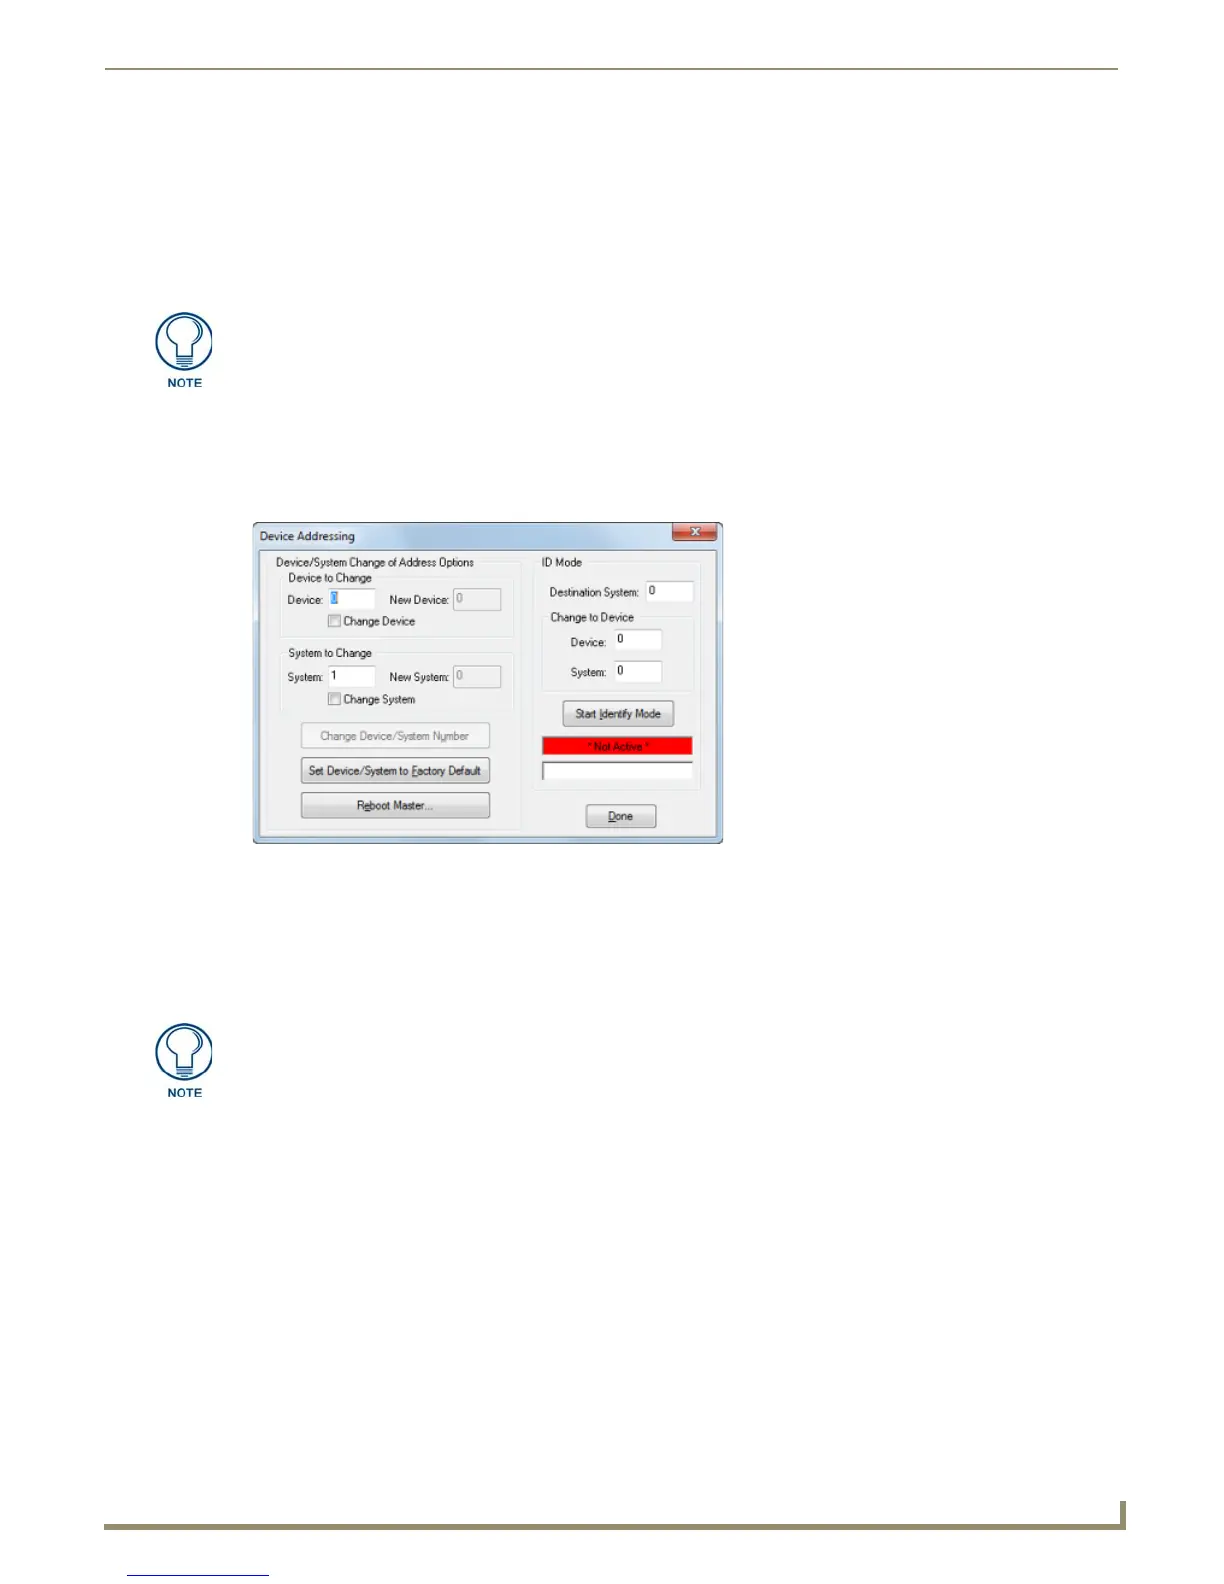
Use the Device Addressing dialog to change the Device and System assignments for a specified NetLinx device, or to
change a NetLinx Master's System number. Select Device Addressing from the Diagnostics menu to access this dialog
(FIG. 255).
Use the set of options on the left side of this dialog to specify the Device and System assignments, when you
know the current address assignments as well as the address that you want to change the device to.
Alternatively, you can use the set of ID Mode options on the right side of this tab to change the address
assignment for a specified NetLinx device, using Identity (ID) Mode. The Start Identify Mode button places
the entire NetLinx system (specified in the Destination System field) in ID Mode.
Changing the Device/System Address On a NetLinx Device
Select Device Addressing from the Diagnostics menu to access the Device Addressing dialog, which allows you to
change the Device and/or System Address for a NetLinx system device:
1. Enter the target device's current Device number in the (Device to Change) Device field.
2. Click the Change Device check box and enter the new Device number in the New Device field.
3. Enter the target device's current System number in the (System to Change) System field.
4. Click the Change System check box and enter the new System number in the New System field.
5. Click the Change Device/System Number command button to set the new address information for the specified
device.
6. The master must be rebooted to accept the new System number assignment. To reboot the master, select Reboot
Master from the Tools menu.
Enable NetLinx Notifications to view the results in the Notifications tab of the Output
Bar. For example, in order to view a string sent to a device, you must first enable
Strings to Device notifications (in the NetLinx Device Notifications Options dialog).
FIG. 255 Device Addressing dialog
If the target Master has security applied, NetLinx Studio will prompt you for a User
Name and Password in order to change these settings.