Setting Program Preferences
202
NetLinx Studio - Instruction Manual
2. In the Export File Name field, specify a name and target directory for the resulting *.EPX file.
3. Under Export Preferences Options, select Editor, and click OK.
Importing an Existing *.EPX File
1. Select Tools > Import Preferences.
2. The program will prompt you to acknowledge that the imported settings will overwrite your current Editor
preferences.
3. Click Ye s to proceed.
4. In the Open dialog, locate and select the desired *.EPX file, and click Open.
The Editor tab of the Preferences dialog should now reflect the preferences specified in the imported *.EPX file.
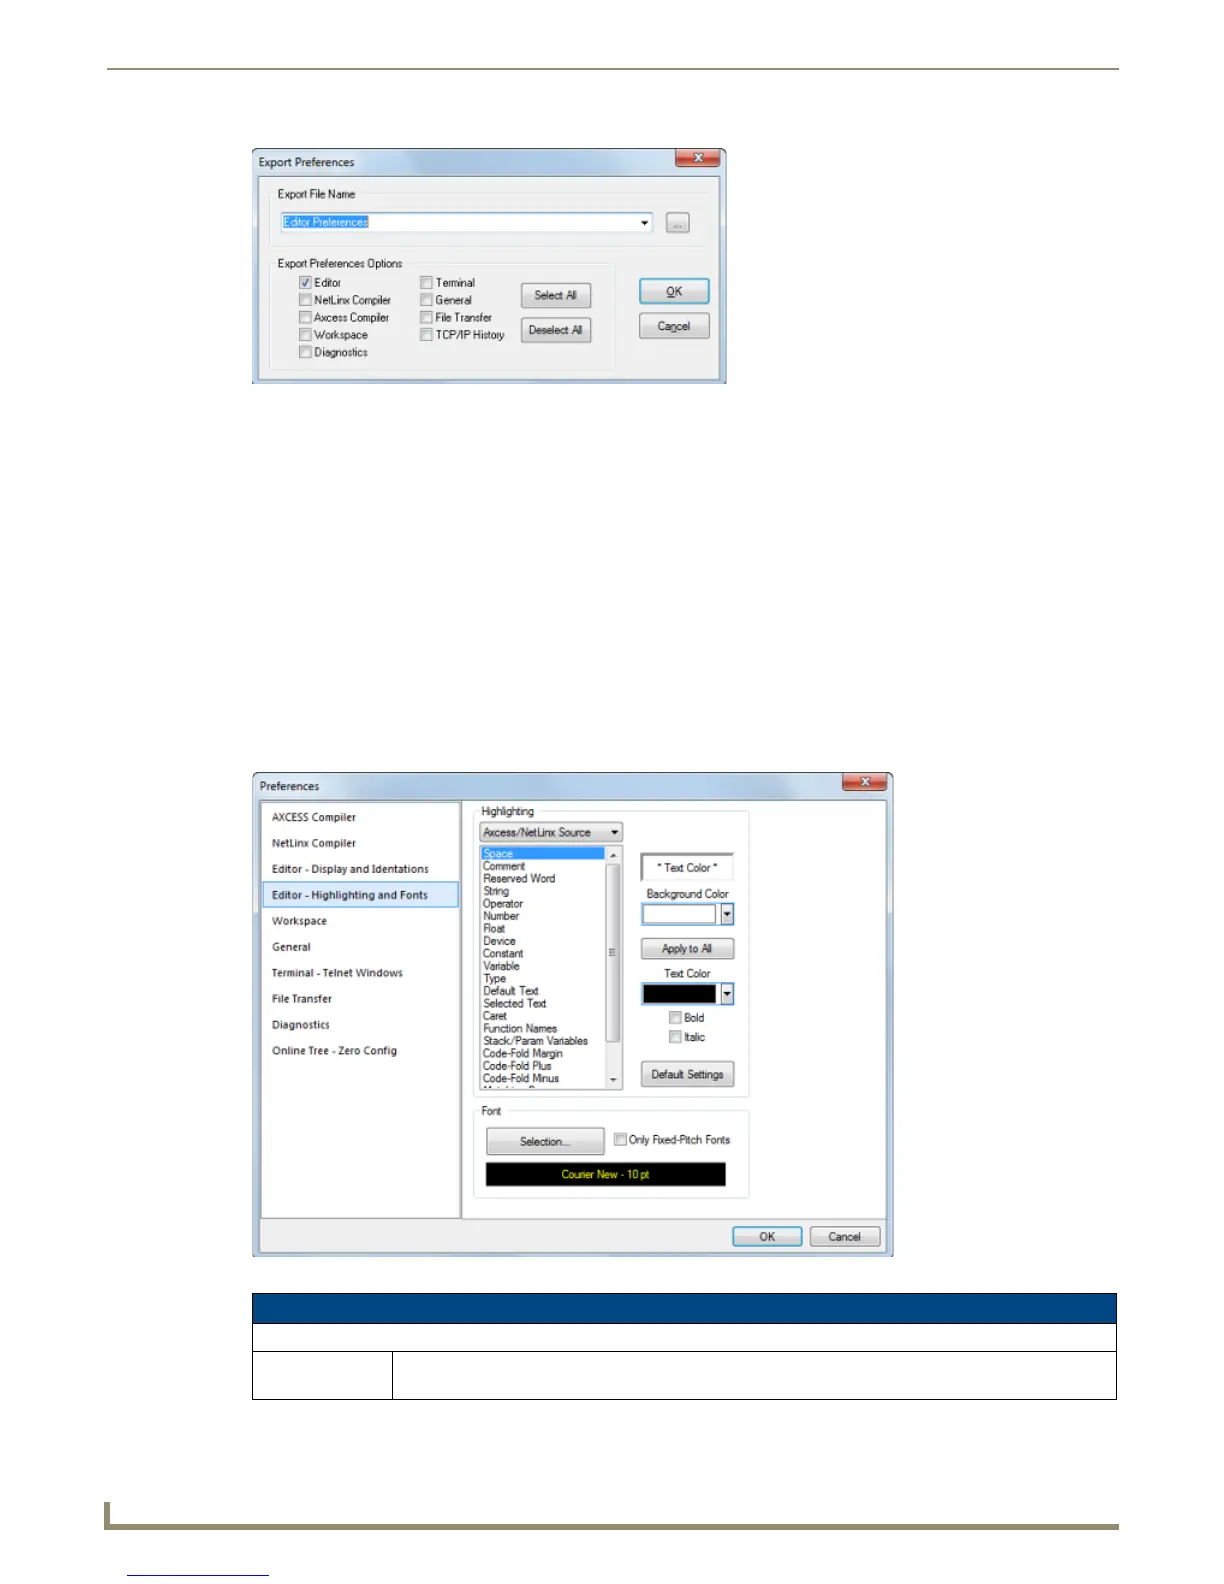
Preferences dialog - Editor - Highlighting and Fonts tab
Use the options on the Editor - Highlighting and Fonts tab of the Preferences dialog to set default syntax highlighting
preferences within the Editor windows (FIG. 288).
FIG. 287 Export Preferences dialog
FIG. 288 Preferences dialog - Editor - Highlighting and Fonts tab
Editor - Highlighting and Fonts options
Highlighting
Document Type Select the type of document that you want to set highlighting options for (Axcess/NetLinx Source
code files or Text Files).