Working with System Files
47
NetLinx Studio - Instruction Manual
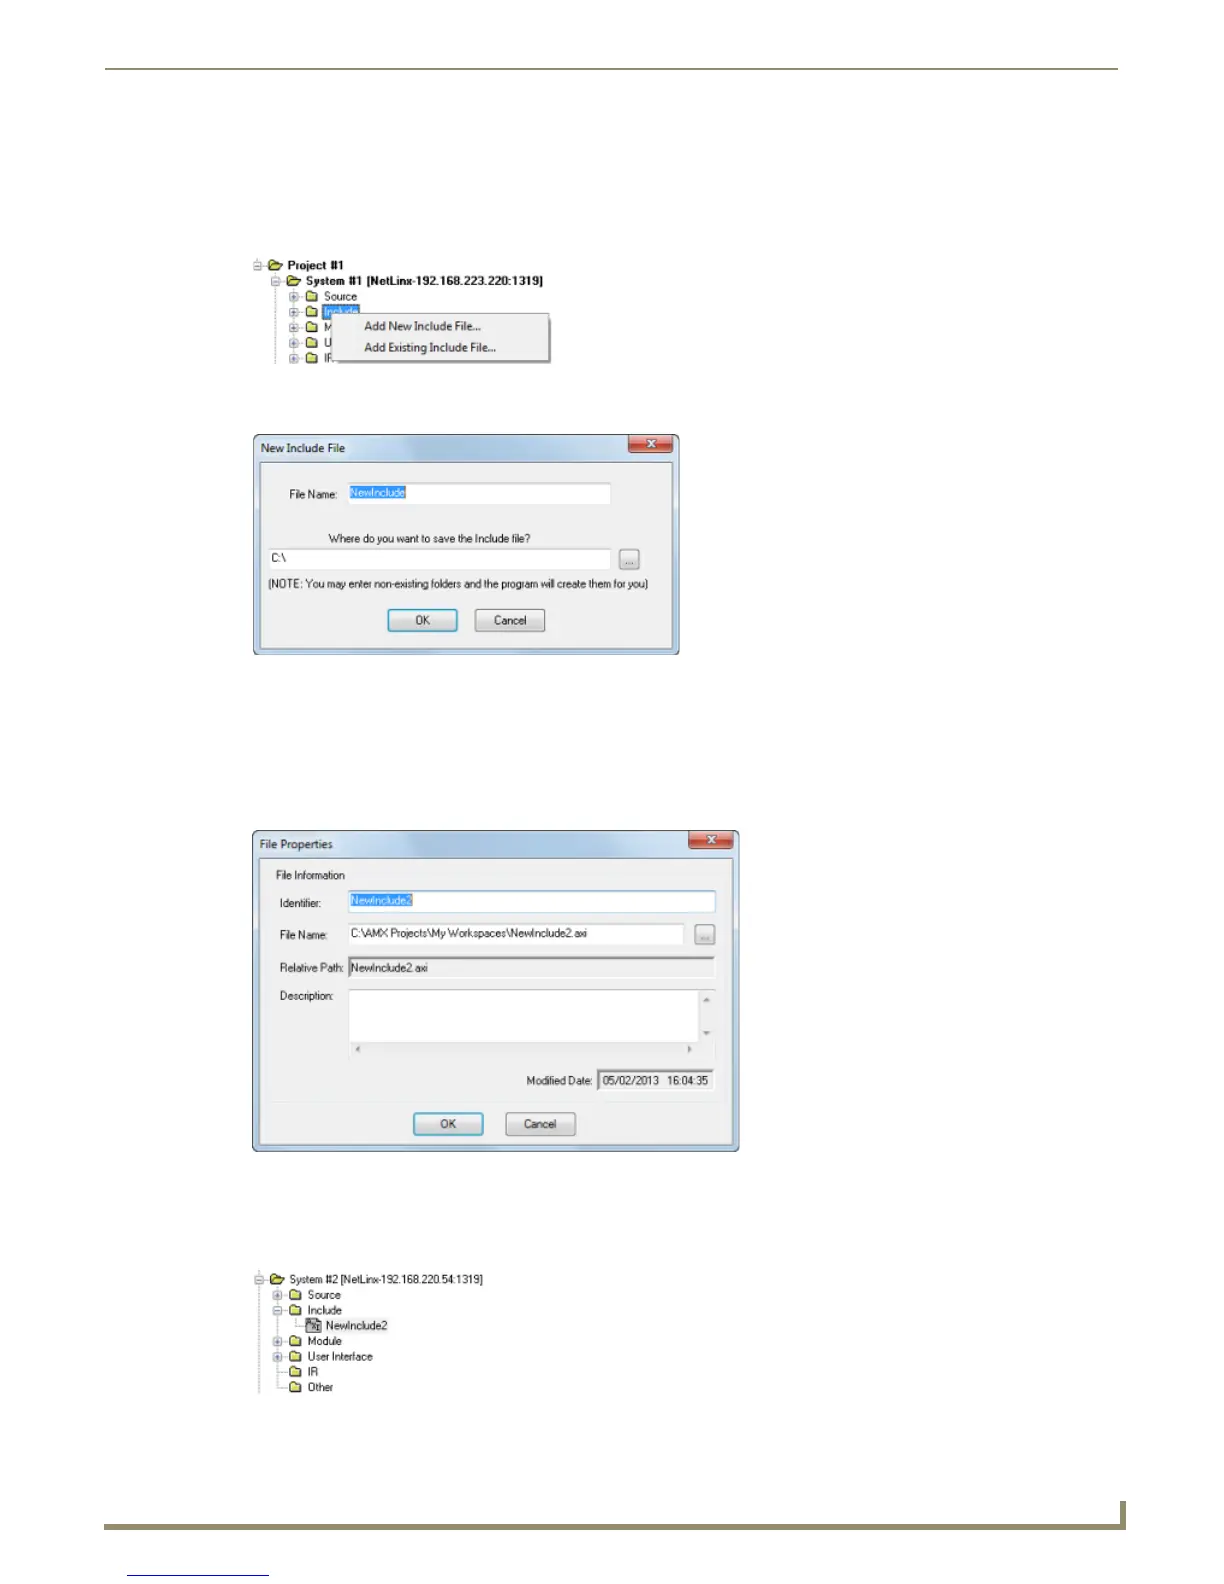
Adding a New Include File to a System
1.
Click to select (highlight) a System (in the Workspace tab of the Workspace Bar).
2. Right-click on the Include folder to access the Include File Folder context menu, and select Add New Include File
(FIG. 82).
3. In the New Include File dialog, specify a File Name and target location for the new Include file (FIG. 83).
4. By default, the new file is named NewInclude.axi. Edit the file name and the target location for the file and click
OK.
Note that you can enter a path for a non-existing folder in the text box and the program will create it for you.
Click the Browse button to locate and select the target directory in the Browse For Folder dialog.
5. In the File Properties dialog, enter/edit the file properties (FIG. 84).
6. Click OK to close the dialog and create the file.
The new Source Code file is opened in an Editor window for editing. Also, the new file should now appear in the Source
folder (FIG. 85).
FIG. 82 Include Folder Context Menu
FIG. 83 New Include File dialog
FIG. 84 File Properties dialog
FIG. 85 Workspace tab - Include File Added